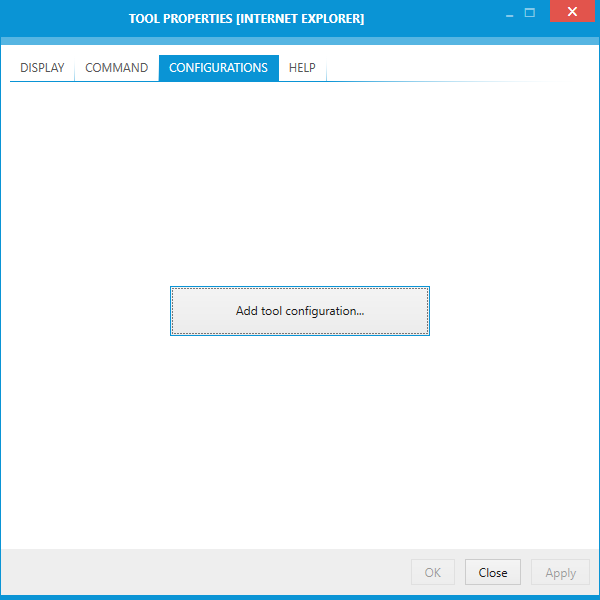
The CONFIGURATIONS tab contains an editor for tool configurations.
Each tool can define several tool configurations. A configuration can be used to redefine the entry point file, arguments, or behavior of a tool.
Configurations should be used in the following scenarios:
•To group similar functionality in one tool
•To group functionality by entry point executable
•To provide different configurations for slightly different tasks (for example: a configuration to convert RCP to RPP and another one to convert RPP to MSI format)
The number in the tab shows the number of configurations associated with this tool. When a new tool is created, by default, it has no configurations:
 v
v
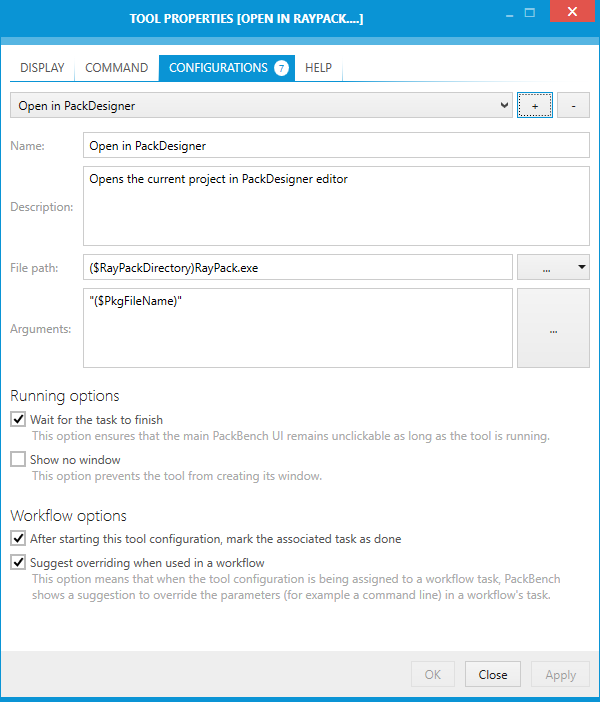
Once at least one configuration is available, the configurations are displayed in the following way:
Configuration Selector
The drop-down menu contains all configurations associated with a given tool. All following input controls are always showing the details of the currently selected configuration.
•To add a new configuration, press the plus (+) button next to the drop-down menu.
•To remove currently selected configuration, press the minus (-) button next to the drop-down menu.
Name
Shows the name of the tool and can be used to change the name. This field is mandatory for all tools.
Description
The description of the tool can be entered or altered here.
File Path
The file path can be either typed in directly or added by clicking on the Browse button [...] and either choosing the From local folder... option or the Using variables... option.
•From local folder...
Choosing this option will open the Open window. Browse to the location where the file can be found, select the file, and click on the Open button to add the file to the task.
•Using variables....
Choosing this option will open the Value Editor. For information on how to use the Value Editor refer to the Value Editor chapter.
The File path is a mandatory field for all tools.
Arguments
Arguments can be configured either directly or by clicking on the Browse button [...] and using the Value Editor. To learn more about arguments refer to the Value Editor chapter.
Running Options
These options define how the tool is started and processed:
•Wait for the task to finish
If this checkbox is checked, it is not possible to use the main PackBench UI while the tool is running. It can be used again, as soon as the tool is closed.
•Show no window
If this checkbox is checked, the tool will not create a window.
Workflow Options
These options define the behavior of a tool when used/configured in a workflow:
•After starting this tool, mark the associated task as done
If this checkbox is checked, the associated task in the workflow will automatically be marked as done if the tool is started with PackBench. If the checkbox is not checked, the task has to be marked as done manually.
•Suggest overriding when used in a workflow
All tools can be overriden on a workflow basis (see workflow configuration section for more information). By enabling this option, when authoring a workflow a message will be displayed each time the tool is connected to a workflow without overriding its parameters. These option can be used, for example, to:
▪Use placeholders in the tool and signal to the workflow creator that certain strings have to be replaced with workflow-specific variables
▪Keep the tool generic although it is expected that the workflow author has to always adjust it to make it work
Once this flag is open, every time the tool is accessed in the task editor a following message will be shown:

More information about consuming tools and their configurations can be found in chapter Configuring task tools.
