After selecting Enter Text and clicking Next, the wizard continues with the remaining steps of the process (Paste the text with the license contract details for AI processing):
2. Enter text
The Enter text option allows you to paste raw text from emails, contract excerpts, word documents, or other sources so that SAM AI can extract and process the license contract information.
Paste the relevant contract text into the large input field. You can copy text directly from:
•Email bodies
•Contract excerpts
•Scanned documents that have been converted to text
Click Process text to let SAM AI analyze the content and extract relevant fields such as contract name, supplier, customer, dates, costs, and products.
 |
Best practice: After the text has been processed successfully, click Next to continue to the Verify data step. |
3. Verify data
After processing, you reach the Verify data step. Here SAM AI presents the extracted information for review and correction.

In this step you review and edit the following extracted fields:
•License contract name*
•Contract ID
•Invoice date*
•License contract currency*
•Total costs
•Customer
•Supplier
•Invoice number
•Purchase order (PO) number
•Sales order number
•Quote number
The original text is shown in the preview pane on the right for reference.
After reviewing and making any necessary corrections, click Next to continue to the Product Suites step.
4. Contract items
After verifying the contract header in the previous step, you now define the specific products and entitlements that are covered by this contract.
Click the + Add button to open the product assignment dialog and manage product suites linked to this contract.
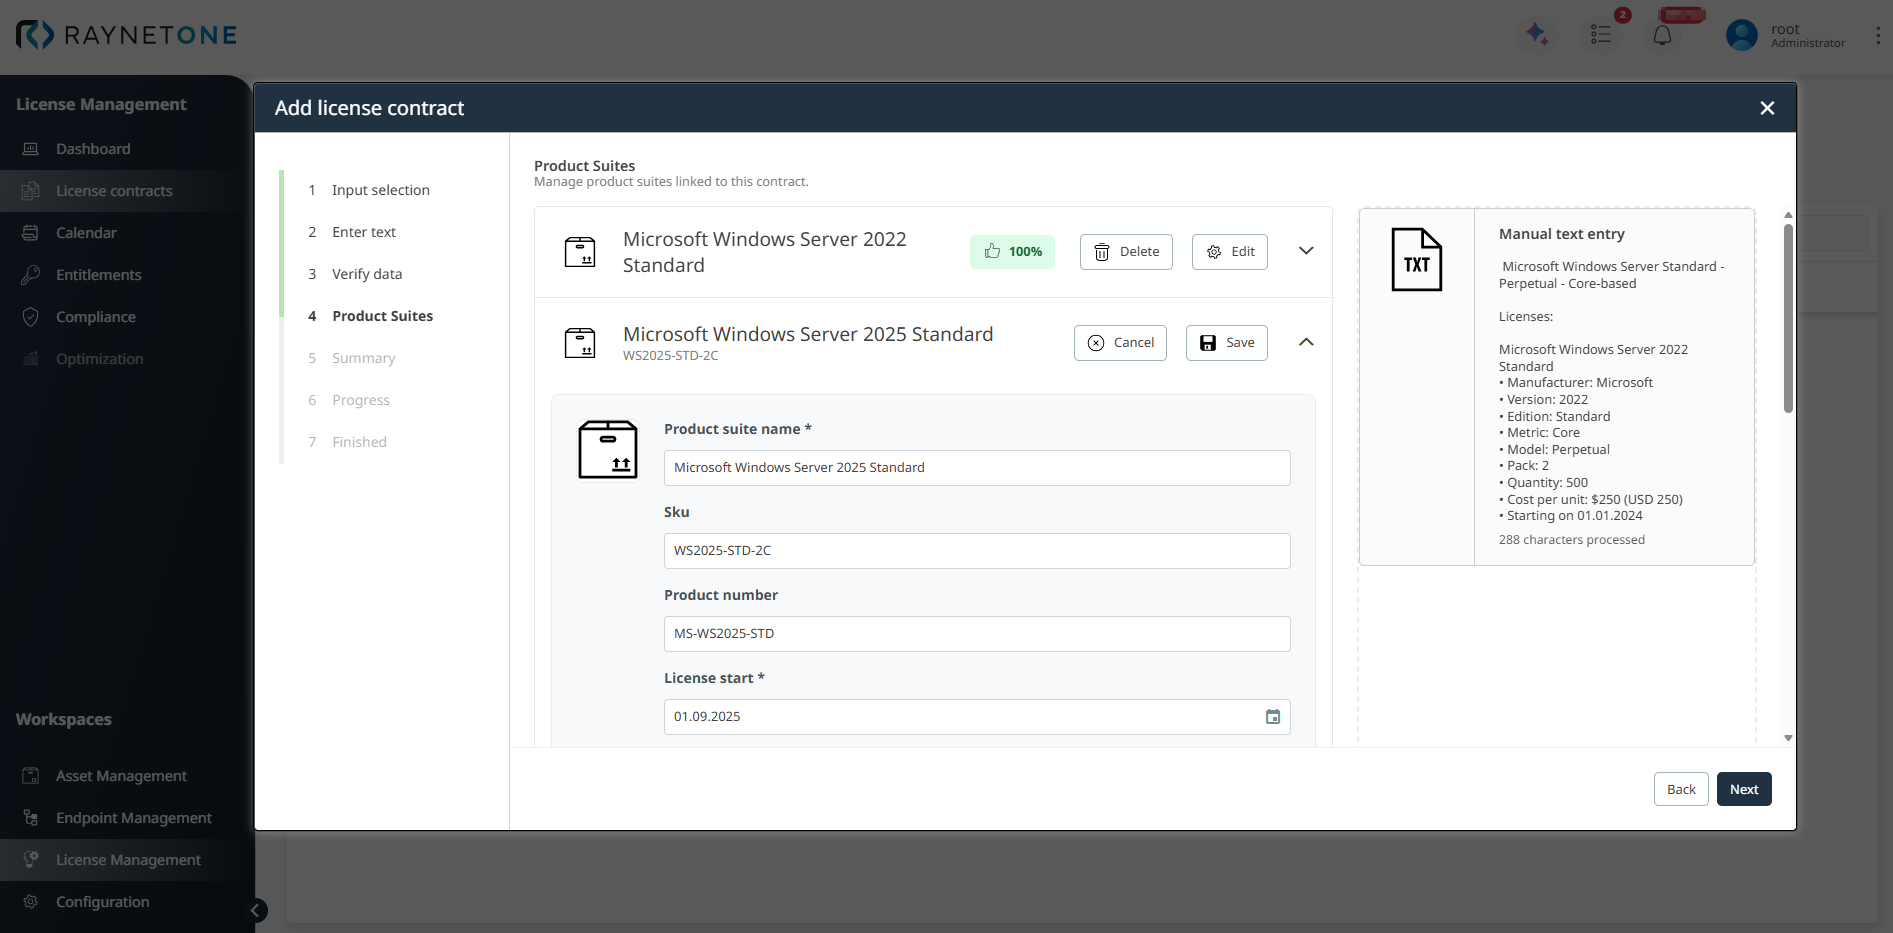
In this step you review and edit the following extracted fields:
•Product suite name*
•Sku
•Product number
•License start*
•License end
Click + Show more fields to to show more fields:
•License model*: Example: Perpetual
•License metric*: Example: Device-based
•License pack*: Example: 1
•Quantity*: Example: 500
•Currency (Read-only): Usually pre-filled (e.g., USD or EUR)
•Unit price*: Example: 142.00
•Total cost (Read-only): Automatically calculated as Unit price x Quantity
Click Save to save the product suite you created.
|
Best practice: |
After adding all relevant product suites and entitlements, click Next to continue to the Summary step.
5. Summary
In the Summary step, Raynet One shows a final overview of all contract details and linked products before the contract is created.
You will see two main sections:
•License contract details: All header information (contract name, Contract ID, customer, supplier, invoice date, total costs, etc.)
•Products: A summary of all products and entitlements you added, including quantity, license model, metric, and calculated costs.
Review everything carefully for accuracy.
•If something is incorrect, click Back to return to the previous steps and make corrections.
•If all information is correct, click Create to finalize and save the license contract.
6. Progress
After clicking Create in the Summary step, the wizard enters the Progress phase. Raynet One now processes the contract, validates all entered data, links the defined entitlements, and performs initial analysis using SAM AI. This steps usually completes within a few seconds and requires no further input from you.
7. Finished
Once processing is complete, you will see the following success message:
License contract upload completed.
The license contract has been successfully processed and added to your license management system.
At this point, the new contract and all its associated entitlements are fully available in the License Contracts overview and can be used for reconciliation, compliance tracking, and optimization.
Click Finish to close the wizard and return to the License Contracts list, or click View details to immediately open the detailed view of the newly created contract.
|
Best practice: |