Now that you have discovered your managed environment, you can start actually managing it. The next step to a simplified data management on the platform is to create a normalized and enriched data inventory. At this point, it is time to start your first inventory run. As described in the chapters Start a discovery run in Active Directory and Start a discovery run via Ping Sweeper, you can either trigger runs manually or via an automated device schedule.
Let's start off by configuring and starting a simple one-time inventory run. Here are the steps on how to do it.
|
Be aware: |
1.Navigate to the Devices view in the Asset Management workspace. Then click on Inventory to open the Device inventory wizard.

The devices list has got device entries and all of them lack operating system details. This situation is typically observed when device discovery has finished but inventory hasn't. After successful inventory, the remaining empty columns of the devices list will be populated.
2.Under Selection Type, you can select your preferred inventory method. For this device inventory, we pick the Devices option (selected by default). The other options compute the set of devices by relationship or filtering criteria. Click on Next to proceed.

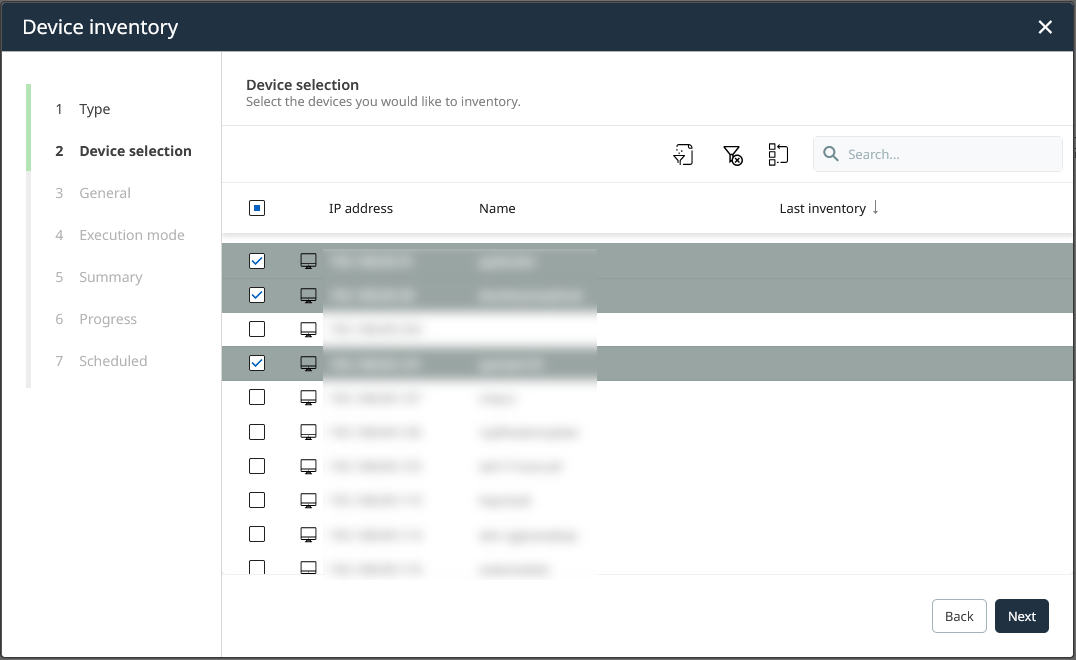
3.Select devices for the inventory run. Make use of the filter and search functions to quickly find your devices. Then, proceed via Next.
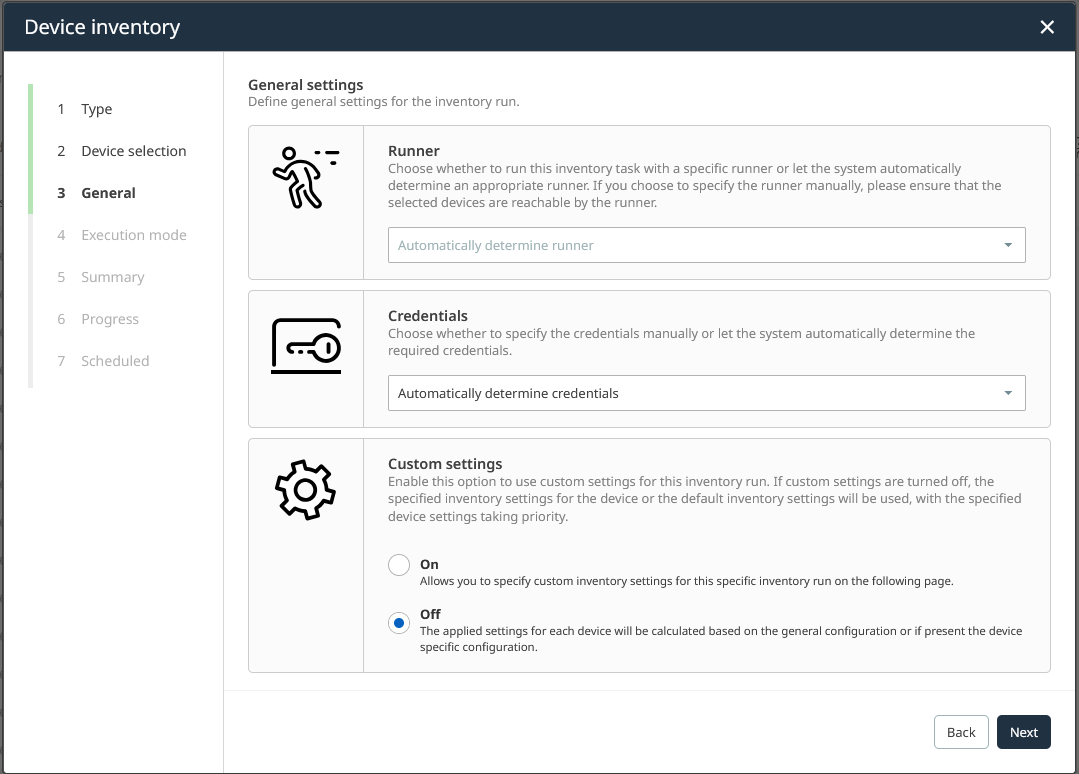
4.Determine the runner and credentials for this inventory run. Automatic runner determination attempts to pick a random compatible runner out of all authorized ones. Click on Next to proceed. In future inventory run configuration, you have the option to specify custom settings.
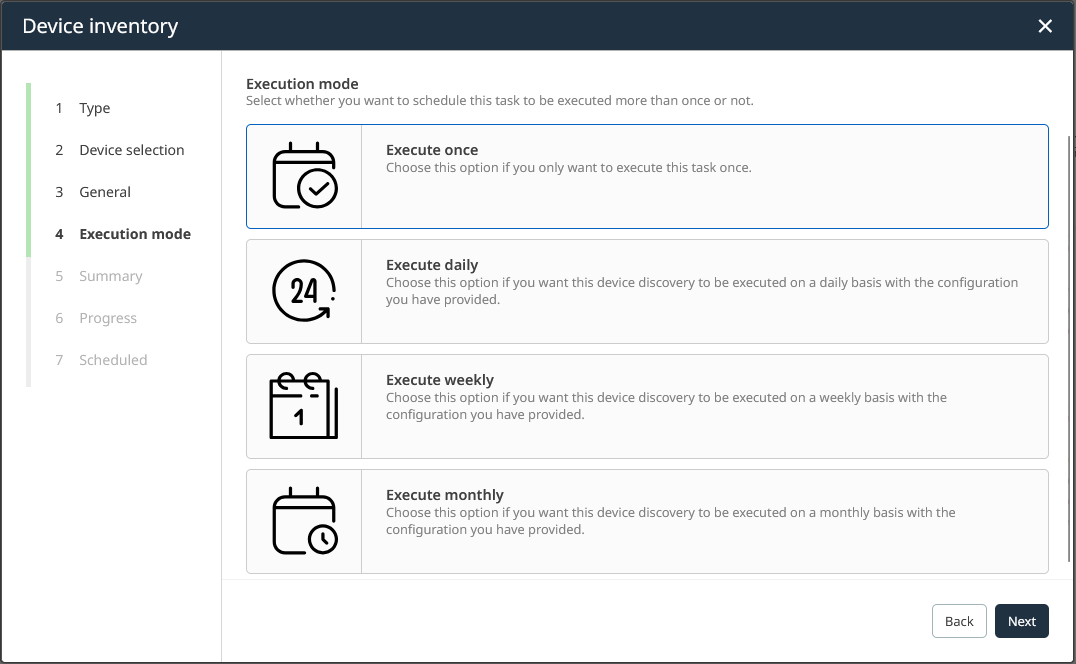
5.Define an Execution mode. We want to choose the Execute once option (selected by default). Click on Next to proceed. As hinted at in previous chapters, you can use these options to schedule automated runs. Find out more about job automation in the chapter named Schedule your discovery and inventory jobs.
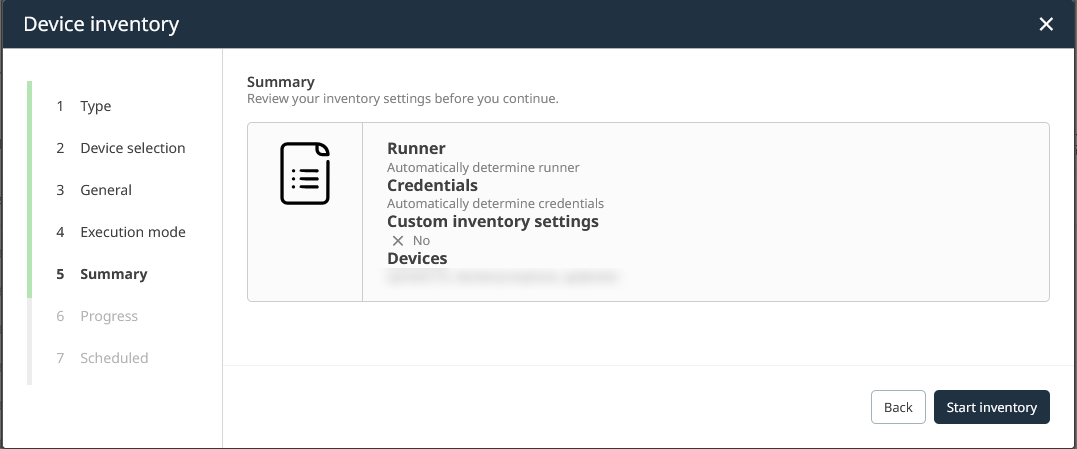
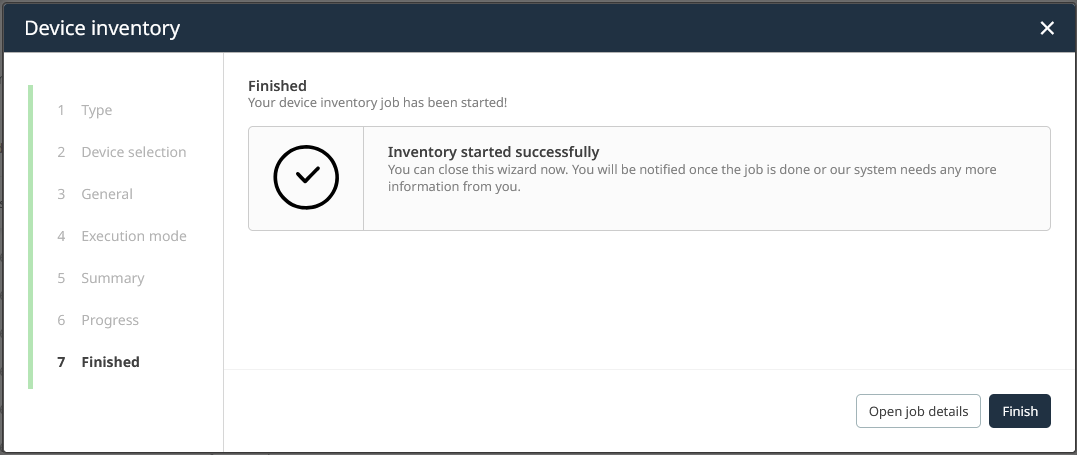
6.Verify the summary of your configuration. If it is correct, click on Start inventory. Otherwise, you can always go back to previous steps.
7.Click on Finish to finalize the process. Alternatively, click on Open job details to check on all the details of our triggered inventory job.
After following this guide, you have successfully triggered your very first device inventory manually. The presentation of the IT Visibility dashboard is meaningful only if computed from up-to-date inventory. In case of big changes inside of your IT landscape, it could be a smart idea to manually trigger device inventory for only the affected areas. In the next chapter, we want to learn about device inventory extension.
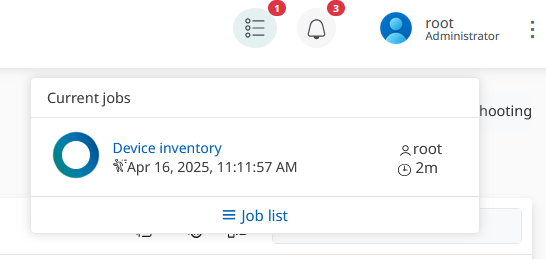
The job list widget at the top right of the web interface. It is meant to give you a quick overview of important platform activity on your IT landscape resources. Click on the Job list link to navigate to the complete version. You should get familiar with this widget as it includes job execution by the entire IT administration team and automatically scheduled jobs.
|
Tip: |