To import an OS Snapshot (.rcs) file into the library, first select the OS Snapshots from the file type section in the library view.
|
Tip: OS Snapshots in the .rcs format can be created by using RayPack. For information on how to create an OS Snapshot using RayPack refer to the RayPack User Guide. The RayPack User Guide can be found on the RayPack Product Homepage. |
Either select an existing folder or create a new folder for importing a OS Snapshot into the Library. Right click upon the target folder to show the context menu:
The IMPORT SNAPSHOT WIZARD is launched. On the File selection view, specify the path to the OS Snapshot that is to be imported.
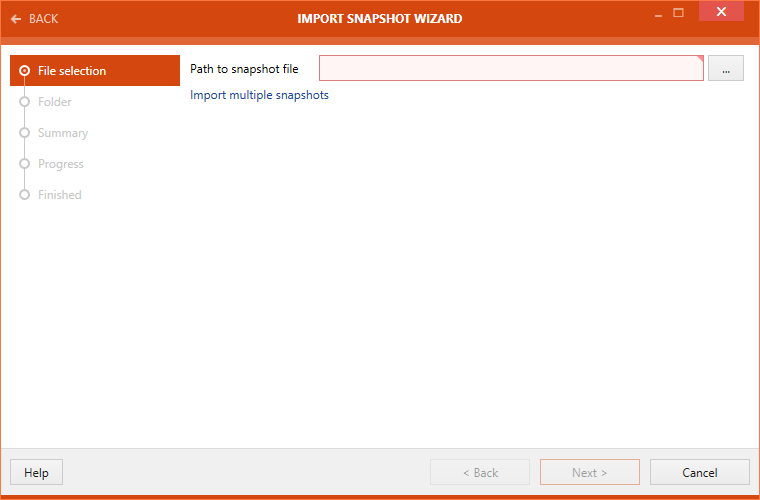
Click on the Next > button to proceed further with the import.
A target folder can be selected in the Folder section of the wizard.
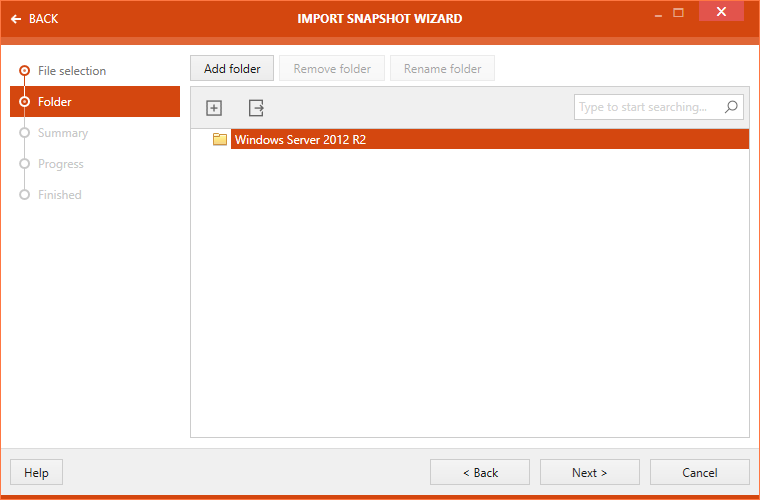
There are three buttons available at the top of the wizard.
•Add folder: This button can be used to add a new folder.
•Remove folder: This button can be used to remove the selected folder.
•Rename folder: This button can be used to rename the selected folder.
Select the target folder and click on the Next > button to proceed further.
A summary of package import properties is shown on the Summary view.
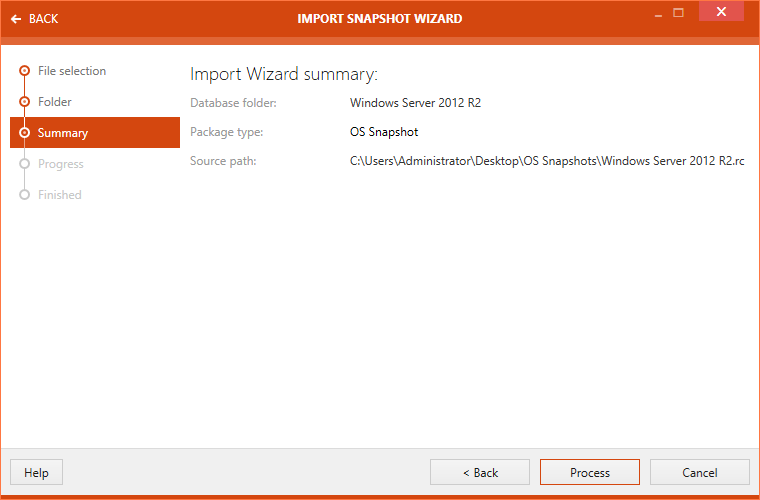
Click on the Process button to initialize the snapshot import. After the package import is complete, the import status is shown on the FINISHED view.
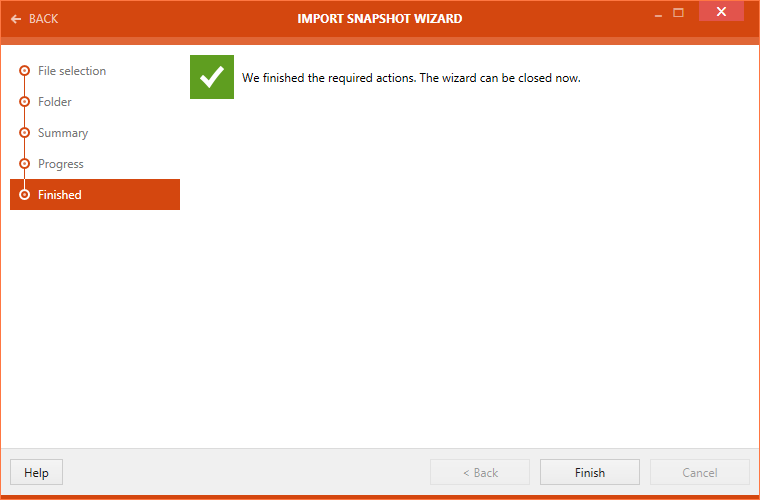
Click on the Finish button to close the IMPORT SNAPSHOT WIZARD.