RayQC Advanced extends RayPack by adding a new functionality to the File > Quality menu.
A range of rule sets available in the RayQC Advanced library is available directly from RayPack, and the result of testing are shown immediately in the tables view, section Test results.
In order to create a RayQC checklist from the current package:
1.Open any MSI/MST/RPP project
2.Click on the FILE menu and select the Quality tab.
3.The screen is divided into two sections - the right one contains RayQC Advanced-related functionality.
4.When the screen is accessed for the first time, RayPack will try to connect to the RayQC Advanced library to get a list of available rules. This make take a few seconds, depending on the location of SQL database, network speed etc.
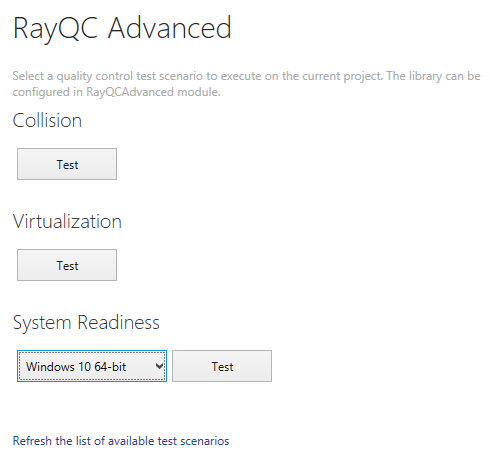
5.Finally, a view similar to the following should be shown:

6.The view represents a flat representation of rulesets as they were defined in the RayQC Advanced library. The selected ruleset will be executed when its corresponding TEST button is pressed. For certain rulesets (for example System Readiness), an additional combobox is shown which allows fine-tuning of the selection (for example, changing the target operating system).
oFor some rulesets, additional windows may be shown.
7.The testing process may take a few seconds, depending on size of the package and other factors.
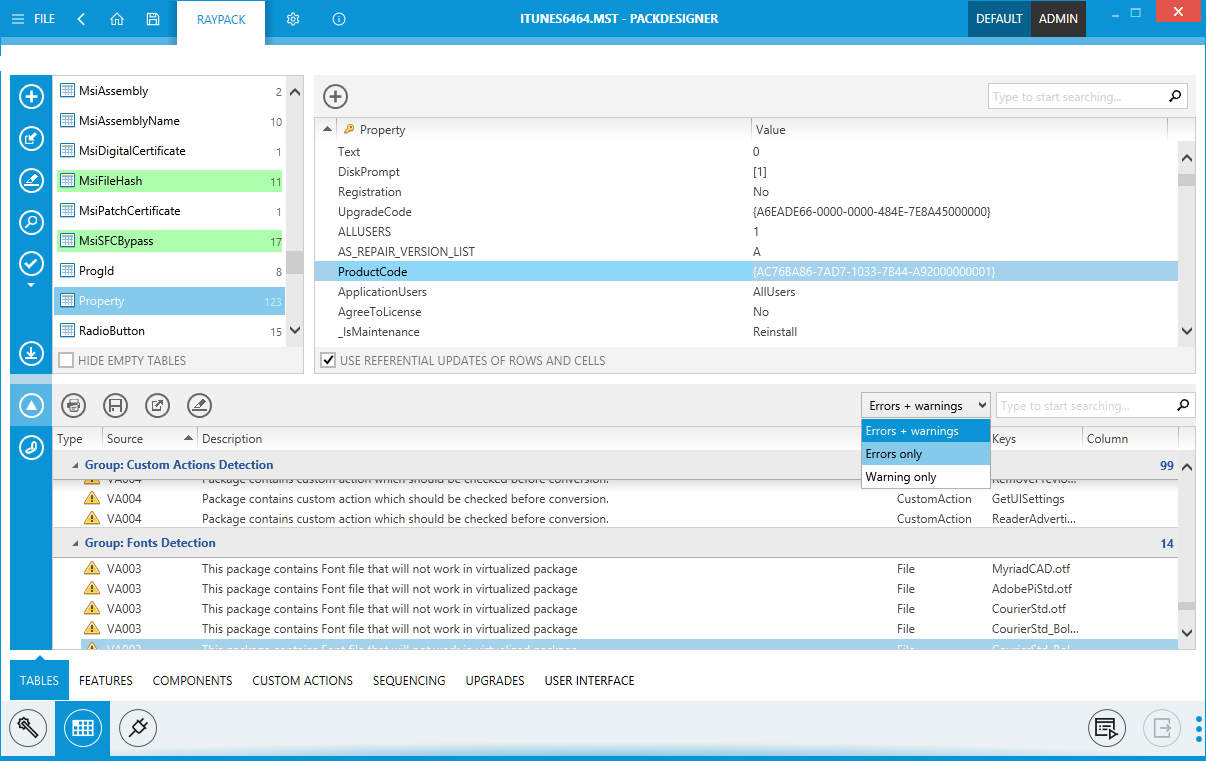
8.When the testing is over, PackDesigner will automatically jump to the Advanced View to the Tables section.

9.The list offers a standard functionality (sorting, grouping, printing and filtering). For more information, refer to the chapter Working with Validation Results.