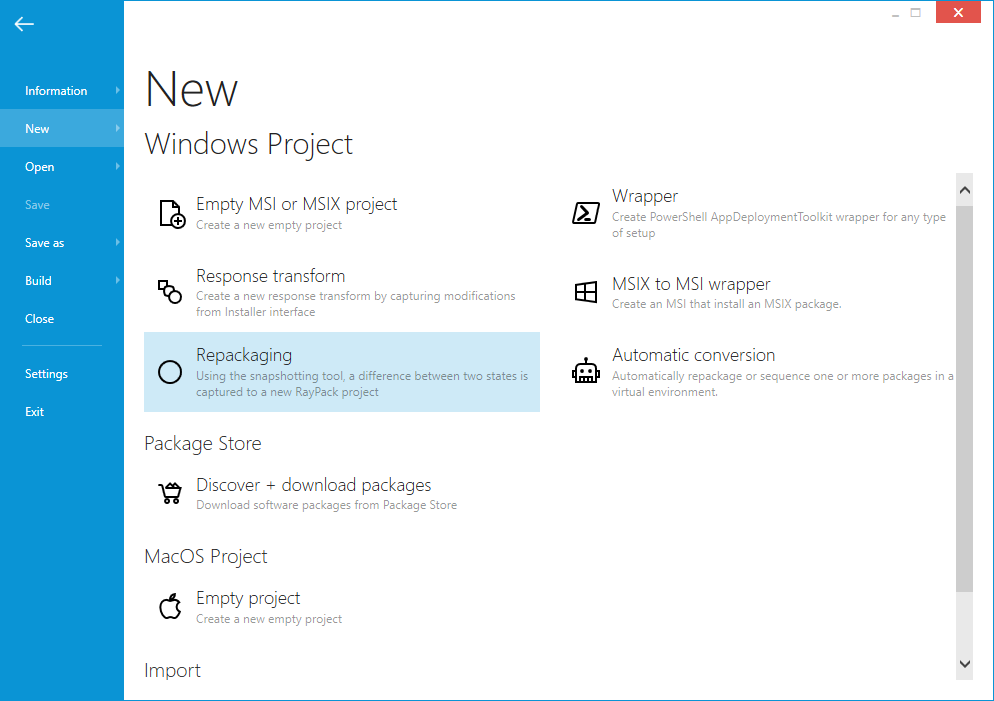
This section describes the setup capture process using PackRecorder.
Launching the PackRecorder wizard for setup capturing is available at two central places:
•By clicking the create a new project tile from the Home Screen
•By clicking the FILE tab of the Main Toolbar
Either way, the NEW dialog of the FILE menu is displayed. Initializing a new PackRecorder wizard run is achieved by clicking on the repackaging button at the right-hand side of this dialog. Please refer to the Common Dialogs section to read more about the FILE menu.

Click on the repackaging button to proceed.
|
Tip: It is recommend to ensure that any services or applications that are not required by the application that is to be captured, be disabled or shutdown. This helps immensely in creating a "clean-capture" and requires less work when editing the resulting capture project. |
Wizard Modes
Some of the pages described in the following sections may be missing depending on the capturing mode specified in the current profile. By default, RayPack uses the BASIC mode, which is limited regarding available options and wizard steps. The EXPERT mode triggers the recommended procedure for experienced packagers with advanced option requirements.
To permanently switch between the modes close the wizard and go to the profile settings.
A temporary mode switch may be performed on the first page of the wizard. However, the local changes made to the mode setting from within the wizard interface take effect on the current wizard run, not the permanent system setting.
The new project type is displayed in the dialogue window. Choose “Capture a setup” to open the Capture Wizard and use as a guide through the capturing process.
|
Note: The steps of the Capture Wizard depend on the Capture Mode defined within RayPack’s Settings section:
•If the mode is set to Basic, the wizard will contain Project Settings, First Snapshot, Install Application, Second Snapshot, Finished. •If the mode is set to Expert, the wizard will contain Project Settings, Options, First Snapshot Configuration, First Snapshot, Install Application, Configure Application, Second Snapshot Configuration, Second Snapshot, Finished.
The additional steps in the Expert Mode enable the manipulation of advanced options for this specific capture process. The standard settings for capturing remain unchanged by these adjustments.
The Snapshot configuration views are designed to decide whether new recordings or existing snapshot files should be used as base for the delta file calculation process. Whenever a fresh snapshot has been taken, the Experts Mode PackRecorder offers a button to save the recorded information as .rcs file (RayPack Capture Snapshot) for later re-using. |
Wizard Navigation
The interface of the PackRecorder wizard offers several ways to navigate between the procedure steps:
The < Back and Next > buttons at the bottom of the dialog window allow to move either one wizard step ahead or back. However, the Next > button will remain disabled until the mandatory fields of the current step contain valid values.
The wizard menu at the left hand side of the dialog window allows to directly jump back to any prior wizard step. Since walking through the whole procedure means to proceed upon prior settings and intermediate results, it is not possible to jump forward by using the wizard step menu. Once an earlier step has been called by using the menu column, it is required to execute the succeeding steps once again.
The Cancel button at the bottom of the wizard window is available at any time during wizard execution. Clicking the Cancel button aborts the current capture procedure. If snapshots have been saved during the current wizard run, they will persist even after hitting Cancel. All other recorded resources will be discarded.