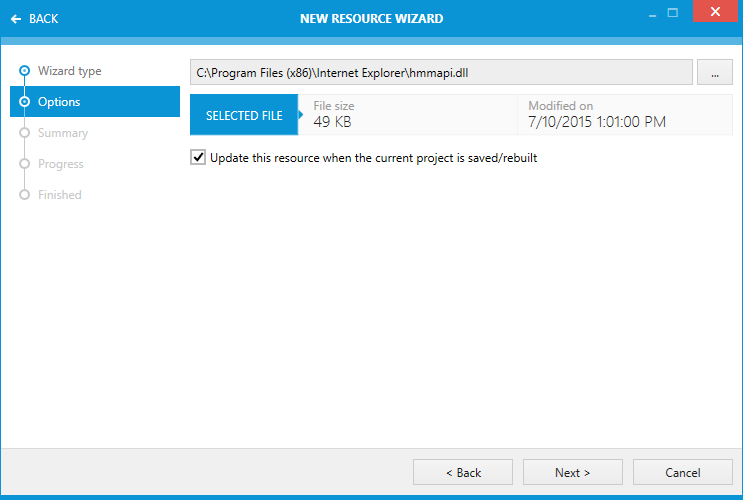
Adding a resource to a packaging project is initiated from the Resources view. To add a new resource:
1.Click on the Create new... button above the list of already available resources.
The Wizard Selector Dialog is displayed, requesting the user to declare what type of resource is intended to be added:
•a new icon resource
or
•a new binary resource
|
Note: Icon resources can be imported from .ico, .exe, or .dll files. All other file types are handled as standard binary resources. |
To Add a New Icon Resource
1.Within the Wizard Selector Dialog: Select New Icon Resource
The Icon Options Dialog is displayed.
2.Browse the local system for the source file of the new icon resource
Once the source file is selected, RayPack analyzes its content and automatically determines the name, size, last update time and visual preview for the new icon resource.
These properties will be saved along with the resource and cannot be changed manually inside the wizard. Nonetheless, it is possible to clear size and last update time by activating the checkbox import the current icon only. Please refer to Edit a resource for further details on how to change resource properties.
3.If the selected source is not an .ico file, RayPack is able to read all icons that are bundled within the source. The icon preview interface allows to navigate through all icons which were read. The arrow buttons below the icon preview allow to walk forward and backward through the icons. The index value of the currently displayed icon is shown in order to enable users to separate icons that are visually similar, but are not the same icon object inside the source file.
|
Note: Please note that the icon index values start at 0 for the first icon found inside a source file, not at 1! |
5.If the All icons radio button is activated and there is more than one icon given within the source file, RayPack imports them all with one step into a single resource.
If the Only the following icon radio button is activated, RayPack automatically reduces the source file to the icon index that is currently displayed within the icon preview interface.
6.Use the "Update this resource when the current project is saved / rebuilt..." checkbox to determine if RayPack should refresh the resource content from the physical file origin each time a project is saved or a target package format (e. g. MSI) is compiled from it. This option is only available when All icons radio button is checked.
Activate the checkbox to assign the automatic source update.
7.Click Next > to proceed to the Summary Dialog.
8.Check the listed information for correctness.
Click Process to create the new resource according to those settings.
Use the < Back button to return to the previous step and make changes before the resource creation is actually executed.
To Add a New Binary Resource
1.Within the Wizard Selector Dialog: Select New Binary Resource.
The Binary Options Dialog is displayed.

2.Browse the local system for the source file of the new resource.
Once the source file is selected, RayPack analyzes its content and automatically determines the name, size, and last update time for the new binary resource.
Whilst the name can be modified manually, size and last update time cannot be edited. Please refer to Edit a resource for further details on how to change resource properties.
The name of a resource has to be a unique, not empty, alphanumeric string with a maximum length of 62 characters. Resource names are internally saved into a column with an Identifier data type, which may contain the ASCII characters A-Z (a-z), digits, underscores (_), or periods (.). However, every identifier must begin with either a letter or an underscore.
3.Use the "Update this resource when the current project is saved / rebuilt..." checkbox to determine if RayPack should refresh the resource content from the physical file origin each time a project is saved or a target package format (e. g. MSI) is compiled from it.
Activate the checkbox to assign the automatic source update.
4.Click Next > to proceed to the Summary Dialog.
5.Check the listed information for correctness.
Click Process to create the new resource according to those settings.
Use the < Back button to return to the previous step and make changes before the resource creation is actually executed.
As soon as the resource creation is finished, the wizard closes automatically, and the object list within the Resources view is updated.