To start a new run open the START A NEW RUN wizard by either clicking on the start new run tile on the Dashboard or by clicking on the Start new run button in the WORKFLOW RUNS view.
Using the New Run Wizard
The START NEW RUN wizard is the tool which is used to create new runs in PackBench.
Project Page
|
Note: This option is only available if there is no project which is currently selected as a default one. Otherwise, the selected project is used implicitly. |
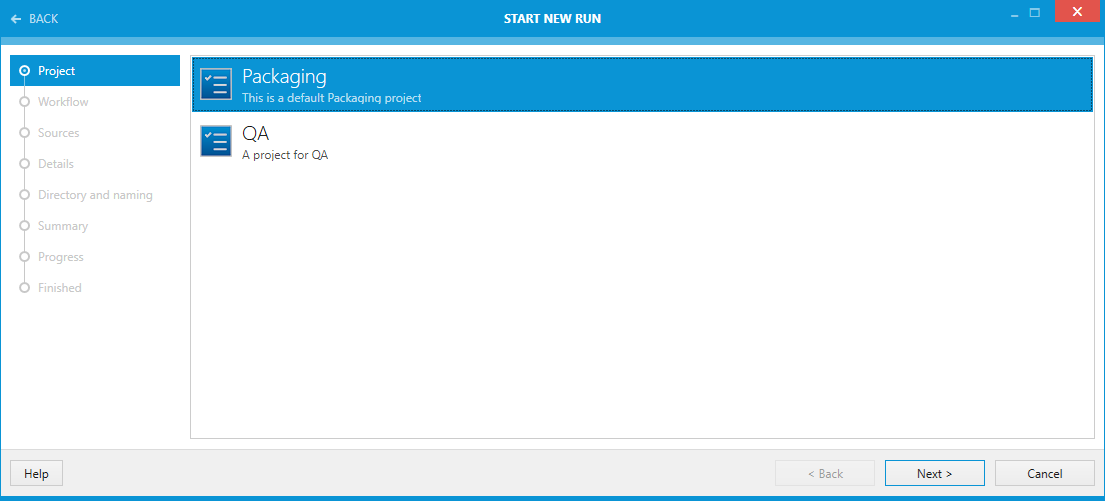
On the Project page the project for the run is chosen. The selection determines the availability of workflows in the next screen.
Click on the Next > button to proceed to the Workflow page.
Workflow Page
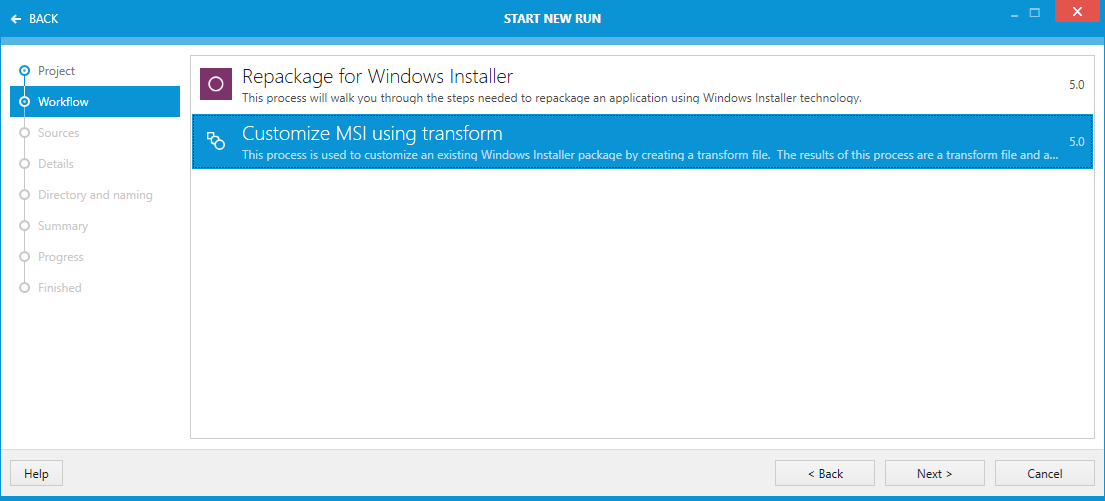
On the Workflow page the workflow for the run is chosen. In this example, the available workflows are Repackage for Windows Installer and Customize MSI using transform.
Select the target workflow and click on the Next > button to proceed to the Sources page.
Sources Page
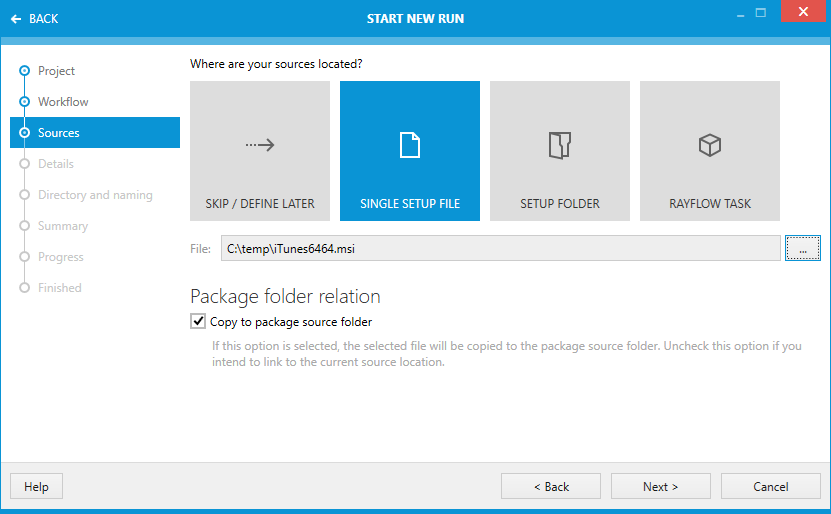
On the Sources page the sources for the new run are selected. Select the type of source using the radio buttons. The following options are available:
•SKIP / DEFINE LATER: If this option is chosen, no file or folder is selected and all configuration in this step can be skipped.
•SINGLE SETUP FILE: If this option is chosen, the Open dialog appears. Select the target source file and click on the Open button. After this, the file can still be changed by using the browse button [...] to browse to the target file. Under the Project folder relation option, choose if the selected sources should be copied into the project or if the current location of the sources should be linked. If the location should be linked, disable the checkbox. If the sources should be copied into the project, ensure that the checkbox is enabled. By default, the sources are copied into the project.
|
Be aware: |
•SETUP FOLDER: If this option is chosen, the Select Folder dialog appears. Select the target source folder and click on the Select Folder button. After this, the folder can still be changed by using the browse button [...] to browse to the new target folder. Select the executable or file which should be used by default to trigger the installation under the Entry Point option. Then, under the Project folder relation option, choose if the selected sources should be copied into the project or if the current location of the sources should be linked. If the location should be linked, disable the checkbox. If the sources should be copied into the project, ensure that the checkbox is enabled. By default, the sources are copied into the project.
•RAYFLOW TASK: With this option a task or a file within a task can be selected directly from RayFlow. More information about working with RayFlow can be found in chapter Working with RayFlow.
|
Note: This option is only available if the currently selected project has been configured to use RayFlow. Refer to chapter RayFlow for more information about setting up a RayFlow connection. |
Click on the Next > button to proceed to the Details page.
Details Page
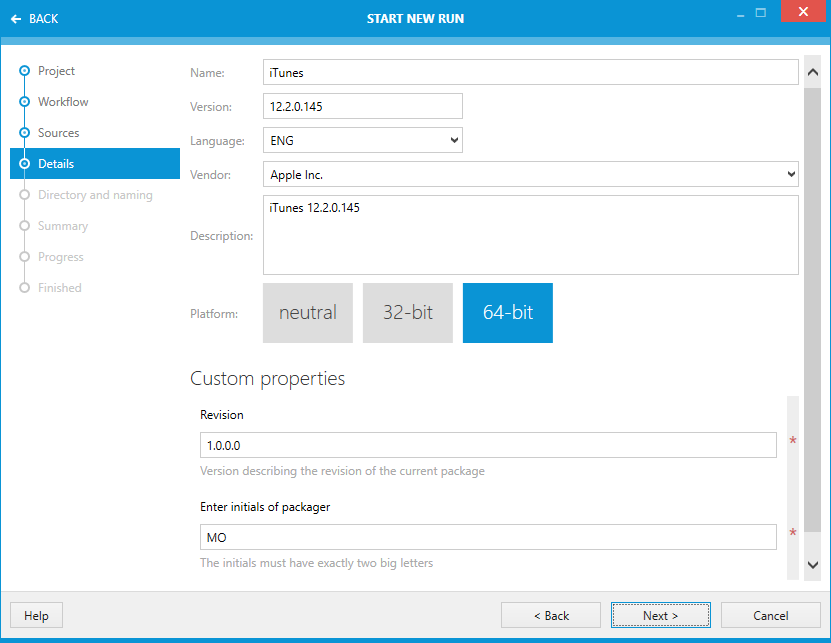
On the Details page, the details of the new run are defined. The following options are available on this page. Most of the fields will be filled in automatically, based on the package that has been chosen. All values can also be configured manually:
•Name: This is the name of the application.
•Version: This is the product version.
•Language: This is the language of the product.
•Vendor: This is the vendor/manufacturer of the product.
•Description: A description for the package can be entered here. For the default value, see the screenshot above.
•Platform: This is where the target platform for the package is configured. There are three options available: neutral (the package can be used on both architectures), 32-bit (only), or 64-bit (only).
Furthermore, the Custom properties are configured on this page. The content of the Custom properties page varies, depending on the workflow that has been selected for the run. The page shown above shows the Custom properties for the Repackage for Windows Installer workflow used in this example. Mandatory fields will be marked with a red * and fields with invalid entries will be highlighted in red and an error message will describe why the value is invalid.
When all necessary data has been entered click on the Next > button to proceed to the Directory and naming page.
Directory and Naming Page
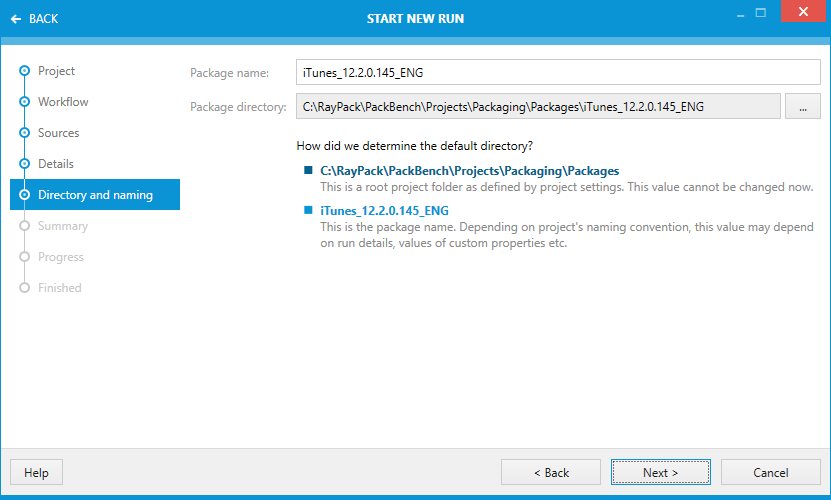
On the Directory and naming page, the directory in which the run is stored is defined under the Store project in the following directory option. It can be changed by opening the Select Folder window through clicking on the Browse button [...]. In the Select Folder window, browse to the target folder and click on the Select Folder button.
|
Note: If the option to copy the sources to the project folder has been chosen and a source file or folder has been selected, the required files will be copied into a subfolder of the project as defined in the Advanced tab of the project properties. |
When all necessary data has been entered click on the Next > button to proceed to the Summary page.
Summary Page
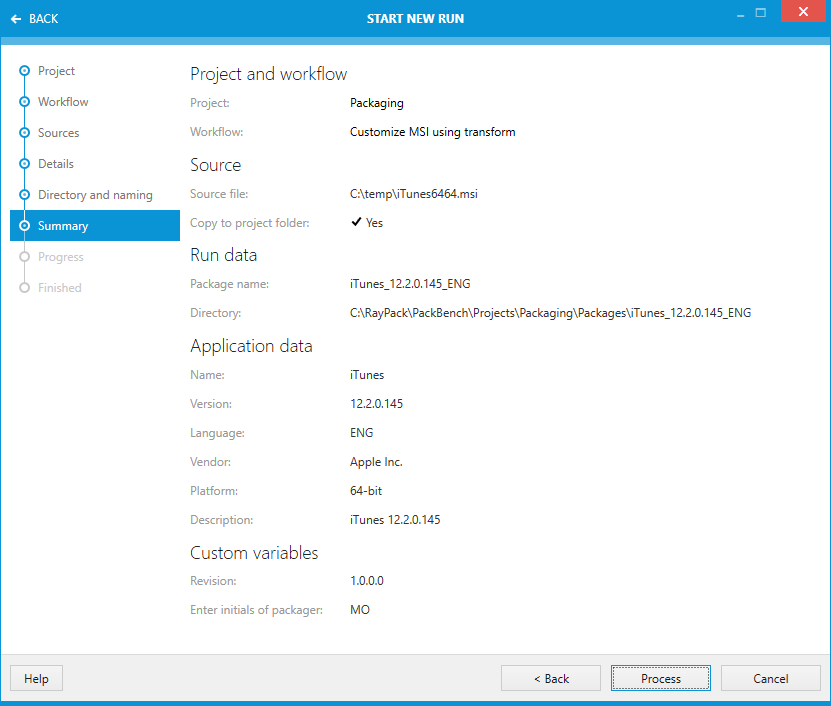
The summary shows all configurations that have been made for the new run. Verify the entries and click on the Process button for the new run to be created.
Progress Page and Finished Page
On the Progress page the progress of the creation of the run is shown. When the creation process is finished the page will automatically change to the Finished page.
The run has now successfully been created and the wizard can be closed by using the Finish button. The new run will be opened automatically.