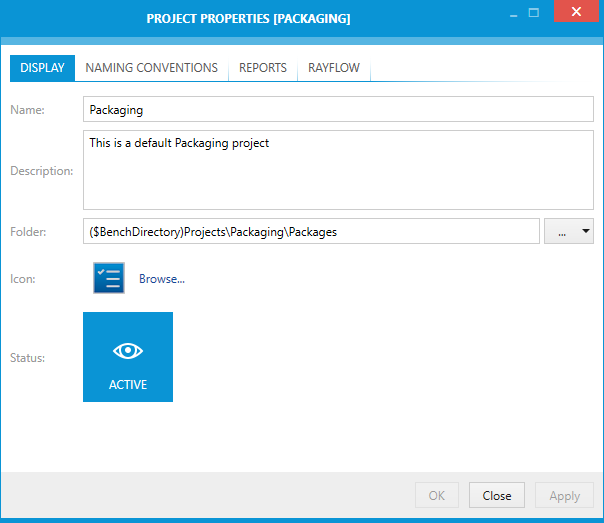
The DISPLAY tab contains various settings which define how the project is presented. Additionally, the status and default project path can be defined here.
Name
Shows the name of the project and can be used to change the name. This field is mandatory for all projects.
Description
The description of the project can be entered or altered here.
Folder
The path to the folder which is related to the project is shown here. It can be changed manually or by using the dropdown menu next to the field. The dropdown menu offers to options:
•From local folder...: When this option is selected, the Select Folder window will open. Browse to the target directory and press the Select Folder button.
•Using variables...: When this option is selected, the VALUE EDITOR will open. For more on the VALUE EDITOR refer to the Value Editor chapter.
Icon
This is the icon associated with the project. The icon is shown primarily in the project browser, shown on application startup (if there is more than one project in current product instance).
In order to define a custom icon, press Browse.. to browse for supported icon files.
|
Tip: |
Status
The status of the project can be defined by clicking on the button. It can be set to either ACTIVE or ARCHIVED. The current status will be shown on the button and the button will be highlighted if the current status is ACTIVE.
Click on the OK button to save the changes and close the window, click on the Apply button to save the changes without closing the window, or click on the Cancel button to dismiss the changes.
