An active Import... option is available in the context menu, launched over a child element (folder or package) of a parent folder.
The following steps, precisely describe the steps required in order to import a software package:
1.From the application dashboard, select the library item to load the SOFTWARE view
2.Within the library, either create a new folder or navigate to an existing folder, under which the package is to be imported
3.Right click upon the target folder, to show the context menu
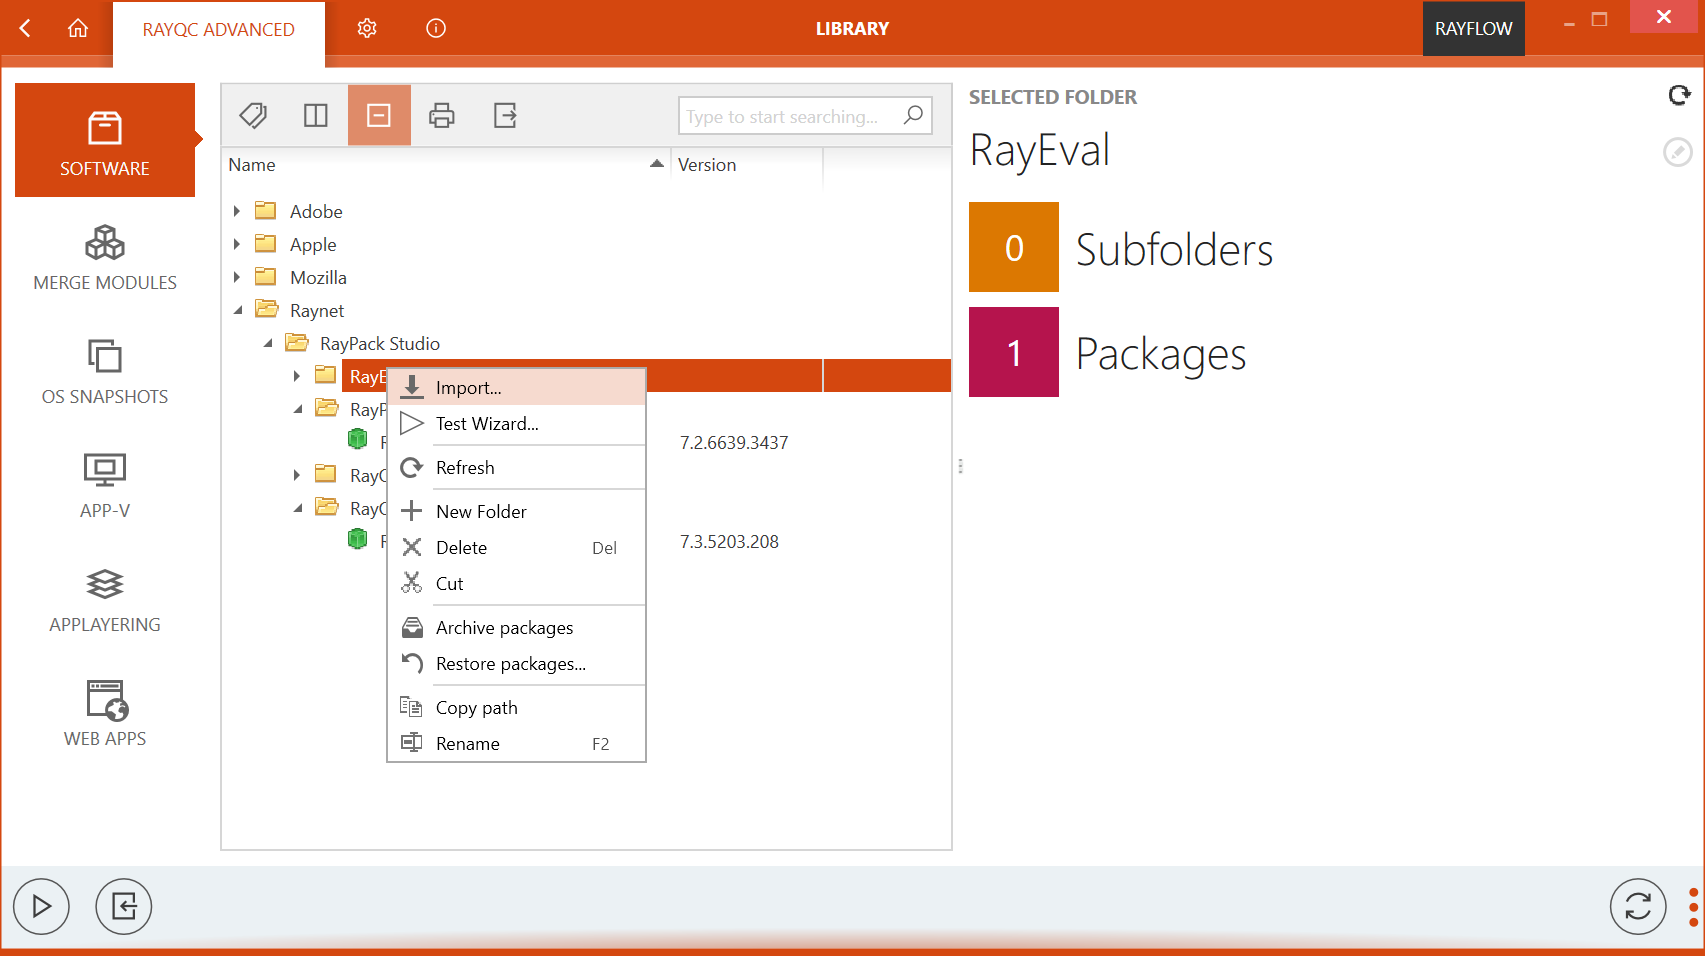
4.Select the Import… option from this menu
The IMPORT PACKAGE WIZARD is launched
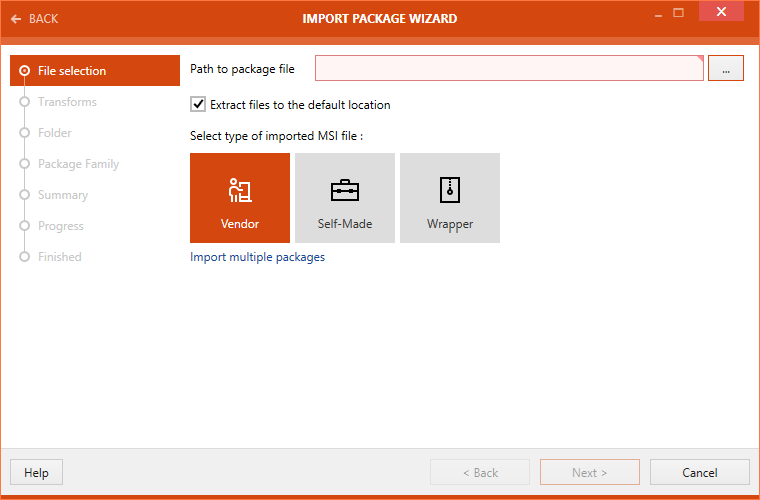
5.In this wizard, the first view shown is the File selection view. This view allows a user to specify the .msi file, its type and an option to extract the .msi to the default extraction folder. Additionally, the Import multiple package option, allows a user to import multiple packages at the same time.
•Select type of imported MSI file: In RayQC Advanced, an imported .msi file can be of three types: Vendor, Self-Made and Wrapper.
oVendor: An .msi file delivered by a vendor and includes a valid signature.
oSelf-Made: An .msi file provided by a packager and may contain a signature.
oWrapper: A wrapper .msi file is usually a program used to execute one or more other installation programs.
•Extract files to the default location: This option that is by default enabled, extracts the imported .msi file to the default extraction directory. Link to this extraction directory is shown under the TROUBLESHOOTING tab of the ABOUT view.
6.After selecting a path to the .msi file being imported, click on the Next > button to proceed.
The Transforms view is shown.
7.Click on the Add button, to add transform to the package being imported. An existing transform can be removed and arranged using the Remove, Up, and Down buttons.
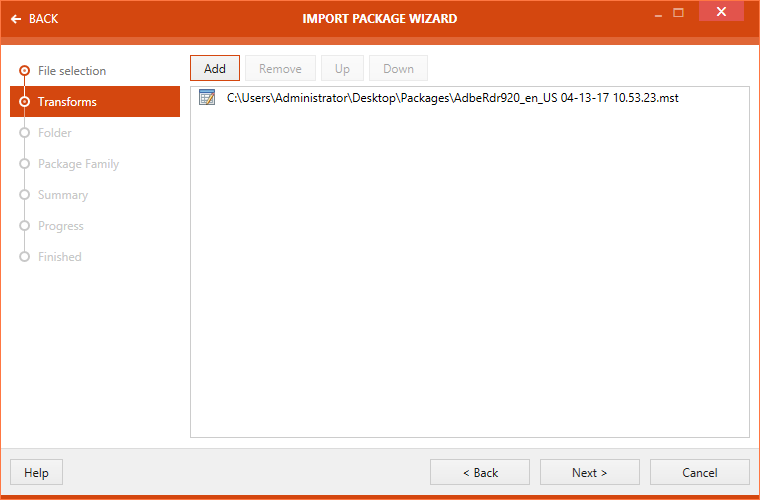
Click on the Next > button to proceed further.
8.A target folder can be selected in the Folder section of the wizard.
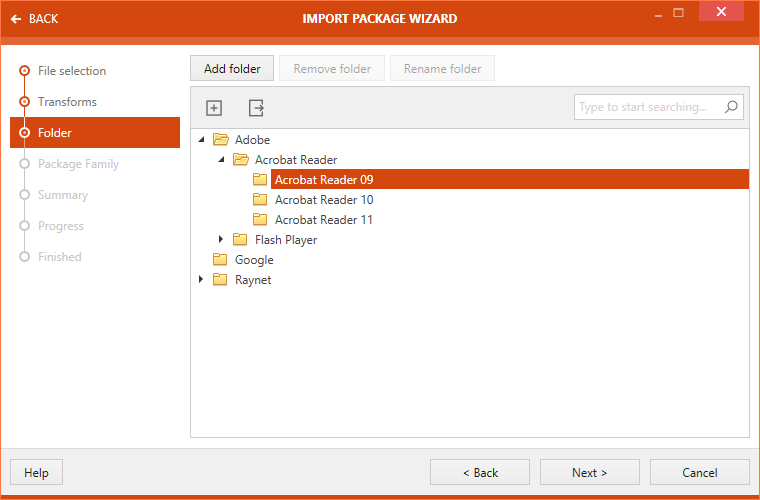
There are three buttons available at the top of the wizard.
oAdd folder: This button can be used to add a new folder.
oRemove folder: This button can be used to remove the selected folder.
oRename folder: This button can be used to rename the selected folder.
Select the target folder and click on the Next > button to proceed further.
9.If applicable, assign a package family to the package.

Click on the Next > button to proceed to the Summary view.
10.A summary of package import properties is shown on the Summary view.
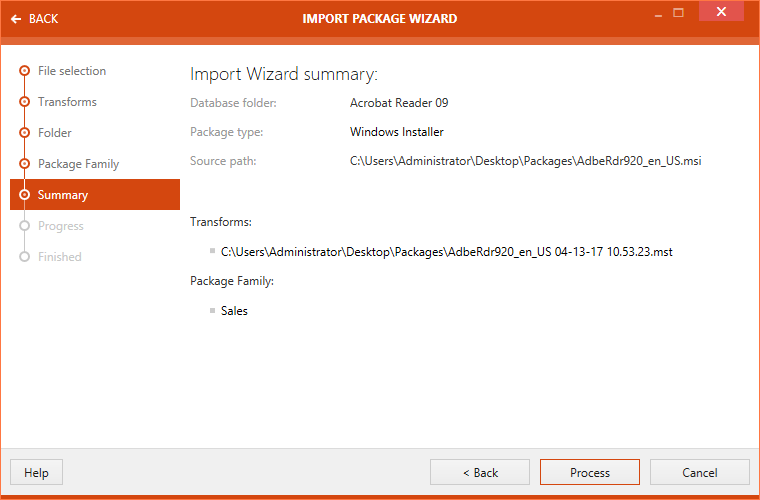
11.Click on the Process button to initialize the package import.
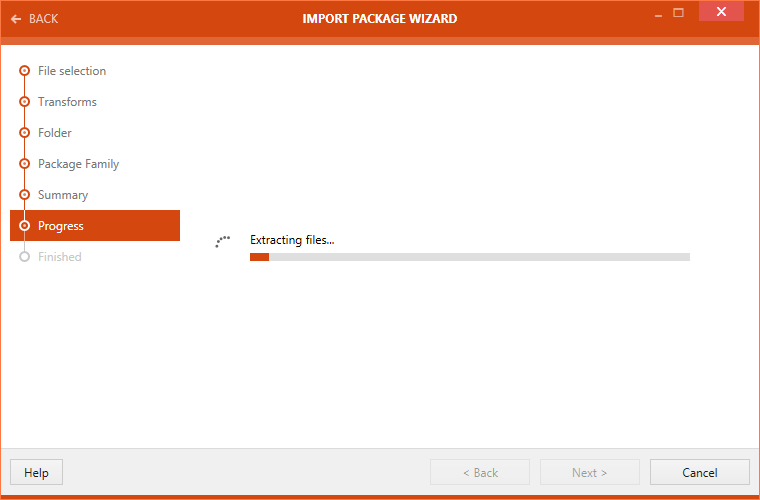
12.The package import is initialized and a progress bar is shown.
13.Status pertaining to the package import is shown on the Finished view.
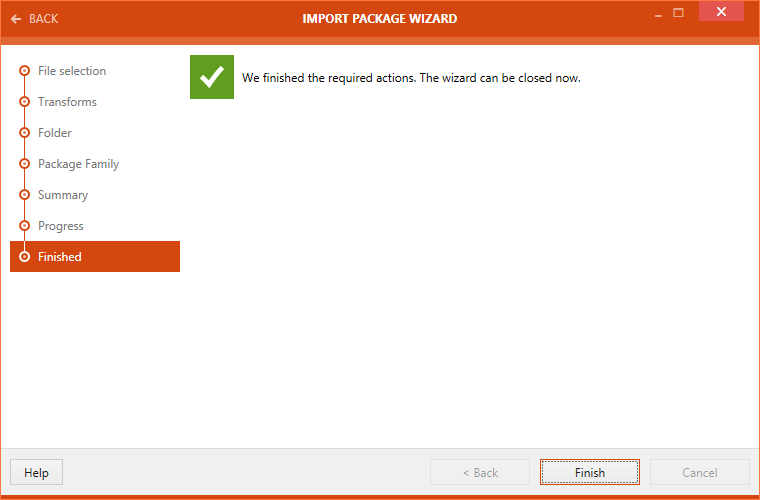
14. Click on the Finish button to finalize the package import.