Any RayFlow task can be used as a source of files and metadata of a run. RayFlow tasks remain assigned to the PackBench run through its whole lifetime, allowing to upload files, send comments, change data fields etc.
|
Note: RayFlow task can be only assigned in the New Run wizard. After a run is started, it is not possible to assign or reassign RayFlow tasks anymore. |
Prerequisites
There are a few prerequisites that must be met in order for the following steps to work.
1.There is an accessible RayFlow instance running in the network, or available online
2.The project that is going to be used has to be mapped to a RayFlow project. This can be configured in the Project Configuration dialog. See more details in chapter RayFlow.
3.The user needs to be signed-in to RayFlow. Contact the RayFlow administrator for the credentials. In order to sign-in, follow the steps described in chapter Signing-in to RayFlow.
In Order to Start a New Run From RayFlow...
In order to start a new run and to associate it with RayFlow task, do the following:
1.In the dashboard, press Start new run button.
2.Select the PackBench project (if required) and workflow as described in chapter Starting runs.
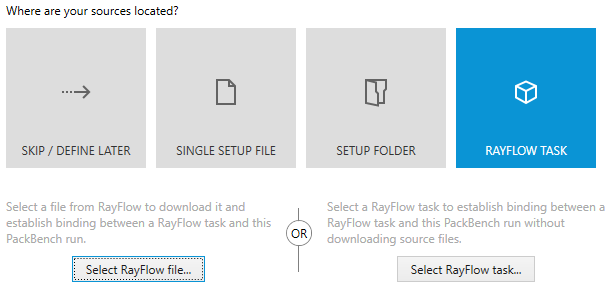
3.Select RAYFLOW as a source type.

|
Note: If the RAYFLOW TASK option is not visible, this means that the PackBench project is not configured to use RayFlow. The chapter RayFlow describes how to configure it. |
4.The following two options are available:
oSelect RayFlow file... - opens RayFlow selector prompting for the RayFlow phase, task, and the required file assigned to the task.The selected sources will be downloaded by PackBench and used as package entry point.
oSelect RayFlow task... - open RayFlow selector prompting for the RayFlow phase and the task assigned to the run. No sources will be downloaded from RayFlow.
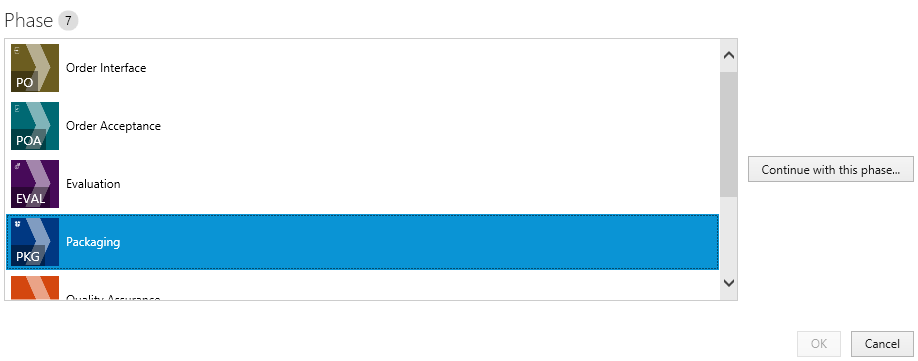
5.A new overlay window will be shown, prompting to select a RayFlow phase, a task, and a file belonging to a task.

6.Select the RayFlow phase which contains the task that is to be opened. The counter above the list shows the total number of phases that are visible to the current RayFlow user.
7.Click Continue with this phase... to proceed to the task selection with the currently selected phase. Press Cancel to go back to the backstage menu.
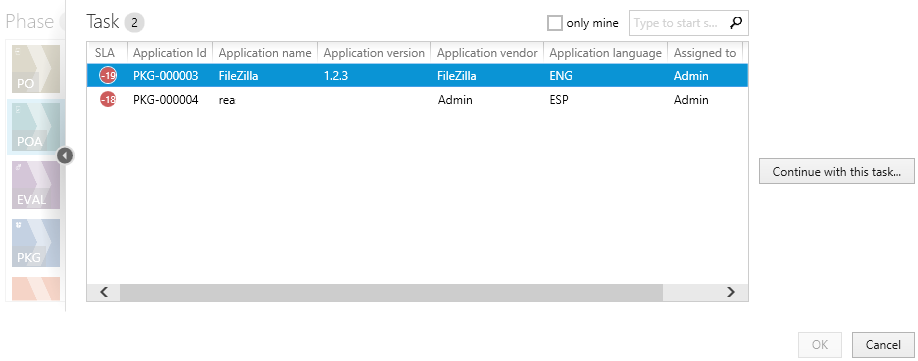
8.Next, select the task that should be opened:

The number displayed above the list shows the total number of tasks that are visible to the current RayFlow user. The results can be narrowed by ticking the only mine option, which hides all packages which are not belonging to the current RayFlow user. The task browser displays first 5 data fields from RayFlow to enable easier identification (refer to the RayFlow documentation about setting up the data fields).
9.It is also possible to narrow the results by searching using the search box in the top right corner of the list.
10.(Only if the option RayFlow task has been selected)
Once a RayFlow task is selected, press OK to accept the selection or Cancel to return to the sources selection.
11.(Not available if the option RayFlow task has been selected)
Once the required task is selected, press Continue with this task... to proceed to the file selection. Press Cancel to go to the backstage menu. In order to go back to the phases view, click the arrow on the left side of the list or the partially transparent area containing the tiles representing available phases.
12.(Not available if the option RayFlow task has been selected)
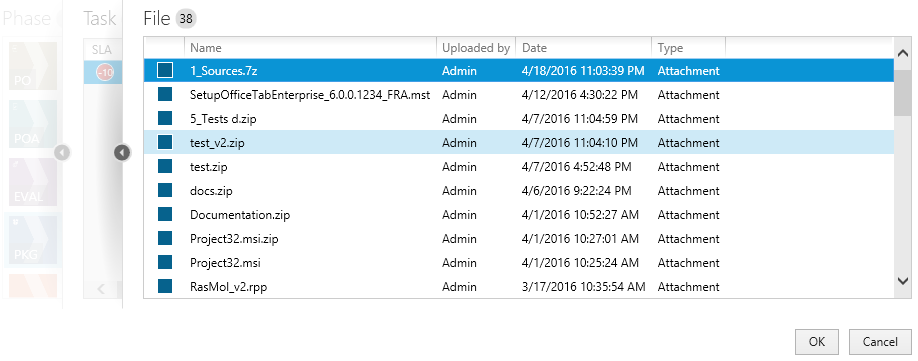
On the next screen, select the file to open:

13.(Not available if the option RayFlow task has been selected)
The number displayed in the top left corner represents the number of files that are present in the currently selected package.
oThe type column represents the source from which the file can be accessed. Possible values are Attachment (file has been physically uploaded to RayFlow) and Link (the package is available on a shared location and only the path to the root file is saved in RayFlow).
oThe Date and the Uploaded by columns denote by who and when the file has been uploaded.
oThe list is sorted by date, the most recent items are displayed on the top of the list.
14.Press OK to open the selected file / task. Press Cancel to go back to the backstage. In order to change RayFlow task or phase, click the arrow on the left side of the list or the partially transparent area containing the list of tasks.
Relations Between RayFlow Data Fields and PackBench Properties
Standard properties like the Application Name, Version, Vendor, and Language are automatically mapped to RayFlow datafields using standard out-of-the-box configuration. If the default names of the instance are changed, it is important to configure RayFlow data mappings to indicate, which of the new fields are to be reported as name, version, vendor, and language respectively.
Custom variables are mapped to RayFlow datafields by using their names. A matching between a variable and a datafield is automatically recognized if any of the following is fulfilled:
▪The name of the custom variable and a datafield in RayFlow are the same (case insensitive).
▪The name of the custom variable is equal to the name of datafield in RayFlow, excluding spaces. For example, MyVariable1 will be mapped to the My Variable 1 data field.