Via The Add Installer dialog for Windows installers, you can add a an additional installer to a package. Creating and applying several installers within the same package can support precise deployment targeting. For example, with several installers, you can separately assign them to different managed devices and servers. You can add further Windows installers to the package by clicking on Add in the Installers toolbar. For more details on the process of adding targeting installers (.msi or .exe), also see chapter Add an additional installer.For now, Add a third party installer is relevant,
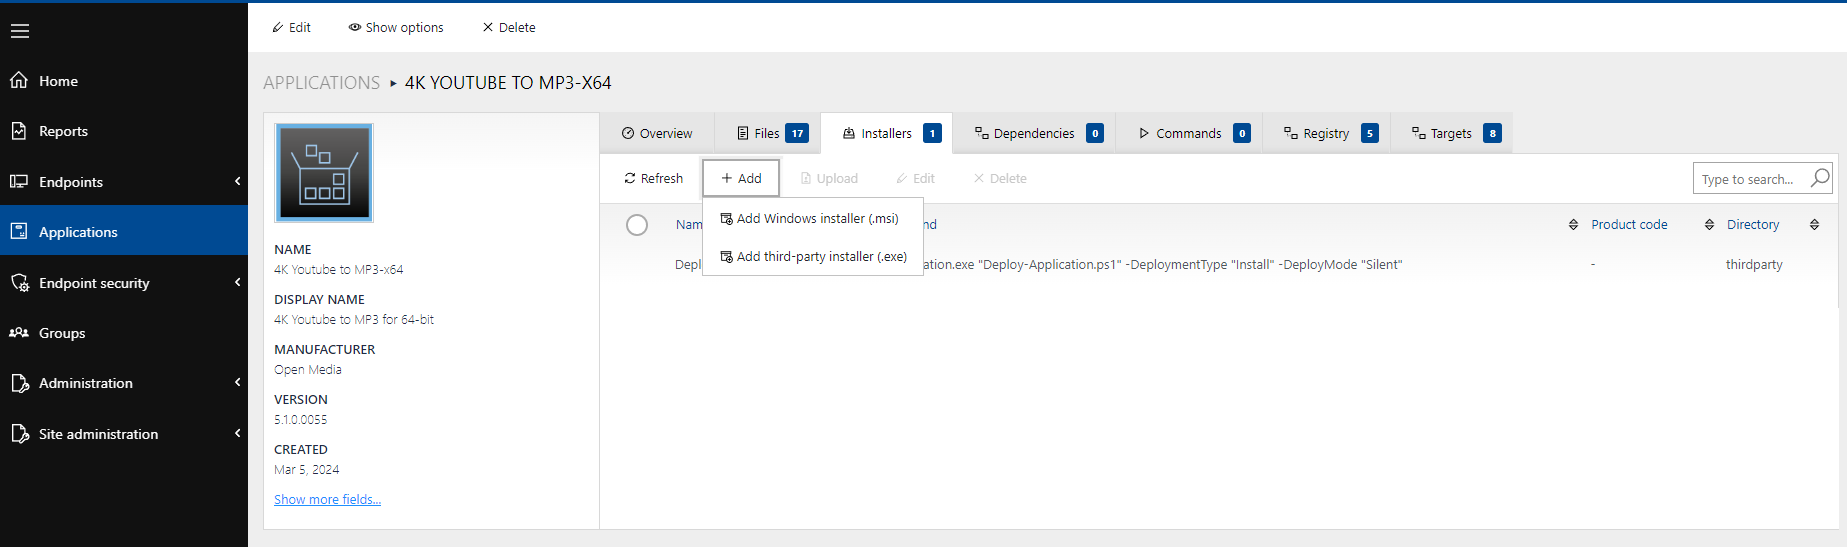
The Add installer dialog includes four tabs: General, Files, Detection, Targets.
General
In the General tab, it is possible to either add one .exe file by clicking on the Add file(s) button, or to add a complete folder with all its content by clicking on the Add Folder button. In case you selected the Add Folder option is chosen, supporting non-installer files that are in the folder will also be added to the package.
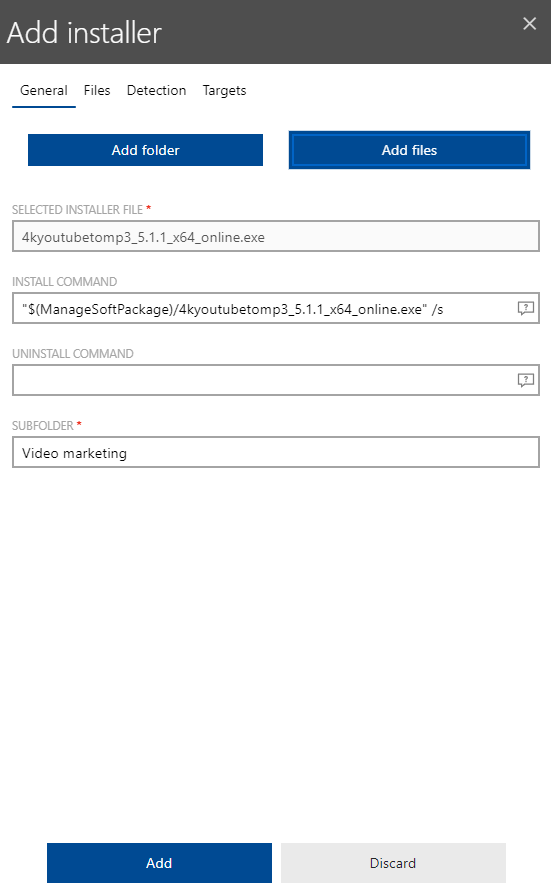
The dialog under the General tab includes the following fields.
•SELECTED INSTALLER FILE: This field shows the installer file that has been chosen. If a folder has been uploaded and the folder contains more than one .exe file, the first (in alphabetic order) .exe file will automatically be chosen as selected file. This value can be changed by selecting another file while in the Files tab. Usually, the installer fills in this field automatically although it can be edited manually. This tab is mandatory.
•INSTALL COMMAND: You can edit this field to add command-line arguments that will be used for the installation of the application. This field is optional.
•UNINSTALL COMMAND: You can manually enter a command to uninstall the package into the UNINSTALL COMMAND field. The command should be an exact match of the command that would be entered into the command-line of the operating system. If using environment variables to define an uninstall command, the variables need to be used in a specific way. For example, if the %temp% variable should be part of the command, It needs to be used as $(TEMP).Filling in the UNINSTALL COMMAND field is optional, but recommended.
Files
Under the Files tab, you can view and check all files that will be added together with the installer. Furthermore, if there are multiple installers, it can be used to define the selected installer.
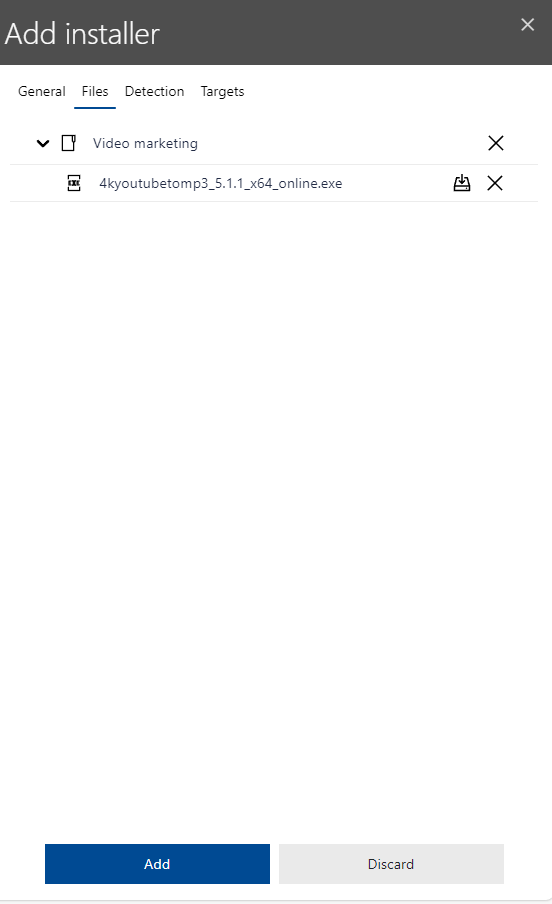
If there are multiple installer in the package, it is possible to switch the installer files by clicking on the icon next to it. The selected installer file is marked by the  icon. All other installers are marked by the
  icon.
icon.
Folders and files in this view can be deleted by clicking on the  icon located behind the item.
|
WARNING Deleting a folder will also delete all subfolders and packages contained in the folder from the package.
|
Detection
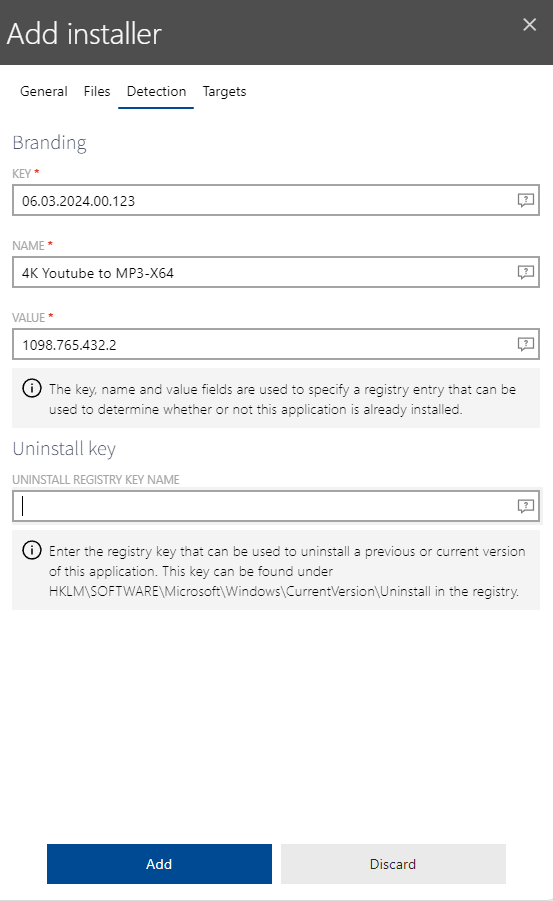
The Detection dialog serves to clearly identify the current installers and package versions. It contains the following fields.
•KEY: In the Key field, you can specify the key of the registry hive and the key name of a registry key that can be used to determine whether or not the package is already installed..
•NAME: In the Name field, you should enter the name of a registry entry that is used in conjunction with the contents of the KEY field. So you can determine n order to determine whether or not the package is already installed. By default, this field is empty.
•VALUE: In the Value field, the value that is used in conjunction with the contents of the KEY and the NAME fields. It also serves to determine whether or not the package is already installed.
•UNINSTALL REGISTRY KEY NAME: This field contains the registry key that is used to uninstall the package. The uninstall registry key usually matches the GUID of the application set in curly brackets. An example value would be {2453DBC8-ACC4-4711-BD03-0C15353AA3D8}. It is not necessary to enter the whole path, the uninstall registry key is sufficient. It does not matter if the key will have to be in the 32-bit or the 64-bit section of the registry. This will be managed automatically.Filling in this field is optional, but recommended for a clean uninstall process.
|
Note: The values entered into the fields shown above are random numbers to show that you can edit values and install commands manually. Naturally, every package requires its own correct entries.
|
Targets
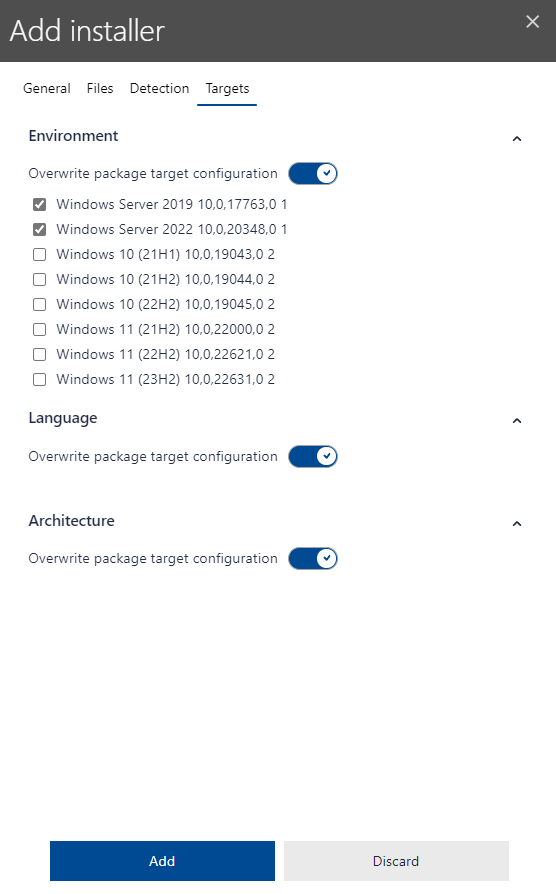
The Targets dialog is identical to the one presented in chapters Edit an Installer and Add an additional installer.
General operations
•Save changes: As usual, you can save your new configurations in the Edit installer dialog via the Save changes button.
•Discard: You can reject all of your new configurations via the Discard button.