Keeping good watch over platform activity is important. The Automation page, found under the Devices view, is made for exactly that. Let's highlight its core activity which is the insertion of new timed job schedules. Learn more about the basics of that view in the Devices chapter. The steps of this chapter are basically the same as in the previous chapter, but the example scenario deserves attention.
In contrast to the discovery job covered previously, in this chapter, we want to schedule a daily complete device inventory job. We aim to target a small set of devices easy to control. The platform needs strong credentials to authenticate against the devices, including permission to perform deep system queries. Make sure to pick a runner able to route to the selected devices. During workdays we need to have a time-window with little to no office (device) activity, neither local nor remote. Prepare these details to be able to fill out the wizard.
1.Navigate to the Devices view in the Asset Management workspace. Then open the Automation tab.
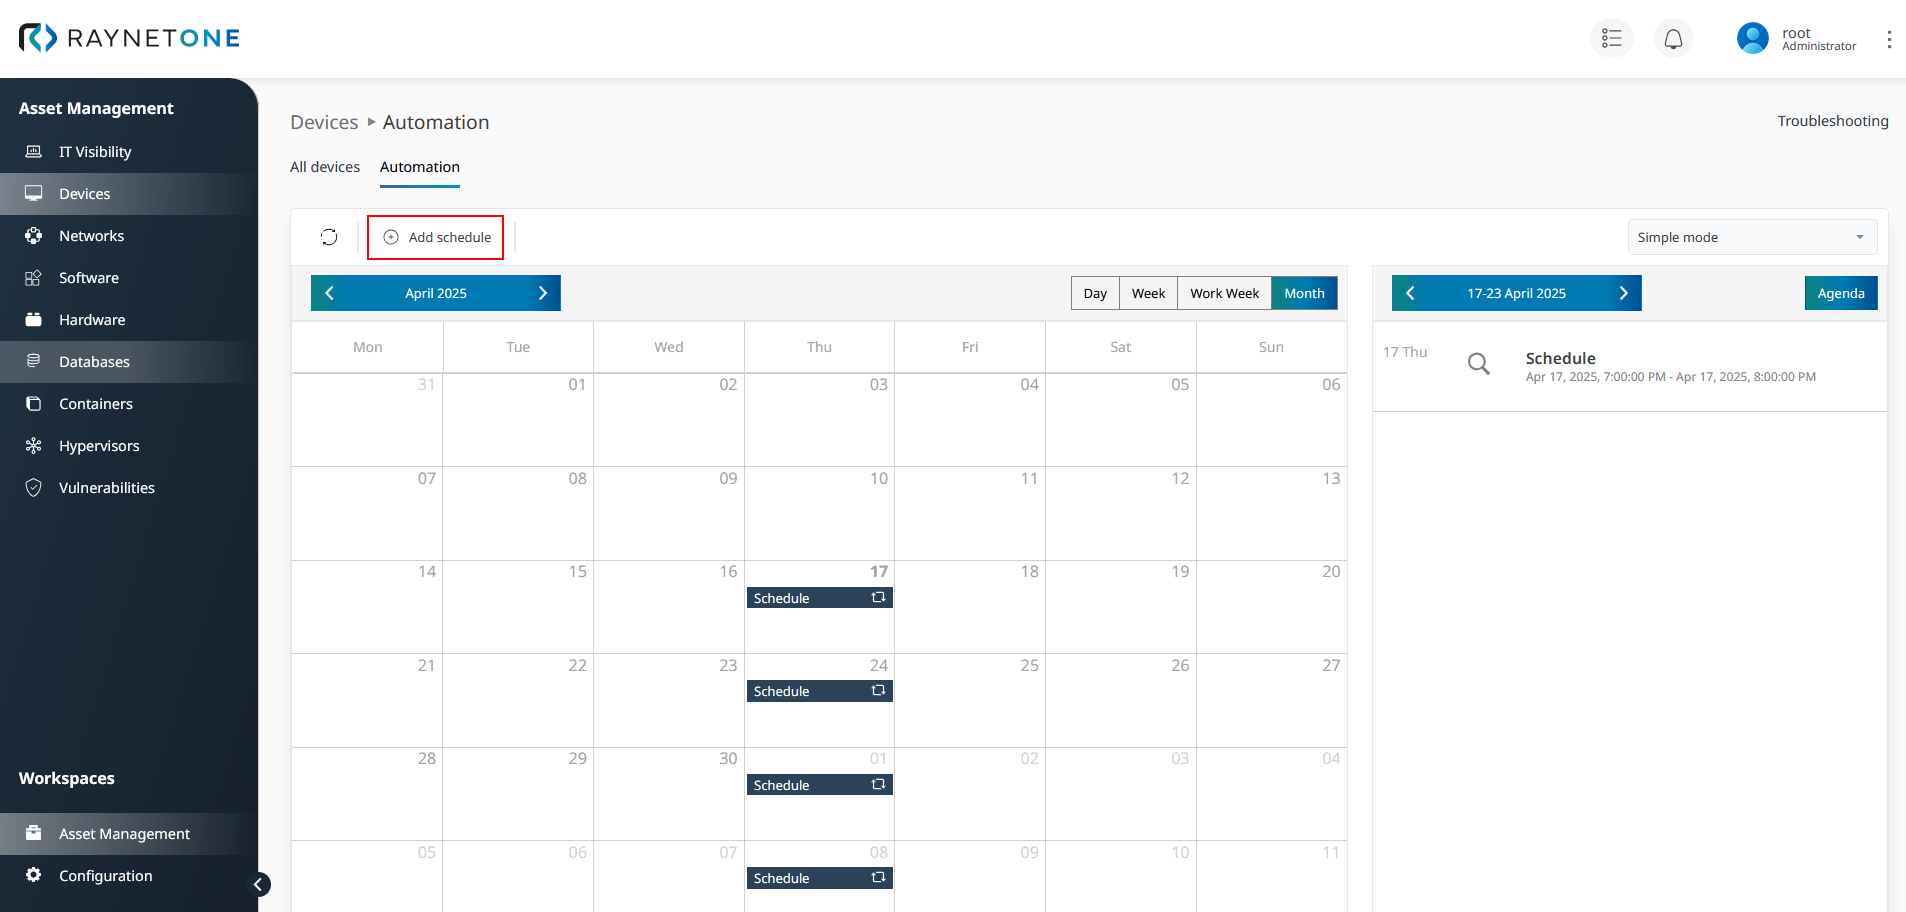
2.Click on Add schedule to select a scheduled job type. Select Device > Inventory existing devices to open the Device inventory wizard.
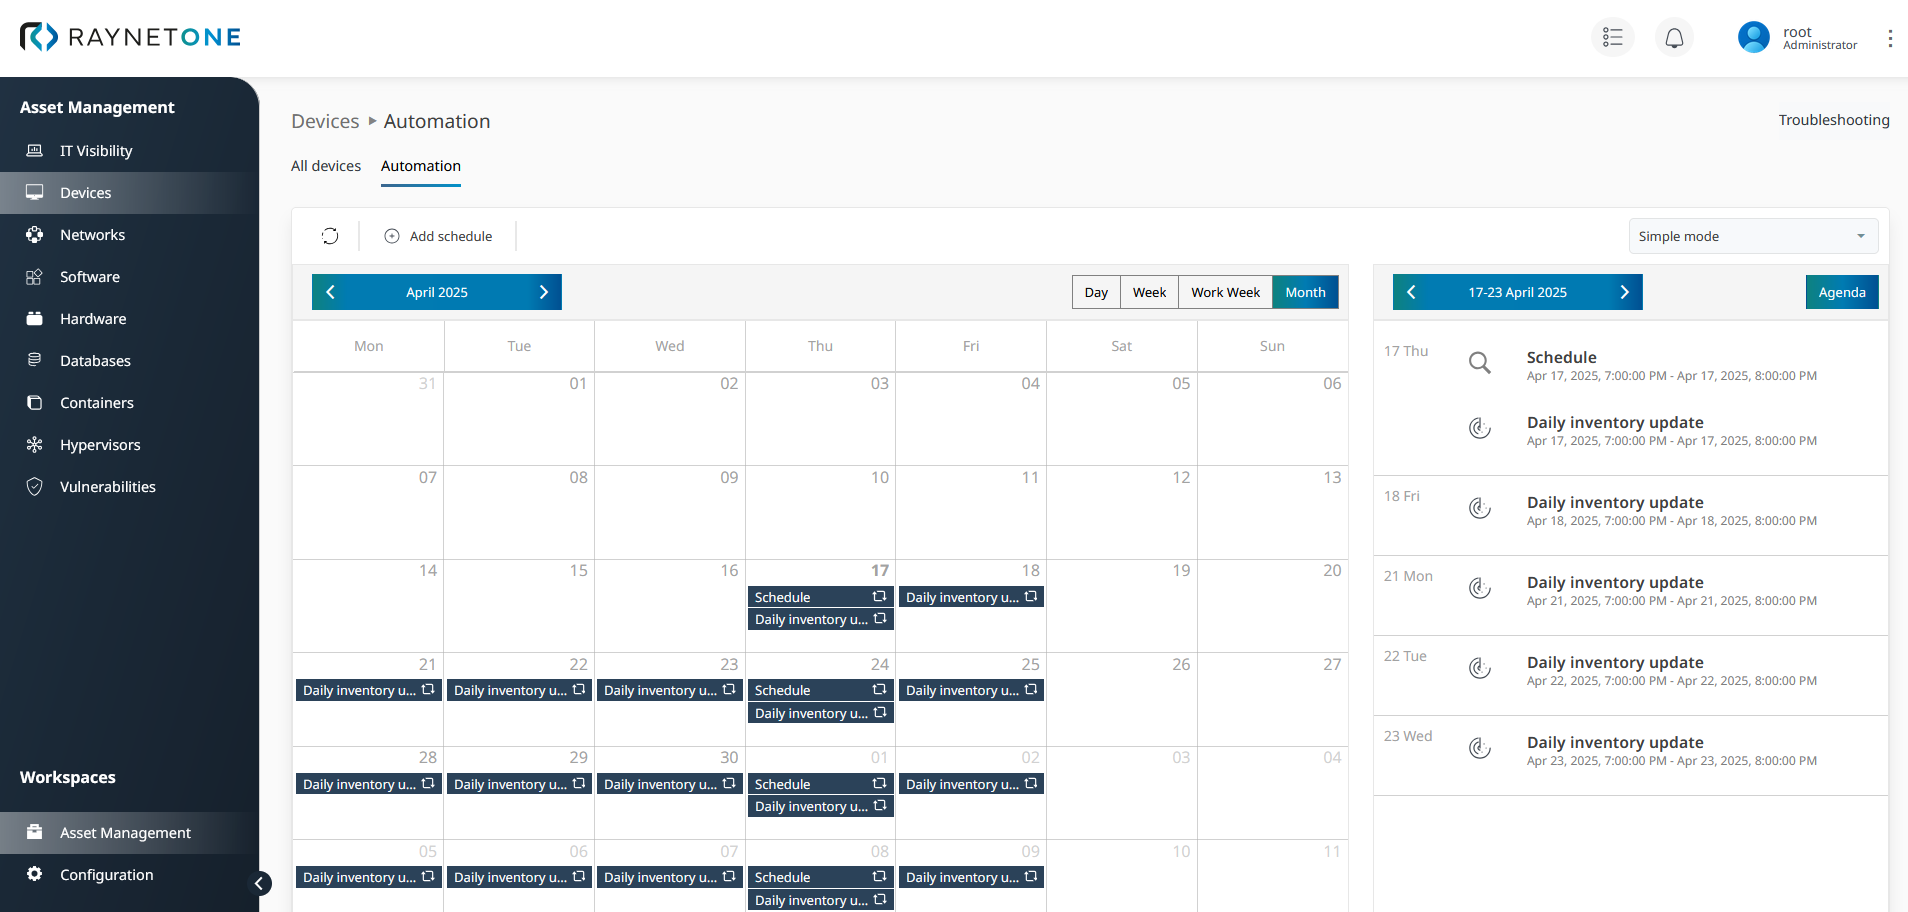
Automation page providing an overview of all job scheduled in the system. You can see the schedule which we added in the previous chapter.
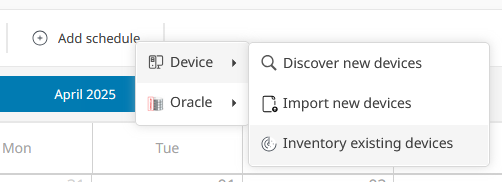
Drop-down menu spawned after left-clicking on the Add schedule button. It serves to offer short-cuts to all platform actions. The unified job wizard configuration design allows us to add a timed schedule to all possible platform actions. Behind the scenes, a specialized algorithmic scheduler software application is used to keep track of and trigger the scheduled jobs.
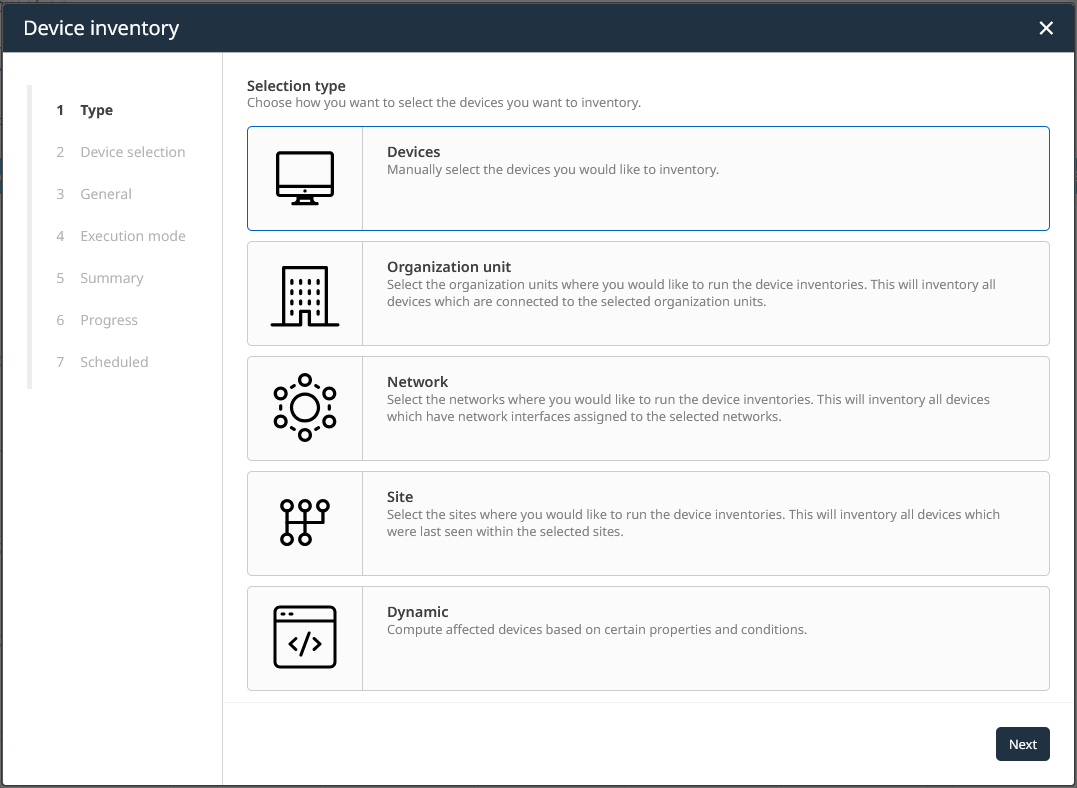
3.The Device inventory wizard is opened. It displays the Type step used to specify job targeting. Select the Devices resource selection type. Click on Next to proceed.
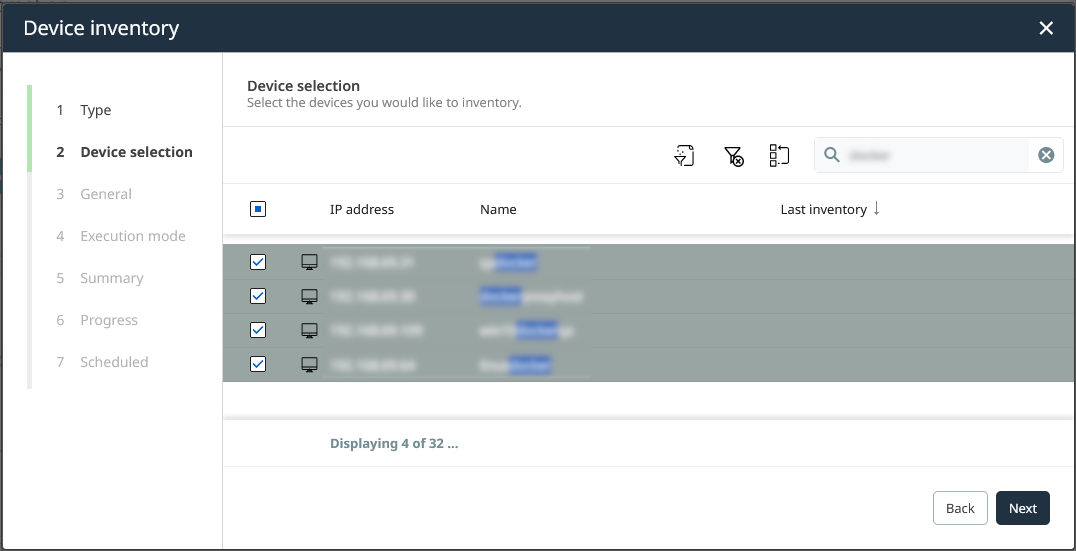
4.Select the chosen set of devices to perform inventory for and proceed by clicking on Next. To simplify finding, you have the option apply filter and search functions in the presented list view.
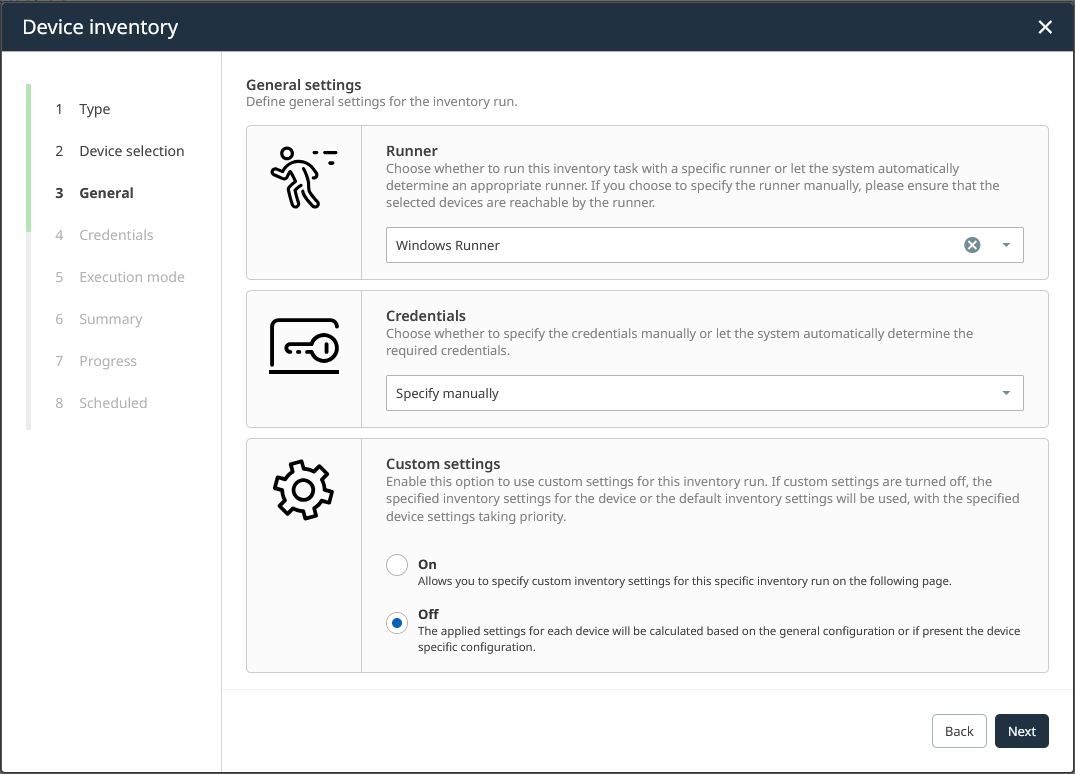
5.Under General Settings, select the capable runner and credentials strategy. In the Credentials section, choose to manually specify the credentials in the next wizard step. Leave the Custom settings turned off. Click on Next to proceed.
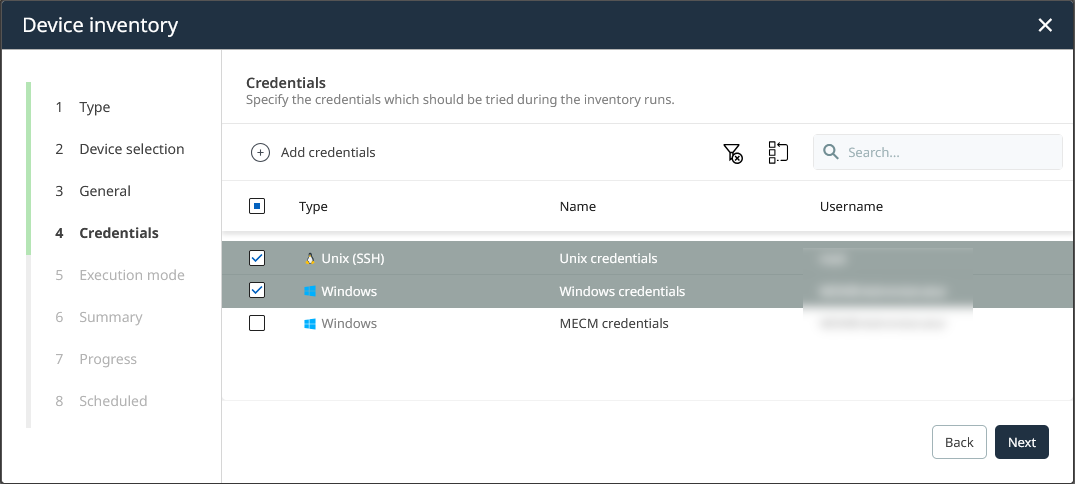
6.In the Credentials step, select the strong credentials capable to authenticate against the device and perform all inventory activities. Do not be afraid to select too many but weak credentials. After successful authentication, last-known-good credentials are remembered for future attempts. Automatic credentials selection has little to no oversight about the grade of access for individual credentials. For more information, read the dedicated chapter. Click on Next to proceed.
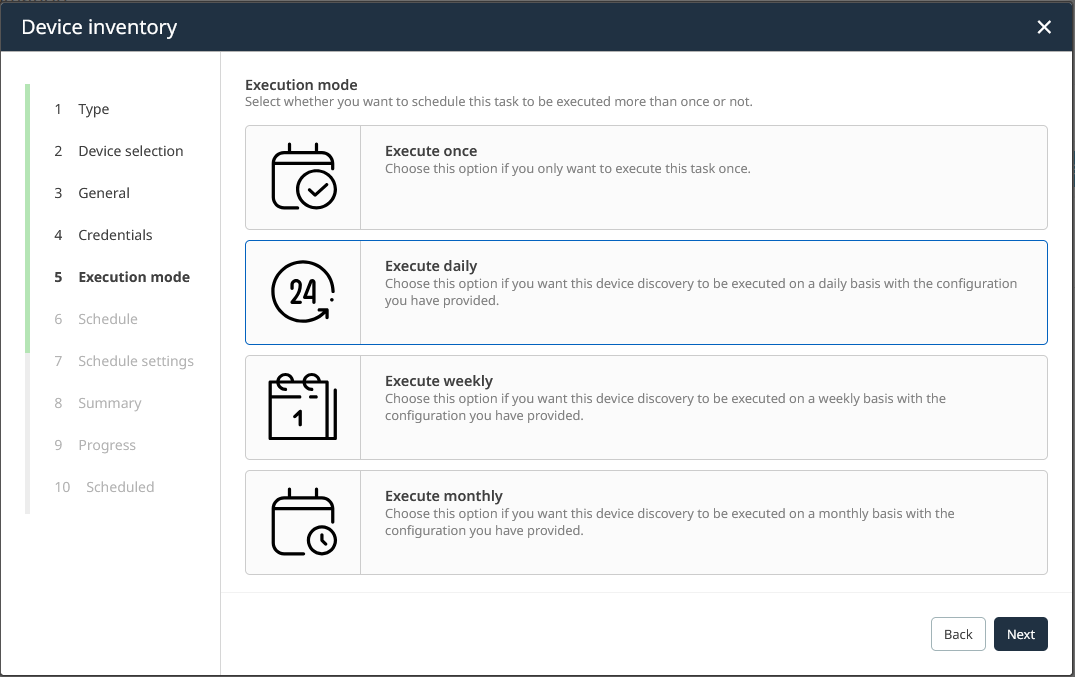
7.Under Execution mode, select the daily execution mode. Click on Next to proceed.
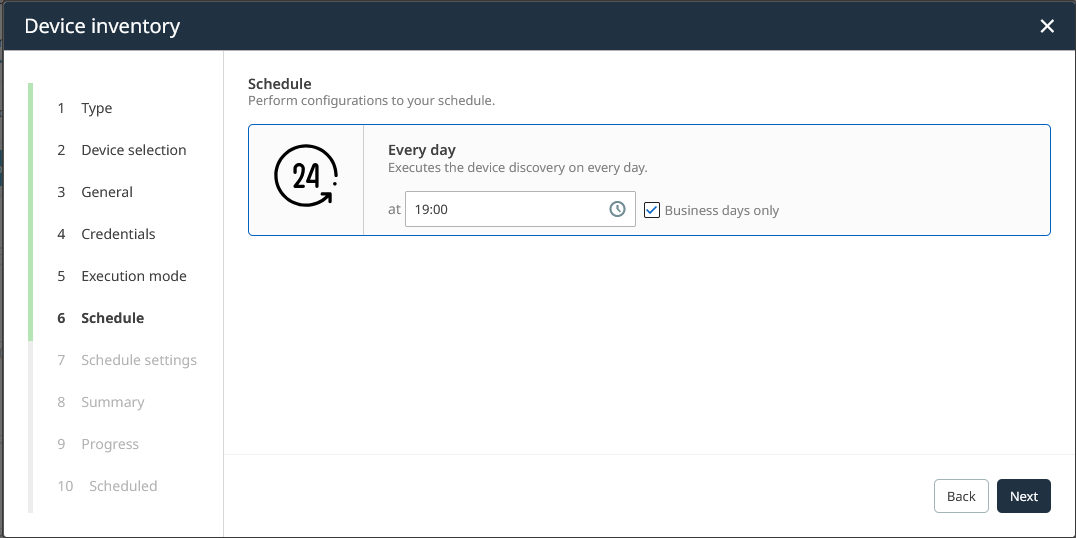
8.The wizard has changed to the Schedule step. Define the time of day at which the inventory run should start. Think of the time local to the people with which you agreed on the schedule, according to plan. After all, taking the initial scenario to heart, we want to align the job schedule to actual business plans. Click on Next to proceed.
9.Under Schedule settings, give the job a good name for proper identification, explanation and communication. If you don't choose to terminate the schedule, you can do so using management options we explain in the next chapter. Remember the time locality topic we covered. Select the Timezone to match the time of day appropriately. After configuration, click on Next to continue.

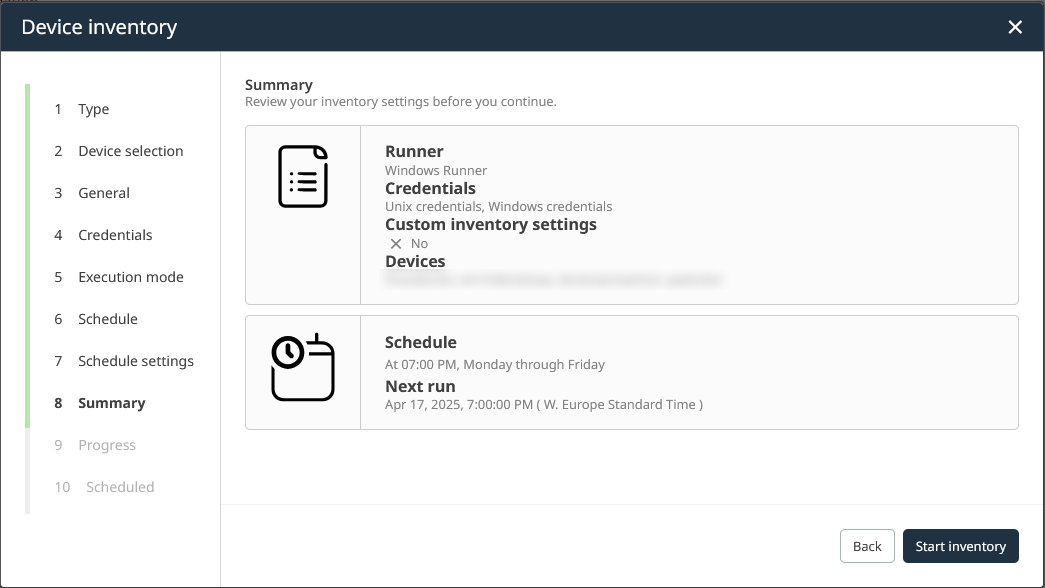
10.Check the Summary of your current discovery run. If the displayed configuration is correct, submit it using the Start inventory button. Otherwise, click on Back to revise your choices in previous steps.
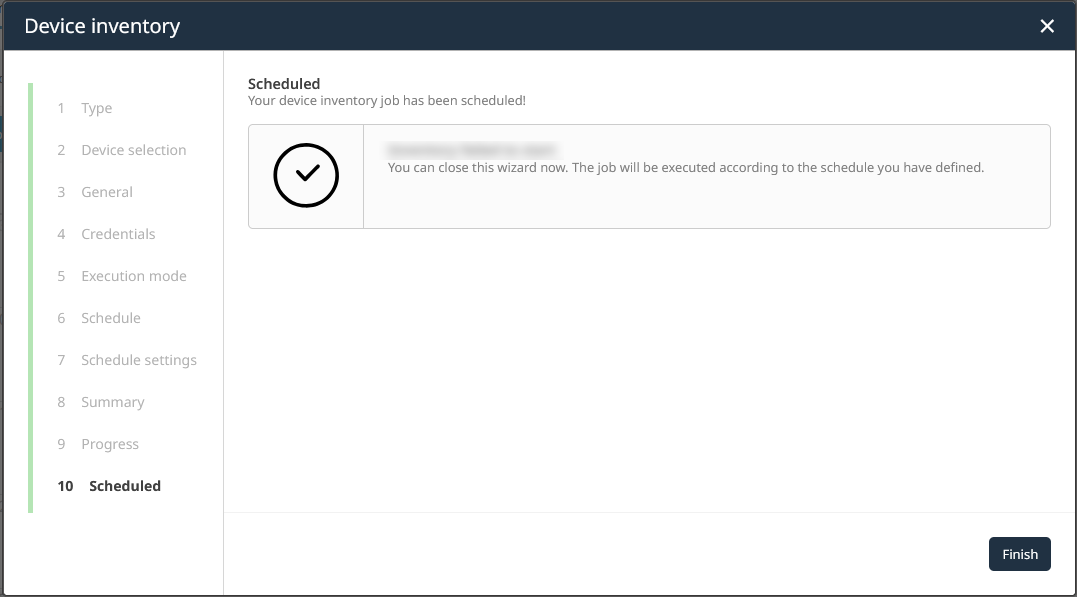
11.The progress of job submission is shown briefly. Then, the wizard changes to the Scheduled step. Click on Finish to finalize the process. You will return to the Automation page.
The created job schedule is now shown in the timetable of the Automation page. From now on, it is going to be picked up by the scheduling system. Out of a technical perspective, a well scheduled system is ready to execute its duties forever. But if we look at it from a management perspective, the growth of device sets bears risks due to increased job execution duration and network load. Do not lose control over your IT landscape growth. Put a monthly check-up onto your business timetable to evaluate your IT landscape using up-to-date resource statistics (count of devices, services, storage space usage, ...). Spend time to optimize scheduled job configuration for long term positive impact!
In the next chapter, we learn how to reconfigure an already existing platform schedule.