The basic configuration page of RayFlow server allows a user to define the basic project properties. Properties defined under this page are required by other RayFlow features including Tools, Notifications, SLA etc.
This page can be accessed by selecting the Configuration > Basic item from the RayFlow web console tree. The properties which can be defined under this page, are divided into following categories:
This chapter of the document describes the properties which can be defined as part of the basic configuration and also how these properties are utilized by other features of this application.
General Information
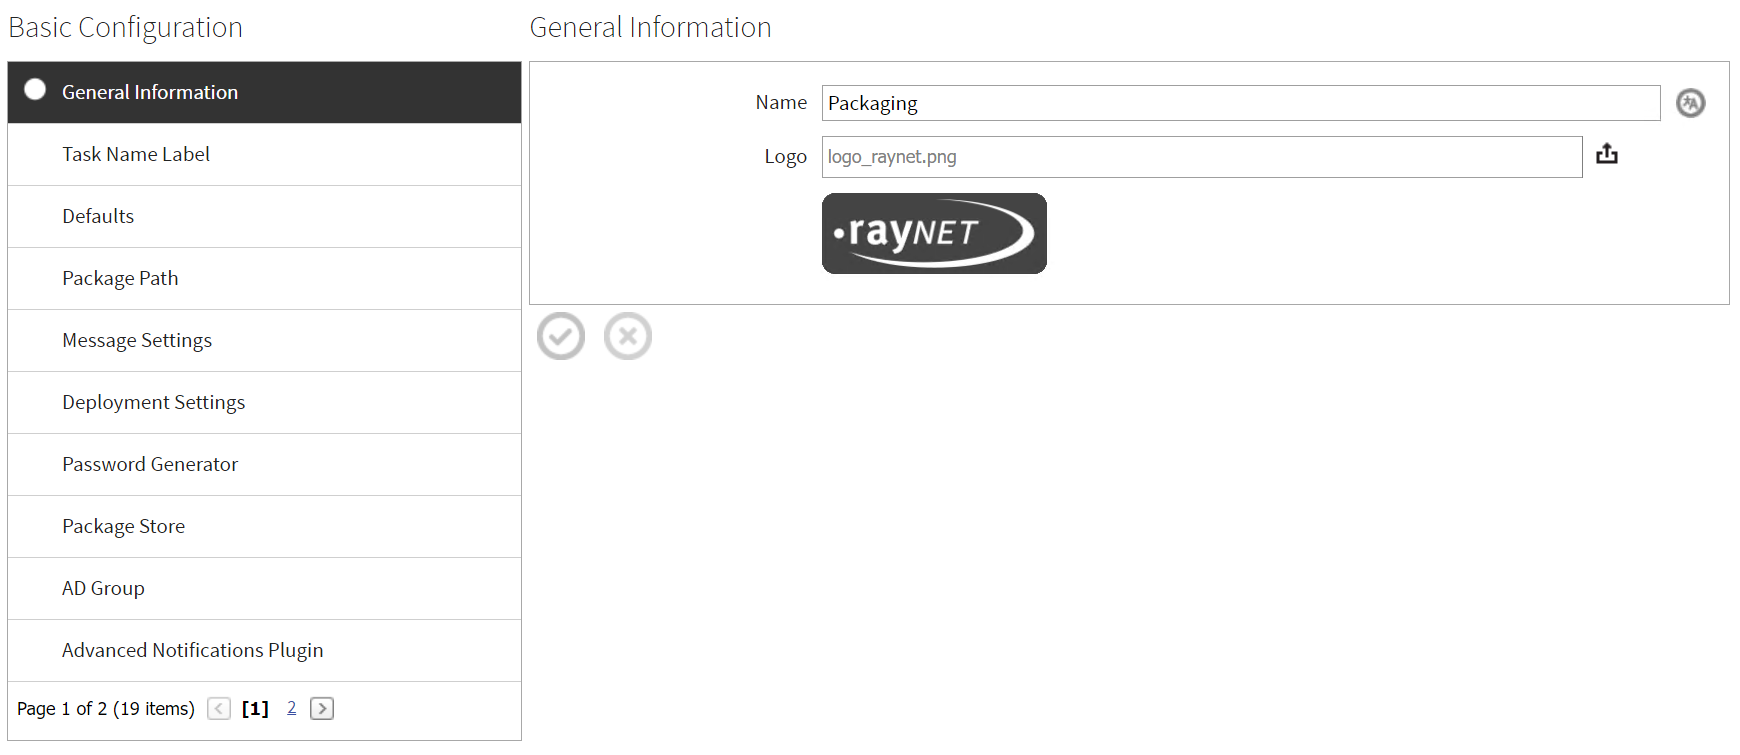
As part of the general information, a user can modify the name of a project and can apply a logo to the same.
Task Name Label
The task name label can be configured here. The task name label is, on some of the pages (for example the tracking page), used for the naming of the tasks. By default, the first datafields will be combined, but it is also possible to configure other datafield combinations.
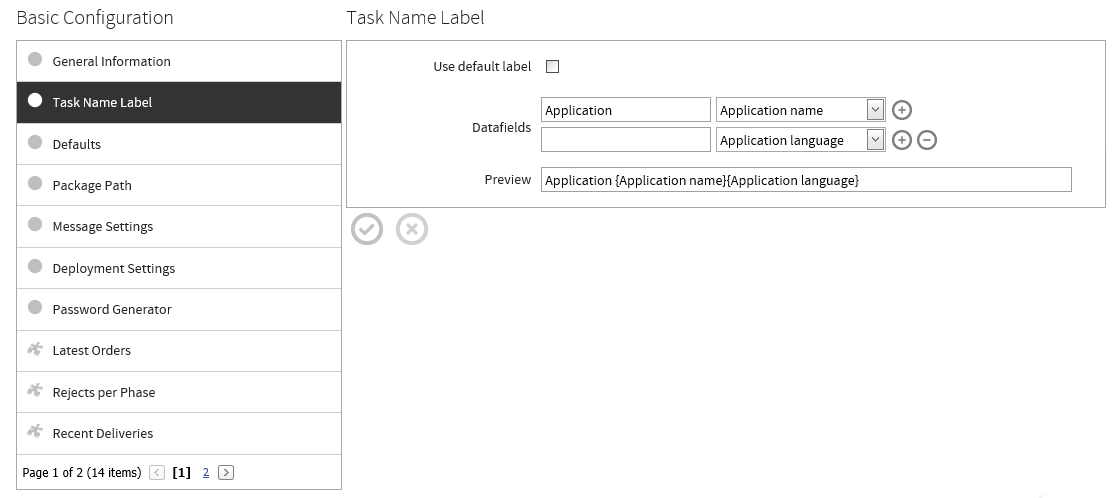
After unchecking the Use default label checkbox one or more Datafields can be selected. These will then be used as task name label. The given example will use "Application [Application name][Application language]" as task name label. For example, Application RayQC ENG if the value of Application name is "RayQC" and the value of Application language is "ENG". This is also shown in the preview.
Defaults
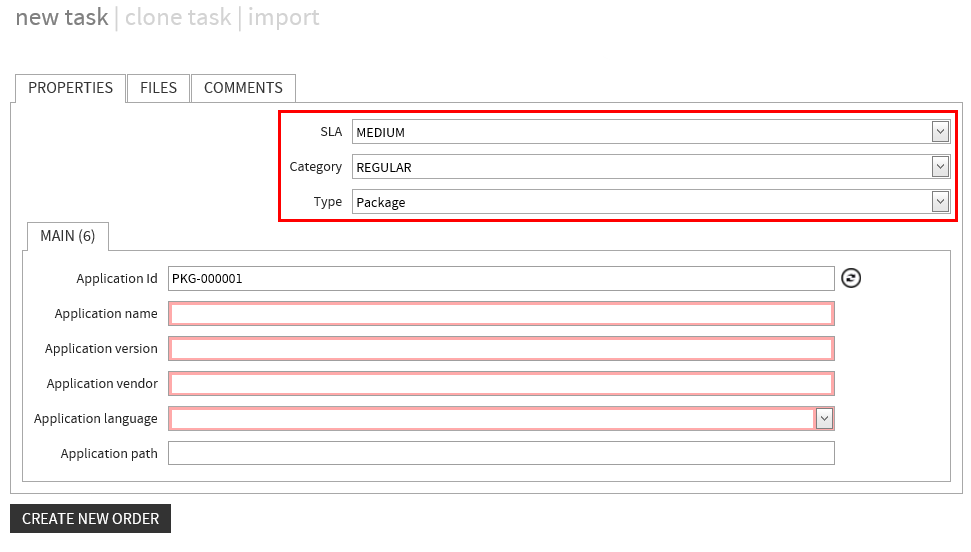
Under the Defaults property, a user can specify a default category and SLA for the tasks within a project.
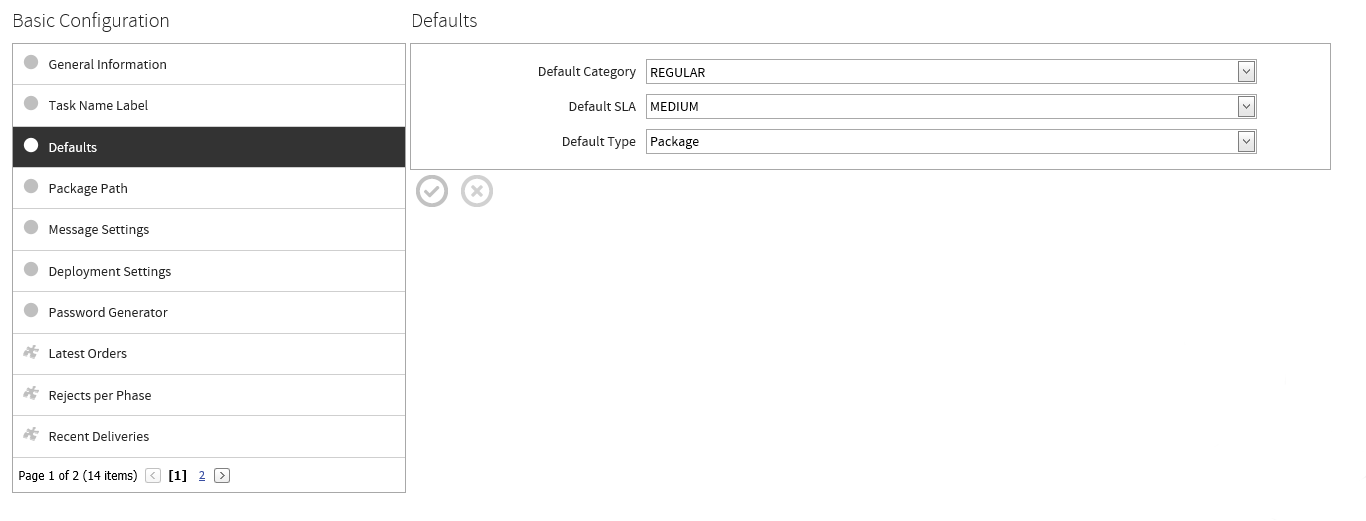
These properties are required to be selected, while creating a new package order.
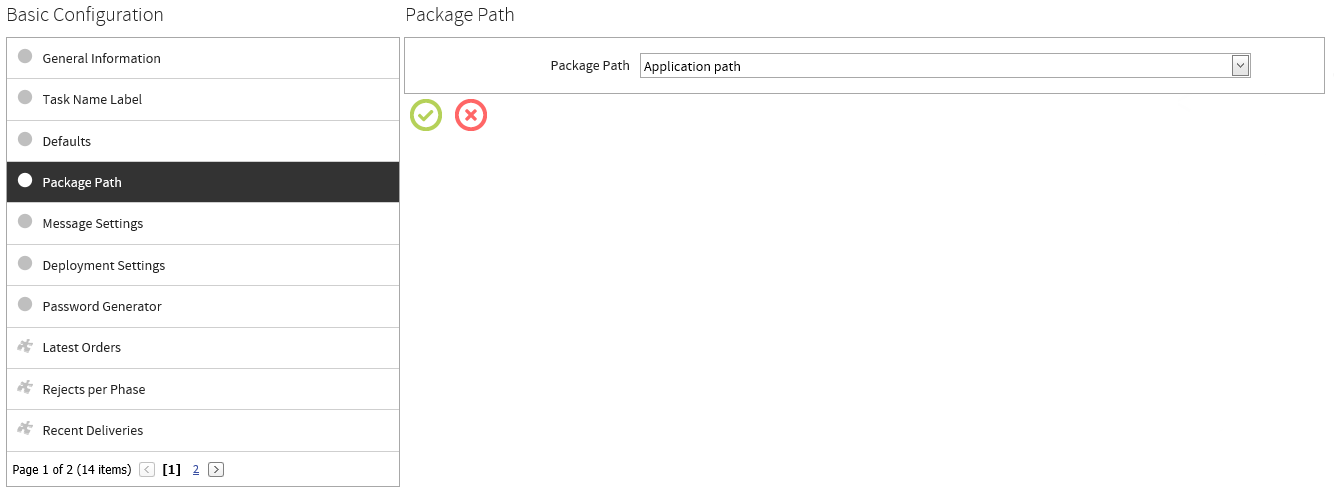
Package Path
Specifies which active text box datafield the RayFlow desktop client will use for the package source location required by the tool. A browse button is automatically added to this datafield in RayFlow desktop client, so there is no need to enable the browse property for this datafield.
Additional details on tools configuration can be found in Tools chapter of this document.
Message Settings
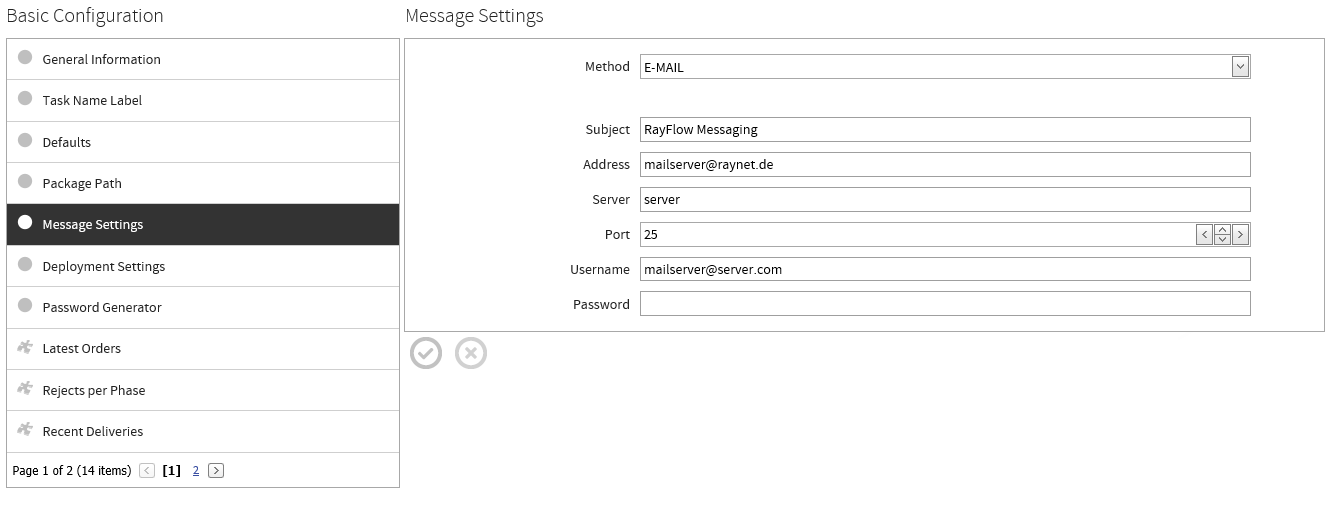
The Message Settings area of the Basic Configuration page allows a user to define settings related to the e-mail server. These properties are required by features including TaskTrack and Notification to send e-mail notifications to the configured recipients.
Deployment Settings
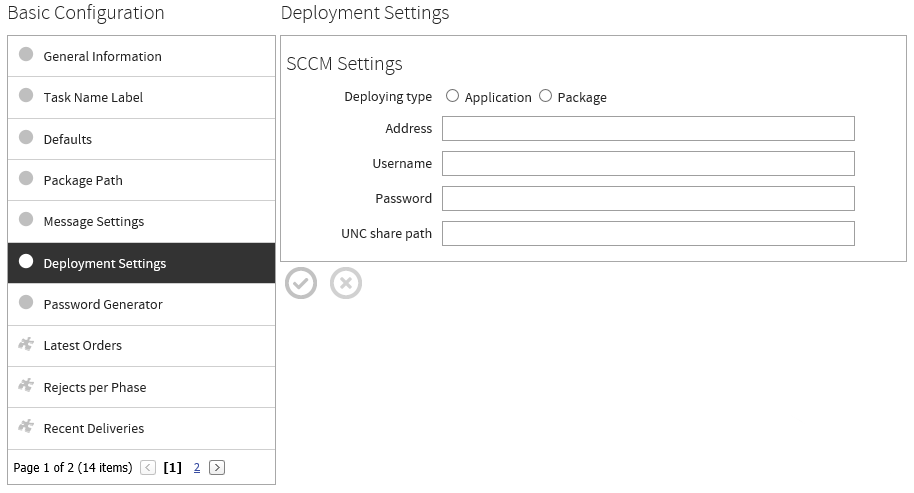
The Deployment Settings area of the Basic Configuration, allows a user to define connection properties to the deployment agent i.e. RayManageSoft, which in turn enables a user to deploy software packages directly from RayFlow to the client machine.
Based upon the connection properties specified, a connection is established between RayFlow Server and the deployment agent. The package is then imported into the Software Library of the agent, and from there based upon the distribution policy, the package is distributed to the target clients.
Further information pertaining to how a user can active deployment of task from a phase, please refer to the phase configuration chapter of this document. The To RMS and To SCCM sub-menus of the Deploy context menu item will only become active after the task moves into a phase that has the Deployment checkbox checked as part of its configuration setting.
Password Generator
Password generator allows a user to generate an encrypted password, which can become handy, if a user wishes to preconfigure the RayFlow desktop client config.xml file without actually running the client and entering the password via the settings page.
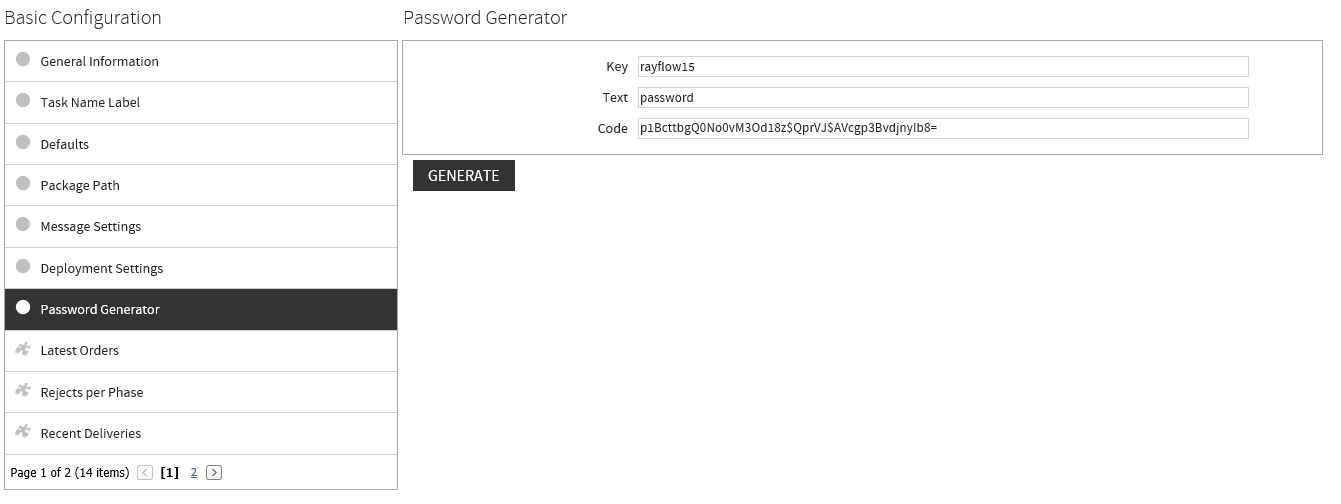
Currently, RayFlow only accepts passwords, which have been generated with the rayflow15 key.
Package Store
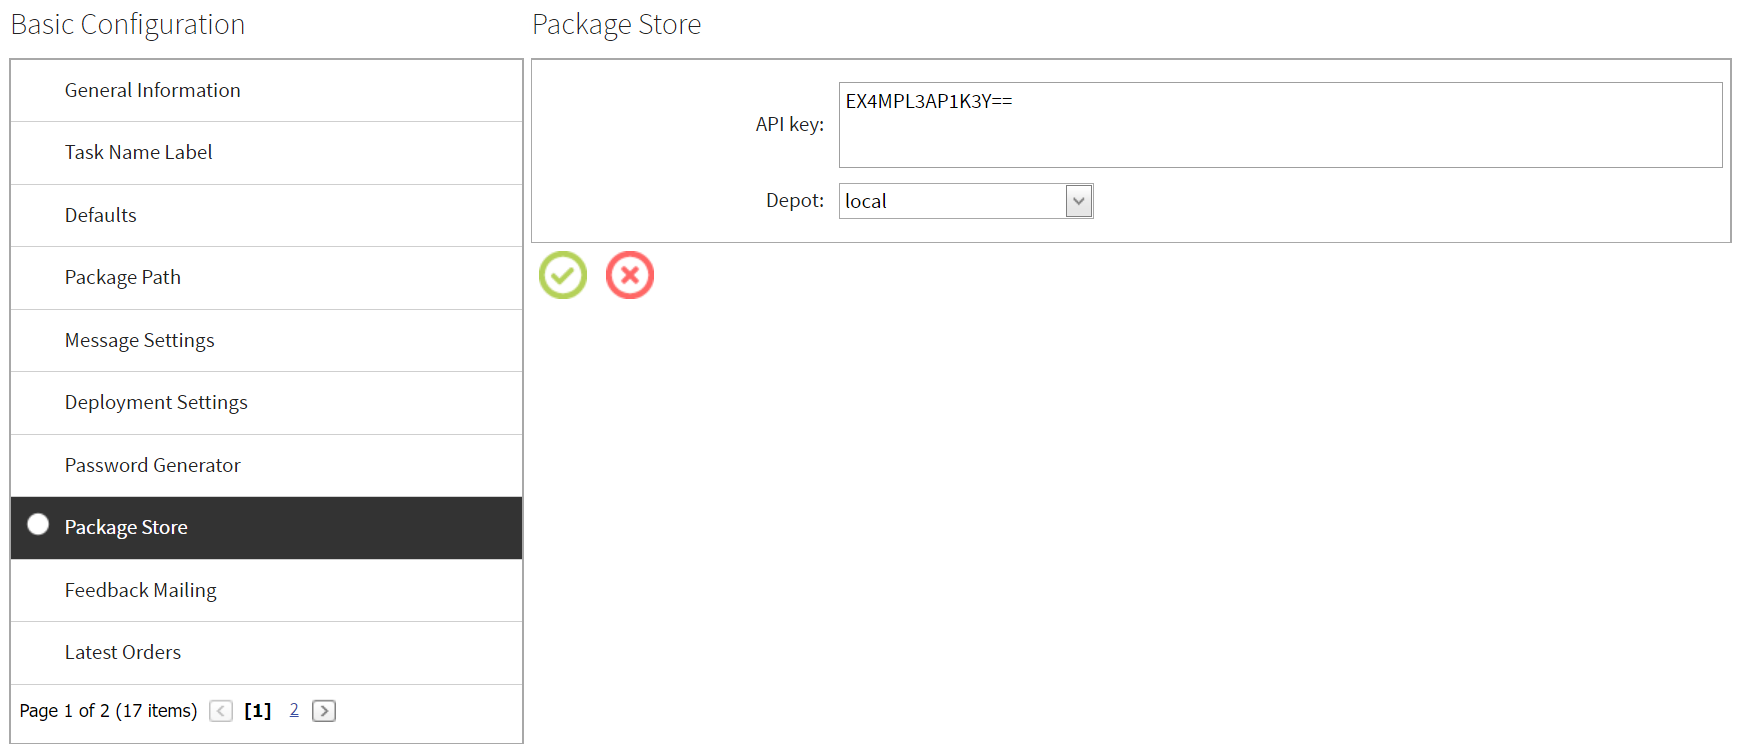
The Package Store allows a user to download packages from the Package Store into RayFlow. The API key that will be used for the connection to the Package Store can be entered here.
Properties
Properties defined as part of the basic configuration are used by different features in RayFlow e.g. Notification, SLA, Tools etc. Each of the property consists of a key and its related value.
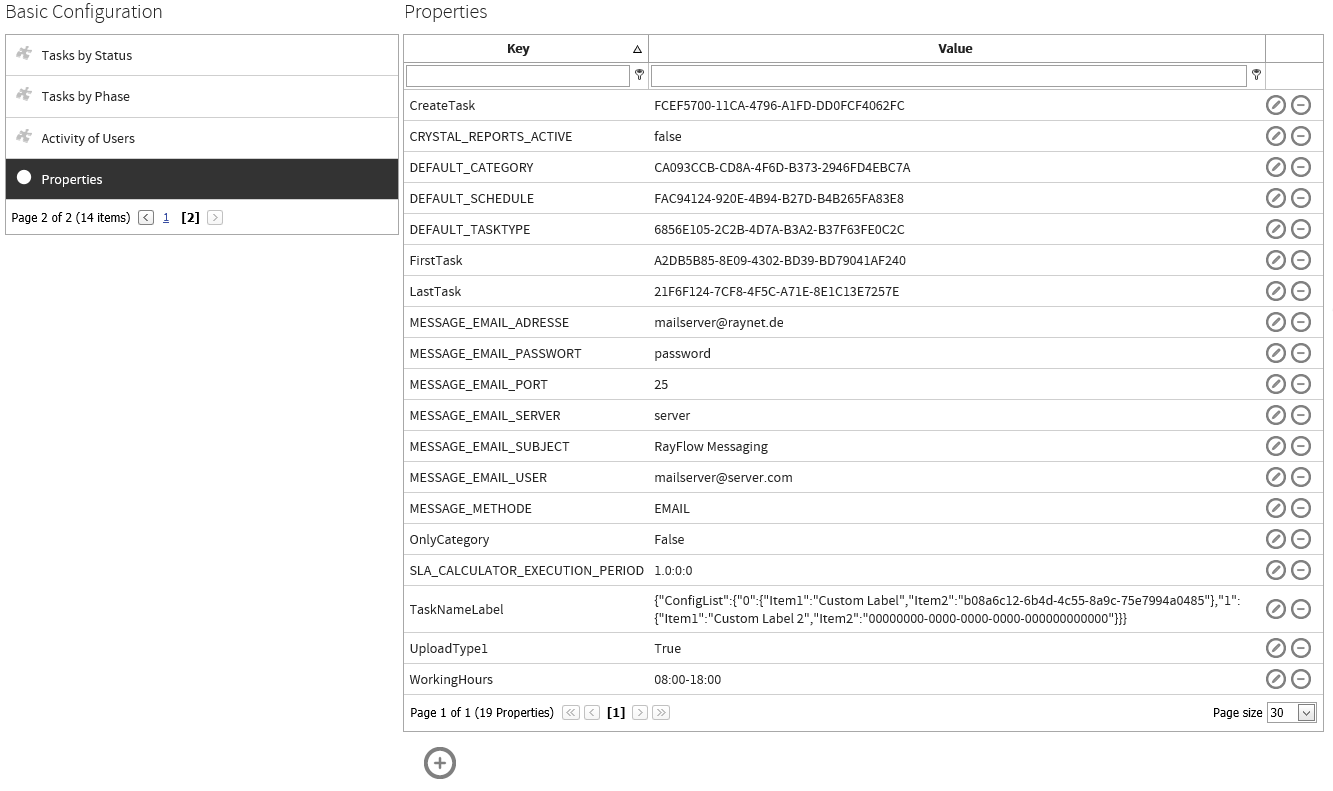
To the right of each property, there exist icon based tools to add a new property, edit and delete the selected property.
 |
 |
 |
Add property |
Edit property |
Delete property |
A new property can also be added by clicking on the Add Property icon at the bottom of properties list.

Clicking on the Add property icon will open the add property wizard.

Provide input for Key and its Value and then click on Save icon to finalize adding of the property.
The table below lists properties which can be added.
Property |
ValueCfg |
Task Information (Set automatically) |
|
CreateTask |
81de0942-95bf-4ce1-9460-2a64c5c0d0c1 |
FirstTask |
ef15defd-3f2b-4981-be72-ac39168115f3 |
Cleanup settings |
|
DATABASE_CLEANUP_EXECUTION_PERIOD |
7 |
DATABASE_CLEANUP_JOBS_PERSIST_PERIOD |
15 |
DATABASE_CLEANUP_LOGIN_PERSIST_PERIOD |
30 |
Email Settings (Required by Mail Notification Feature) |
|
MESSAGE_EMAIL_ADRESSE |
mailserver@company.com |
MESSAGE_EMAIL_PASSWORT |
password |
MESSAGE_EMAIL_PORT |
25 |
MESSAGE_EMAIL_SERVER |
12.34.567.891 |
MESSAGE_EMAIL_SUBJECT |
RayFlow Email Subject |
MESSAGE_EMAIL_USER |
mailserver@company.com |
MESSAGE_METHODE |
|
Type of installation (‘Project’ OR ‘Factory’) Factory operate in one view with all projects |
|
RayflowType |
Project |
Upload Type - (UploadType1 – direct, UploadType2 – Agent&WebUI, UploadType3 - Agent |
|
UploadType1 |
True |
UploadType2 |
True |
UploadType3 |
True |
Working hour for SLA calculation |
|
WorkingHours |
08:00-18:00 |
SLA_CALCULATOR_EXECUTION_PERIOD The time period of the complete project sla calculator job is set initially to 1 day. It can be modified by editing the property SLA_CALCULATOR_EXECUTION_PERIOD of a project (formatting using the following pattern: [d.]hh:mm:ss[.fffffff] which stands for d-days, hh-hours, mm-minutes, ss-seconds, fffffff- one ten-millionth of a second). The change is visible after the next execution of the job calculator. |
|
SLA_CALCULATOR_EXECUTION_PERIOD |
1.0:0:0 |
TestMode: When this property is set to true for a project, then all the packages within a project can be deleted via the Administration page of Default project by a root user |
|
TestMode |
False |
OnlyCategory: When set to true, then users will only see Category field in the PO or Create phase and not SLA field. For this to work, SLA and Categories defined should be identical |
|
OnlyCategory |
False |
PACKAGE_PATH_ID: Used by the RayFlow desktop client to identify the datafield containing the path to application. Automatically set after user selects the datafield under Package Path tab |
|
PACKAGE_PATH_ID |
44584dff-d178-45ca-92aa-c237841fb8d7 |
CRYSTAL_REPORTS_ACTIVE: Activate and deactivate crystal reports in RayFlow |
|
CRYSTAL_REPORTS_ACTIVE |
True |
EmailTemplate_PlaceholderName: Used to define Custom Place Holder for Notification Email Template |
|
EmailTemplate_PlaceholderName |
CustomPlaceholder |
Custom Login Properties: These properties are used to customize the login page |
|
AdditionalLogoImage |
customaddlogo.png |
AdditionalLoginText |
Custom Text for Login Screen. |
LoginBackColor |
#DFDFDF white |
LoginBackImage |
customimage01.png |
LogoImage |
customlogo.png |
FontColor |
#DFDFDF white |
LoginPortrait |
CustomPortrait.png |
Custom Project Properties: These properties are used to customize the layout of a project |
|
WelcomeMessageHeaderBackgroundColor |
white #ffffff #f00 rgb(128, 80, 200) rgb(100%, 100%, 100%) hsla(240, 25%, 50%, .5) |
WelcomeMessageSubtitleBackgroundColor |
white #ffffff #f00 rgb(128, 80, 200) rgb(100%, 100%, 100%) hsla(240, 25%, 50%, .5) |
WelcomeMessageHeaderTextColor |
white #ffffff #f00 rgb(128, 80, 200) rgb(100%, 100%, 100%) hsla(240, 25%, 50%, .5) |
WelcomeMessageSubtitleTextColor |
white #ffffff #f00 rgb(128, 80, 200) rgb(100%, 100%, 100%) hsla(240, 25%, 50%, .5) |
BodyBackgroundImage |
custombackground.png custombackground.jpg custombackground.gif custombackground.svg custombackground.webp |
MainHeaderBackgroundColor |
white #ffffff #f00 rgb(128, 80, 200) rgb(100%, 100%, 100%) hsla(240, 25%, 50%, .5) |
SubHeaderBackgroundColor |
white #ffffff #f00 rgb(128, 80, 200) rgb(100%, 100%, 100%) hsla(240, 25%, 50%, .5) |
HeaderTextColor |
white #ffffff #f00 rgb(128, 80, 200) rgb(100%, 100%, 100%) hsla(240, 25%, 50%, .5) |
Customization of the Login Screen
The following properties can be used to customize the login page. None of these settings is mandatory. These properties can only be set using the root user. These properties can also be found in the table above.
•AdditionalLogoImage
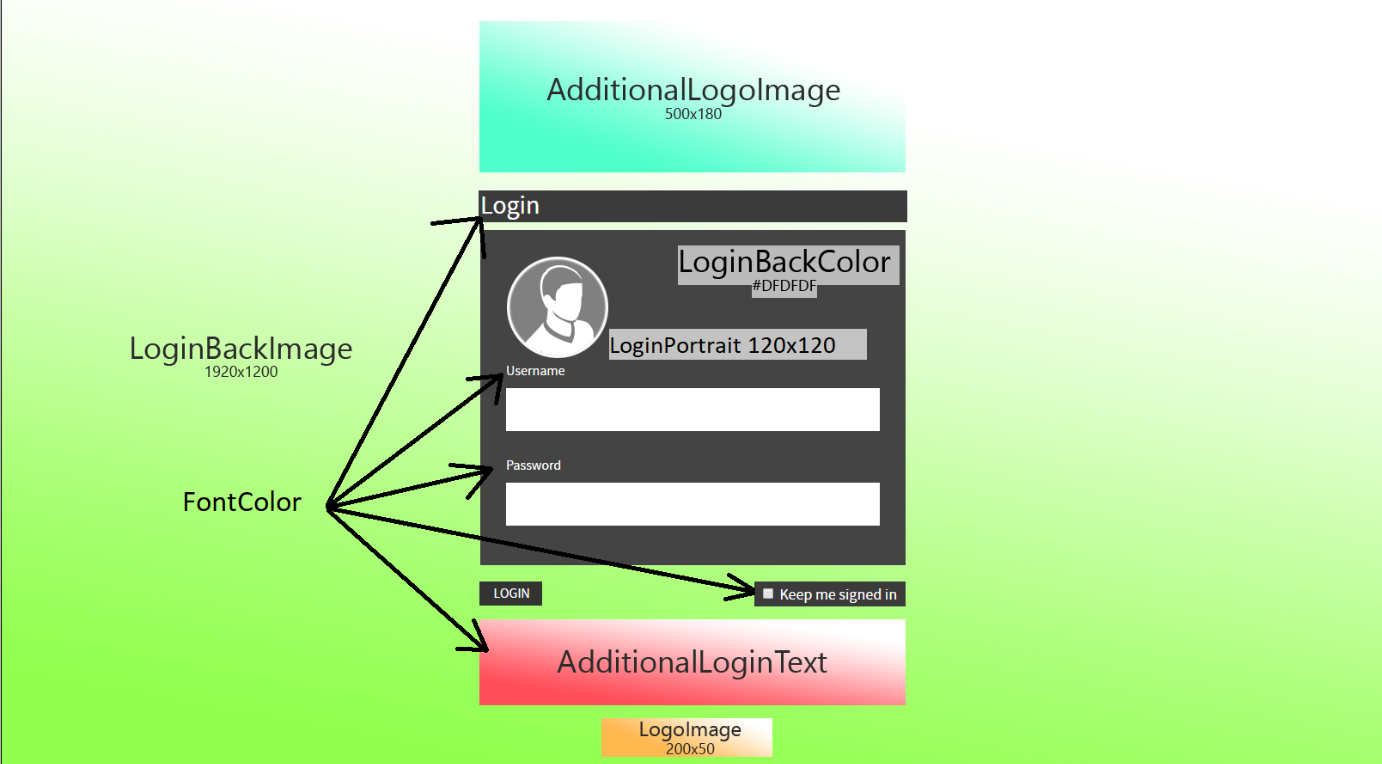
This represents the logo that will be displayed on top of the login form. The file needs to be located in the Content/CustomLogin directory. If this property is not set, no image will be displayed.
Size: The image needs to be exactly 500 Px x 180 Px.
Format: All graphic formats that are supported by the browser can be used, but Raynet recommends to use the .png format.
|
Be aware: If the folder Content/CustomLogin does not yet exist, it needs to be added manually! |
•AdditonalLoginText
This is a custom text that can be displayed beneath the login form. If this property is not set, no image will be displayed.
•LoginBackColor
This property represents the background color of the login form. All color descriptors which are accepted for CSS can be used. For example, both black or #000000 are valid values.
•LoginBackImage
This property stands for the background image of the whole login page. The file needs to be located in the Content/CustomLogin directory. If this property is not set, the default RayFlow login background will be displayed.
Size: The image needs to be at least 1920 Px x 1200 Px.
Format: All graphic formats that are supported by the browser can be used, but Raynet recommends to use the .png format.
|
Be aware: If the folder Content/CustomLogin does not yet exist, it needs to be added manually! |
•LogoImage
This is the image that is displayed on the bottom of the login page. The file needs to be located in the Content/CustomLogin directory. If this property is not set, the default RayFlow logo will be displayed. This property can also be set to the value none to display no logo at all.
Size: The image needs to be exactly 200 Px x 50 Px.
Format: All graphic formats that are supported by the browser can be used, but Raynet recommends to use the .png format.
•FontColor
This property defines the color of all default text and the additional login text. All color descriptors which are accepted for CSS can be used. For example, both black or #000000 are valid values.
•LoginPortrait
This image is displayed between the login header and the entry field of the username. The file needs to be located in the Content/CustomLogin directory. If this property is not set, the default RayFlow portrait will be displayed.
Size: The image needs to be exactly 120 Px x 120 Px.
Format: All graphic formats that are supported by the browser can be used, but Raynet recommends to use the .png format.
|
Be aware: If the folder Content/CustomLogin does not yet exist, it needs to be added manually! |
The image below shows the exact customization options for the login page.
Customization of Projects and the Welcome Screen
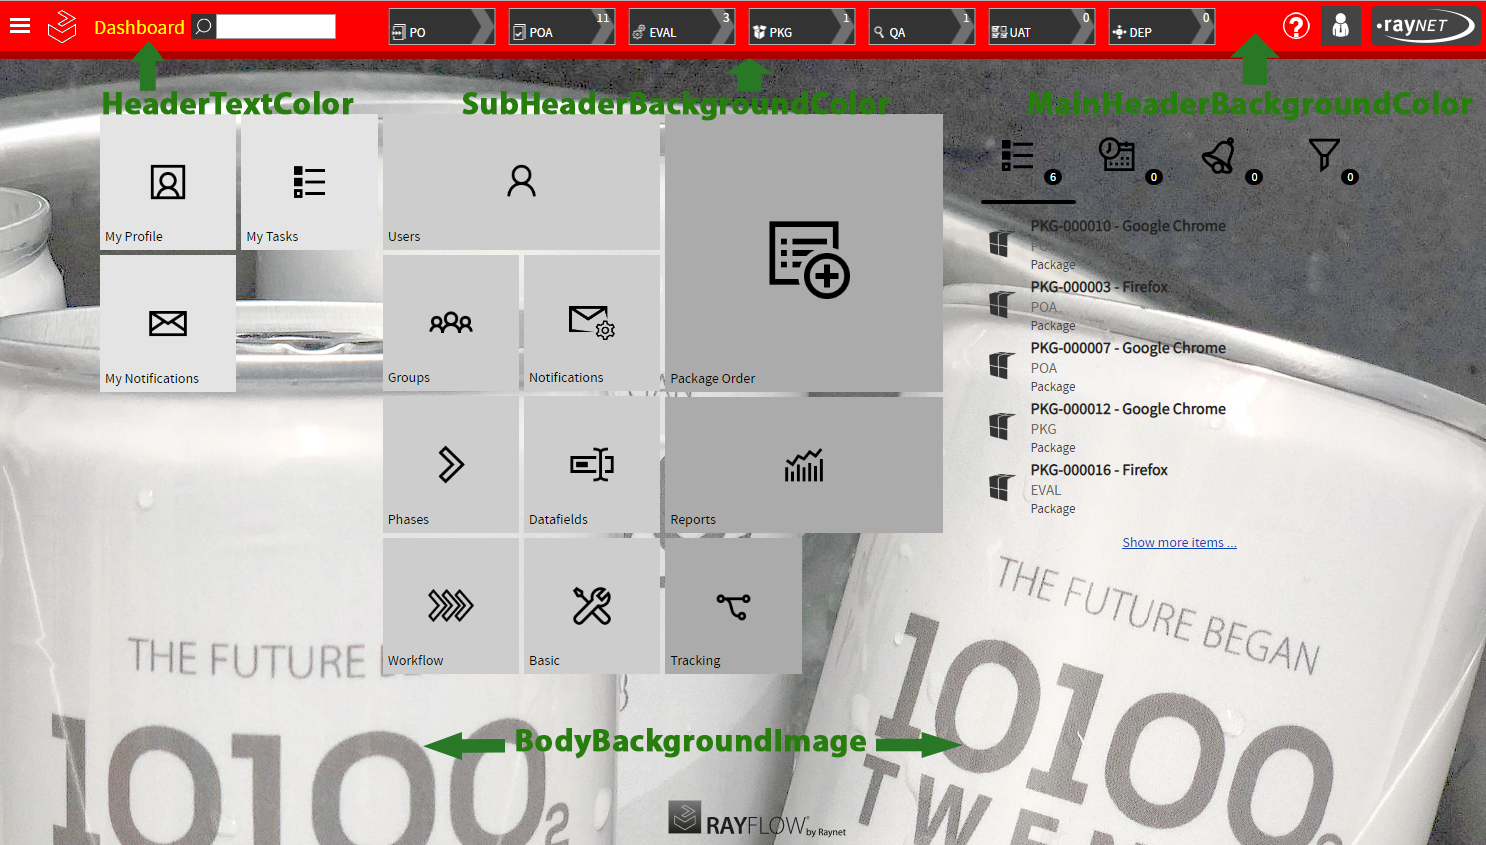
The following properties can be used to customize a project and the Welcome screen. None of these settings is mandatory. These properties can also be found in the table above.
•WelcomeMessageHeaderBackgroundColor
The background color of the header in the Welcome Message screen can be changed by this. All color descriptors which are accepted for CSS can be used. For valid examples look in the table above.
•WelcomeMessageSubtitleBackgroundColor
The background color of the subtitle in the Welcome Message screen can be changed by this. All color descriptors which are accepted for CSS can be used. For valid examples look in the table above.
•WelcomeMessageHeaderTextColor
The color of the text in the header of the Welcome Message screen can be changed by this. All color descriptors which are accepted for CSS can be used. For valid examples look in the table above.
•WelcomeMessageSubtitleTextColor
The color of the text in the subtitle of the Welcome Message screen can be changed by this. All color descriptors which are accepted for CSS can be used. For valid examples look in the table above.
|
Note: These properties (WelcomeMessageHeaderBackgroundColor, WelcomeMessageSubtilteBackgroundColor, WelcomeMessageHeaderTextColor, and WelcomeMessageSubtitleTextColor) are meant to be set by the root user in the default project only!. |
•MainHeaderBackgroundColor
The background color of the header of a project can be changed by this. All color descriptors which are accepted for CSS can be used. For valid examples look in the table above.
•SubHeaderBackgroundColor
The background color of the subheader of a project can be changed by this. All color descriptors which are accepted for CSS can be used. For valid examples look in the table above.
•HeaderTextColor
The color of the text in the header of a project can be changed by this. All color descriptors which are accepted for CSS can be used. For valid examples look in the table above.
•BodyBackgroundImage
This is the background image that will be used throughout an entire project.
Format: The following formats are allowed: PNG, SVG, JPG, GIF, and WEBP.
|
Note: These properties (MainHeaderBackgroundColor, SubHeaderBackgroundColor, HeaderTextColor, and BodyBackgroundImage) can be set either by the root user in the default project or by the Admin for each single project. If it is changed by the root user in the default project it is also changed for the Project Selection view. If it is changed by the Admin user, the color is only changed within a single project. |
