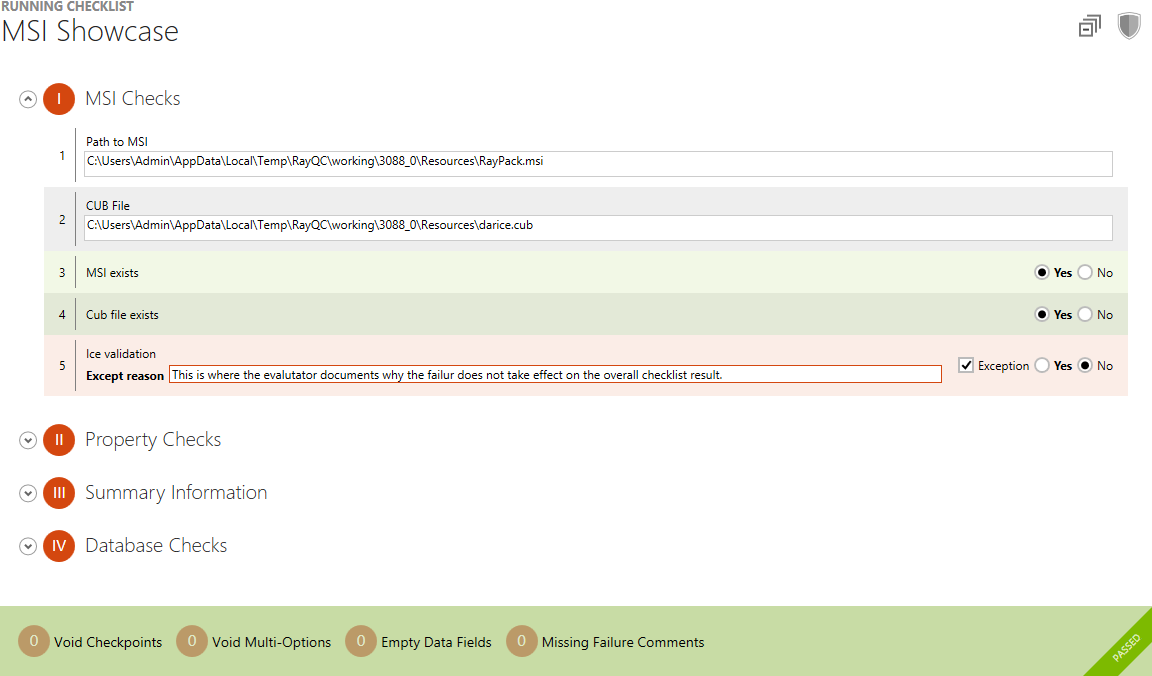
When each of the items present within a checklist is considered to be a rule to check, Exceptions are the circumstances under which breaking the rule does not really matter. Exceptions can only be added to Checkpoint elements, since they are the most strict checklist elements, and therefore most likely to step into an exceptional result state.
When a checklist editor enables the Exception option for a checkpoint, he allows the evaluator to document the actual test result as is, but define it to be uncritical towards the checklist result calculation. For example, when the expected result for a checkpoint is Yes, but the evaluator selects No, the whole checklist will be marked as failed. Even though a failure reason will be given by the evaluator, this functionality would not suffice for those cases, in which the failure reason is not related to the original test object, and therefore should not affect the overall test result.
|
Note: It is not possible to activate the exception option and when the Evaluate this element option for an item is not enabled. |
To Activate This Option
1.Within the Checklist Editor, scroll to the Checkpoint element that has to be equipped with an exceptional result state.
2.Open the Properties tab within the Details pane at the right-hand side.
3.Activate the Allow exceptions checkbox.
4.Save the changes made to the checklist and switch to the Checklist Viewer mode.
5.Set all checklist item results to evaluate to true to set the checklist result to PASSED.
6.Set the result state of the manipulated Checkpoint element to the result that resembles a failure.
7.The checklist item is marked as failed and the exception checkbox becomes available for activation. A failure reason is expected to be entered. The current checklist result is NOT FINISHED (since the failure reason is missing).
8.Activate the Exception checkbox. A text input field becomes visible, expecting an Exception reason from the evaluator. The failure reason is no longer required.
9.Enter an Exception reason. The checklist result switches to PASSED.

The screenshot shows a checklist in the state that has been outlined in the exception activation procedure above. Even though element no 5 of the first group is marked with a failed check result, the exception allows a positive overall checklist result as soon as the reason is entered.