The Testing areas are shown.
Within the Testing areas, five options are available to users: other packages (collision test), environment (conformity test), virtualization, appx and rayqc checklist. A user can either execute a test on a package for all the areas or in a mixed mode. Initially, all the testing areas are selected; a user can simply deselect any area by clicking on it.
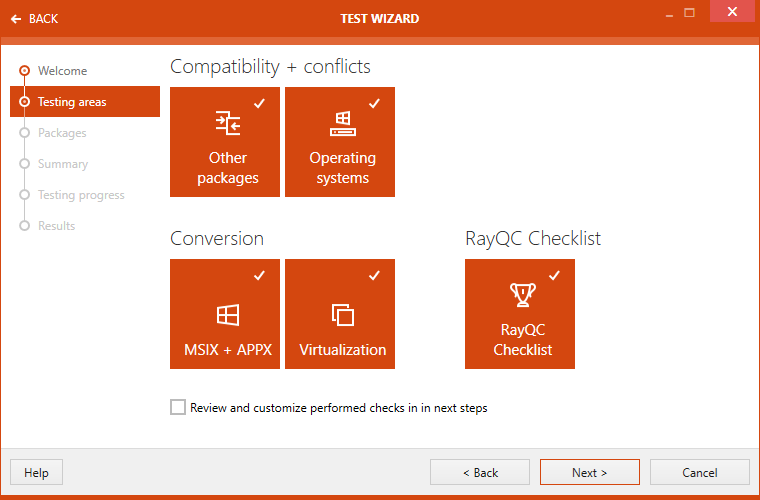
Show detailed rule selector in next step:
Activating the advanced mode provides users an ability to choose testing rules from the supported areas of testing. When this option is not activated, then a package is tested against all the rules from the areas of testing.
To execute collision tests on a package, it is required to select the target packages..
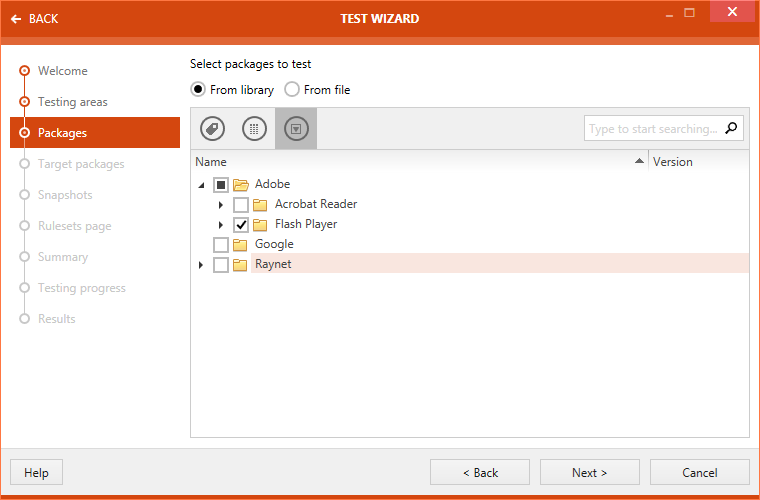
Select package to test. Two radio button options are available to users: From library and From File.
From library:
When this option is selected, then the packages in the Library are shown. Navigate and select the desired package(s) for testing.
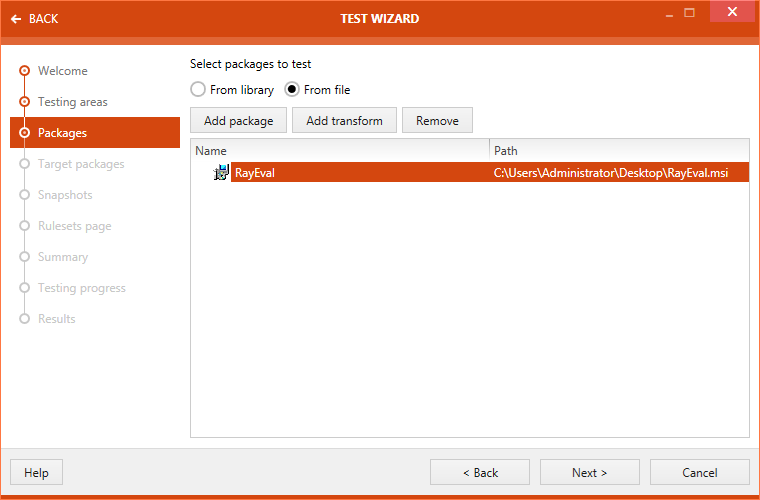
From file:
When this option is selected, three additional buttons are shown: Add package, Add transform, and Remove. The last two buttons are initially deactivated and are automatically activated when a package is added.
Local files can be imported to the library as well. To do this a user has to check the Import local packages option in the Summary step.
Once the package(s) has been added, click upon the Next > button.
When other packages is chosen as the testing area, Target packages section is available to users after clicking on the Next > button in Testing areas section.
Target package can either be selected from database or directly from the disk.
• From library: Select that target package(s) and / or merge module(s)
• From file: Add package and / or transform from disk.
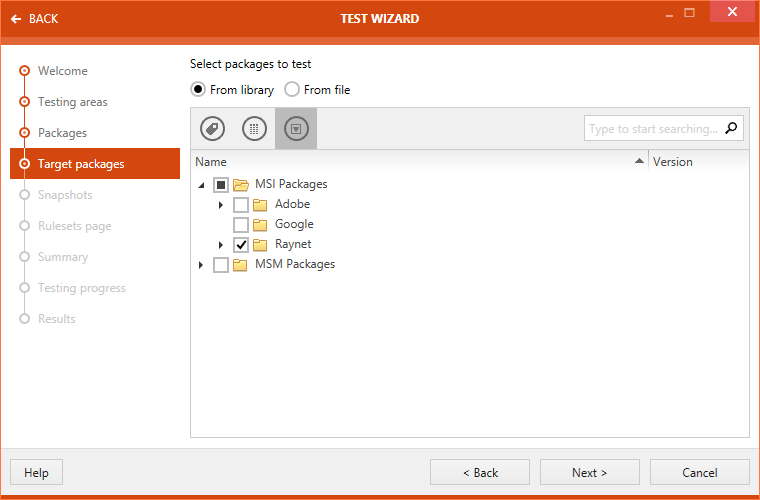
Click on the Next > button.
When environment test is selected as one of the testing areas, a user has options to either test the package against an OS snapshot (stored in the software library) or execute basic rule based testing.
Testing against an OS snapshot: To use this option for testing, select the option Test selected packages against a specific snapshot from the library. When this option is selected, the drop-down list is activated and user can select the target OS snapshot.

Additionally a user can select to perform extended quality assurance with this option. Activating this action will lead to additionally scanning of the package for potential issues that may affect the deployment to a selected operating system.
Testing for a given system: RayQC Advanced contains built-in rules to execute conformity test for a package against particular OS. To use this, select: Test basic quality assurance for a given system. After selecting this option, select the target OS from the drop down list.

Click on the Next > button.
When APPX, Nano Server, or a virtualization solution is selected as one of the testing areas the Rulesets page will be opened. The different rulesets for virtualization and for other fields can be selected.
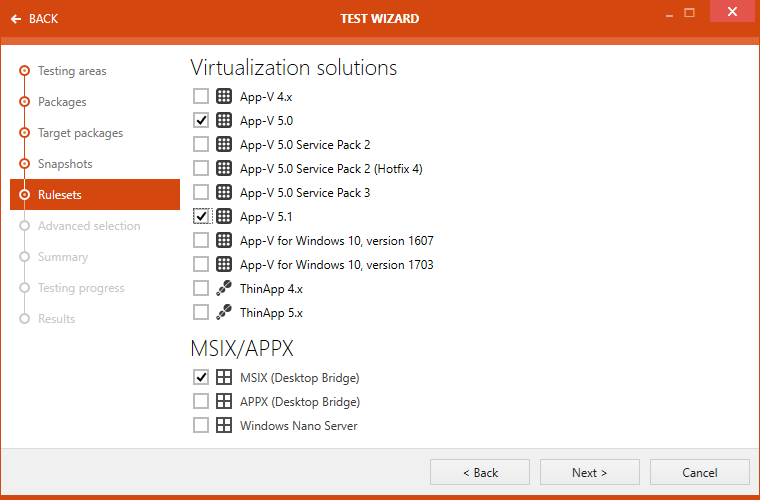
After all target rulesets have been selected click on the Next > button.
If advanced mode was selected, then advanced selection section is shown in the next step. Under advanced selection section, a user can select/deselect rules for executing different test types. Test types shown here are directly related to the testing areas chosen.
When a rule is selected, description of that rule is shown under the Rule descriptions.
On top of this section, three buttons are shown: Check all, Uncheck all, and Toggle.
•Check all: Selects all the rule, covered under different test areas.
•Uncheck all: Deselects all the selected rules, covered under different test areas.
•Toggle: Toggle the selection of rules.
Click on the Next > button. Summary section is now available. Test criteria are summarized under this section. This summary includes information on source and target package, and a list of test rules, against which the test will be carried out.
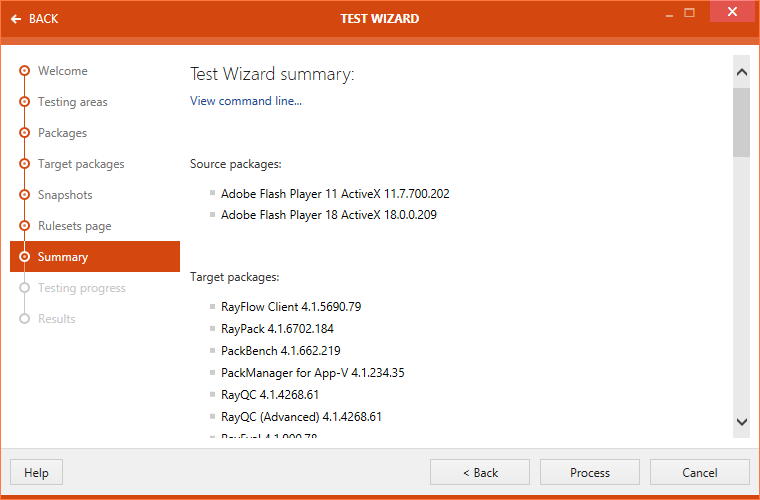
If a user checks the Import local packages option, all local files will be imported into the library.
Click on the Process button to start executing test.
Progress of the test is shown.
After the test are finished the Issues and fixes view will be displayed. The issues found in the test are listed here. Select the issues that are going to be displayed in the report by checking the checkbox next to the issue on the left.
If environment has been chosen as one of the testing areas, to some of the issues found, fixes can be directly applied.
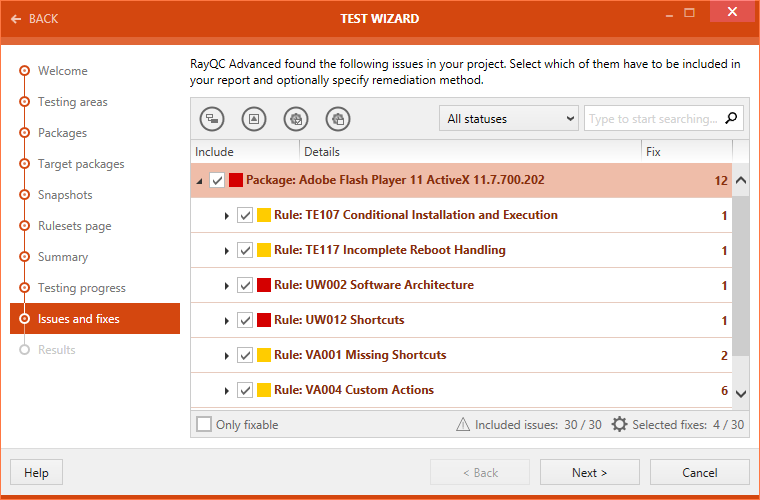
There are two different types of fixes available.
•Light fix: Make only minor changes to the package.
•Power fix: Which make huge changes to the package.
A fix can be chosen by using the dropdown menu next to the issue on the right. By executing fixes an .mst, and in some cases also a .cab, for the package will be created.
Select the fixes that should be applied to the package and the issues that will be displayed in the report and click on the Next > button.
|
Warning: Since Power fixes can damage the package, only apply Power fixes if sufficient packaging experience and knowledge is at hand. |
The progress of the fixing is shown in the Fixing Progress section.
After execution of the test, the test result is shown in the Results section.
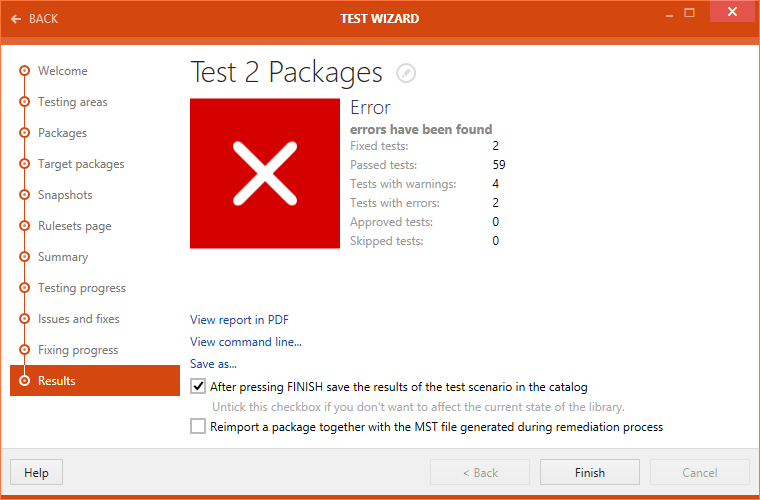
After the fixing is finished, the result will be shown in the Results section. There are different options available:
•See the generated MST file: Click on this option to open the directory which contains the generated .mst file.
•View reports in PDF: Click on this option to open the test result in .pdf format.
•View command line...: Click on this option to view the command line arguments for the current testing scenario.
•Save as...: Click on this option to export the test result in one of various available formats. Possible formats are: .pdf, .docx, .doc, .html, .xps, and .xml.
If the After pressing FINISH save the results of the test scenario in the catalog option is checked the results of test will be saved in the catalog after clicking on the Finish button. Untick the option if the result should not be saved in the library. By default the checkbox is ticked.
If the After pressing FINISH save the report in RayFlow server option is checked, the result of the test will be saved to the RayFlow instance after clicking on the Finish button. By default, the checkbox is unticked.
If the Reimport a package together with the MST file generated during remediation process option is checked, after clicking on the Finish button, the package will be reimported and the .mst that was generated when applying the fixes will be imported alongside the package.
Click on the Finish button to close the TEST WIZARD.