This section contains a step-by-step description on how to setup the Microsoft SQL Server connector. Specific information about the different connectors and how they work can be found in the RayVentory Data Hub Connectors documentation.
1.Got to the Connectors page and click on the Microsoft SQL Server connector.

2.The Edit connector settings dialogue will be opened.
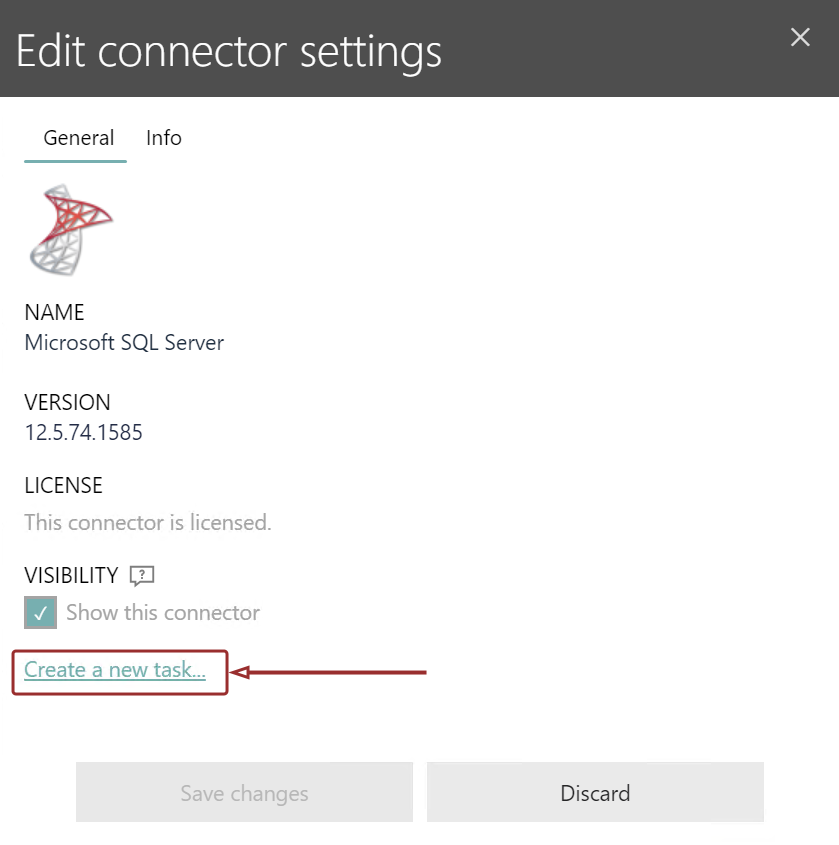
In the General tab, click on the Create a new task... button.
3.The Add task dialogue will be opened. In order to setup the Microsoft SQL Server connector, execute the following steps.
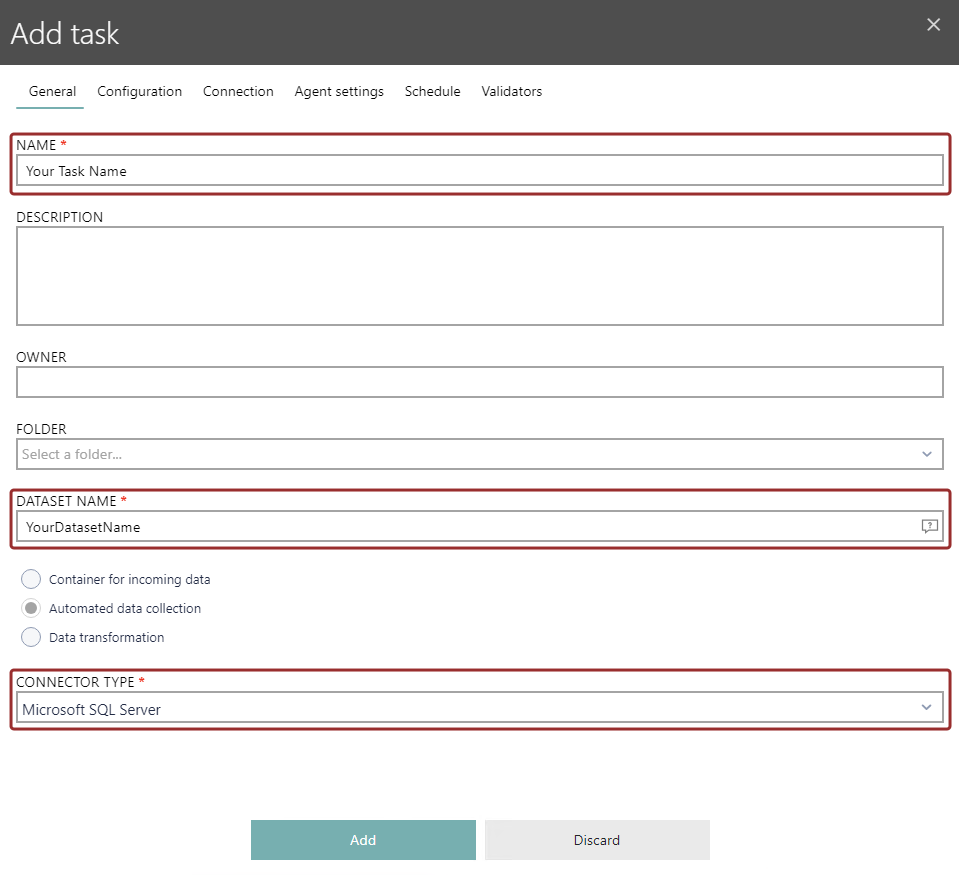
In the General tab, enter a descriptive name for the new task in the NAME field. Enter a name for the dataset in the DATASET NAME field (information on how to best name the dataset can be found in the Naming Conventions chapter). Finally check that CONNECTOR TYPE is set to Microsoft SQL Server. More information about the options in the General tab can be found in the Task > Creating or Editing Tasks > General chapter. When all mandatory information have been entered, switch to the Configuration tab.
4.In the Configuration tab, the query that will be executed on the database needs to be configured.
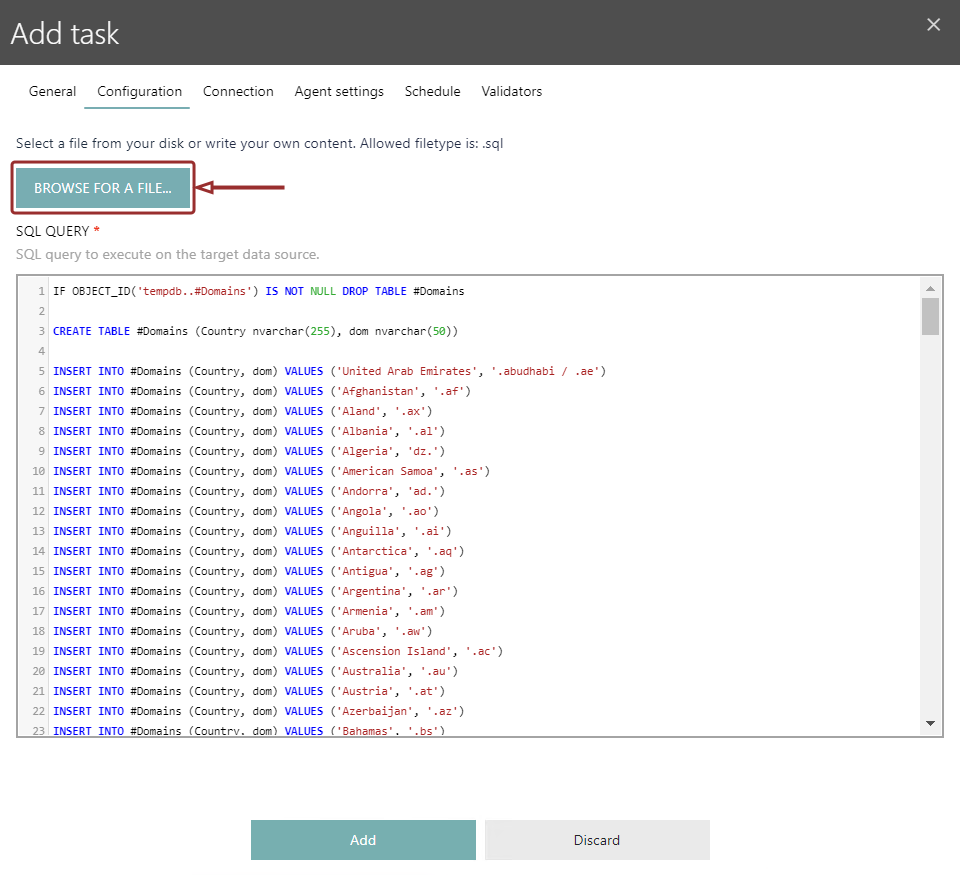
Either enter the query manually into the SQL QUERY field or use the BROWSE FOR A FILE... button and upload an .sql file containing a predefined script. More information on the Configuration tab can be found in the Tasks > Creating or Editing Tasks > Configuration chapter. Click on the Connection tab to continue.
5.In the Connection tab, all information that the connector needs for the connection to the target need to be entered.
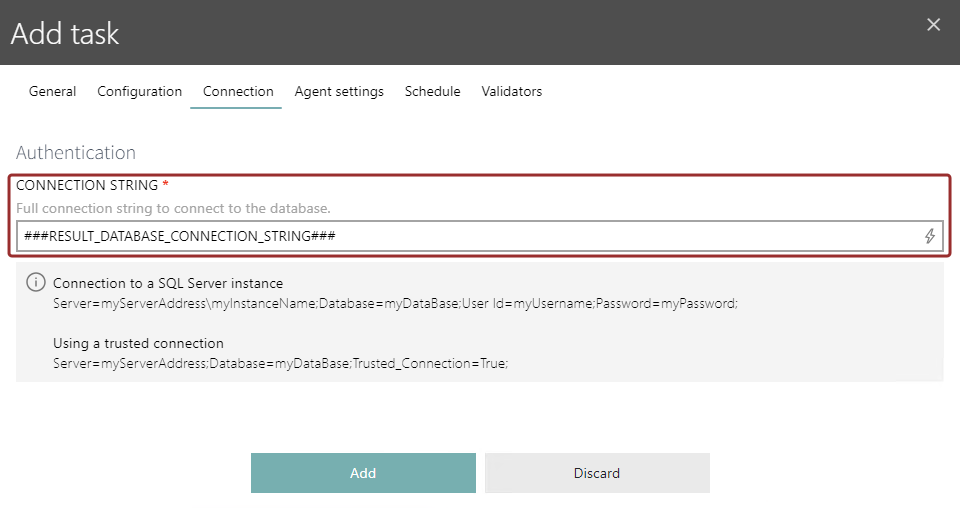
For the Microsoft SQL Server connector, only the CONNECTION STRING is needed. Enter a valid connection string to your SQL Server instance. Additionally, it is also possible to enter a variable as shown in this example. If a variable is used, first ensure that the variable has already been defined. How to define a variable is shown in the Administration > Variables chapter. More information about the Connection tab can be found in the Tasks > Creating or Editing Tasks > Connection chapter. Click on the Agent settings tab to continue.
6.In the Agent settings tab, the agent that will be used with the connector needs to be configured.
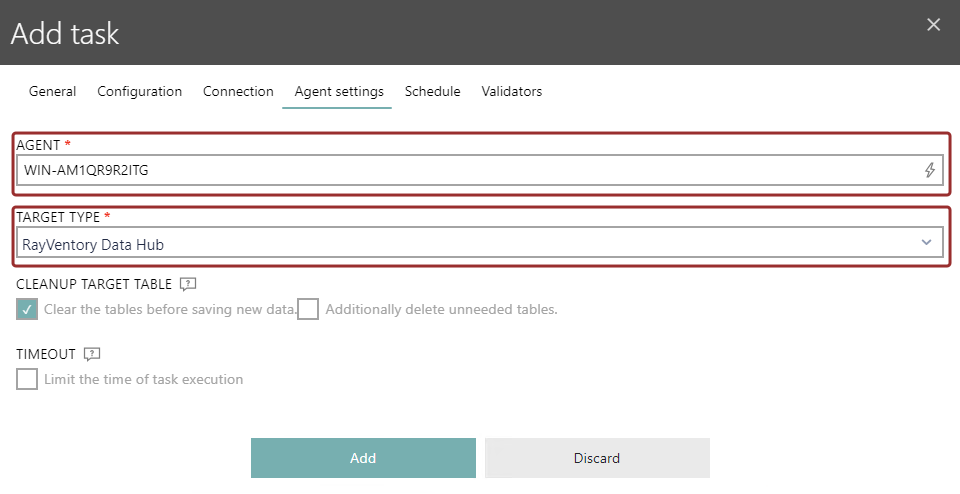
First, define the agent that will be used in the AGENT field. The field supports auto-completion. If no agent is shown when tapping into the field, there are no valid agents configured yet. In this case, it will be necessary to setup an agent first. The agent can be installed on the same machine or on another device. Information on how to install and configure an agent can be found in the Raynet One Data Hub Installation Guide. Once the agent has been configured, select the target type in the TARGET TYPE field. The target type defines where the data will be saved. More information on the Agent settings tab can be found in the Tasks > Creating or Editing Tasks > Agent Settings chapter. Click on the Schedule tab to continue.
7.In the Schedule tab, it is possible to create a schedule for the automation of the task. If no schedule is created, the task will only be executed, when started manually.
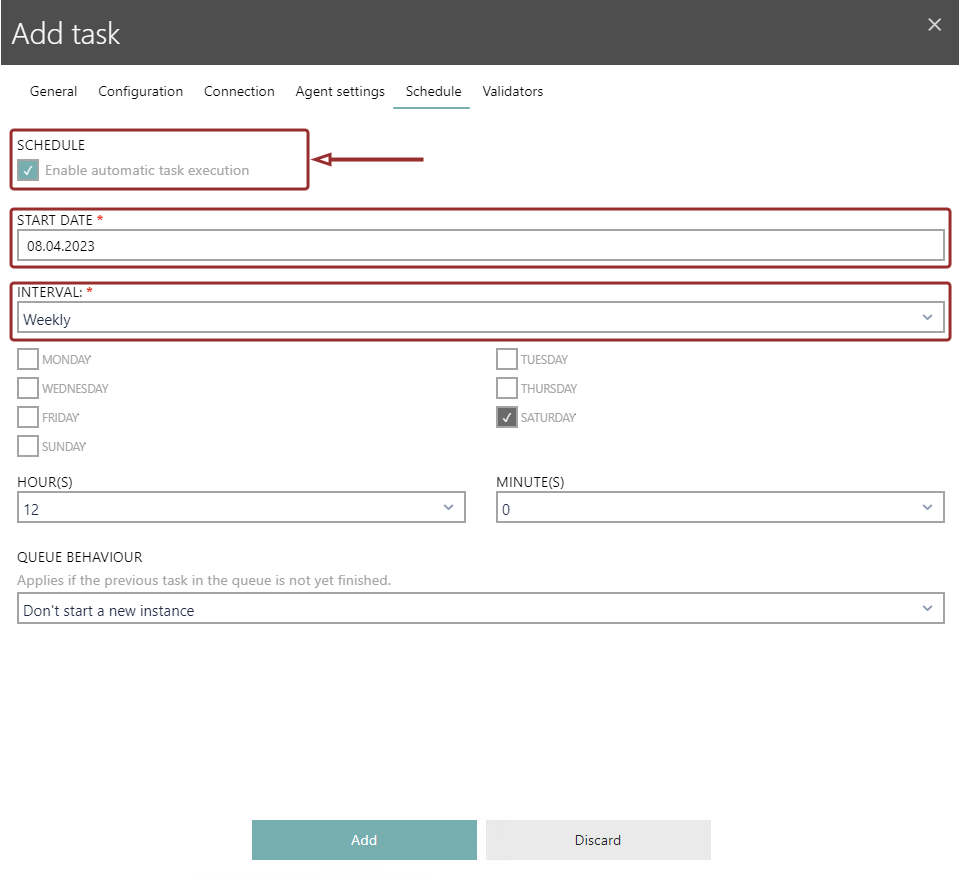
In order to create a schedule, check the SCHEDULE checkbox as sown in the screenshot above. It is necessary to enter the START DATE of the schedule which defines when the schedule will be started and the INTERVAL which defines how often the task will be executed. More information on schedules can be found in the Tasks > Creating or Editing Tasks > Schedule chapter. Click on the Add button to create the new task.
8.The Task details view for the new task will be opened.
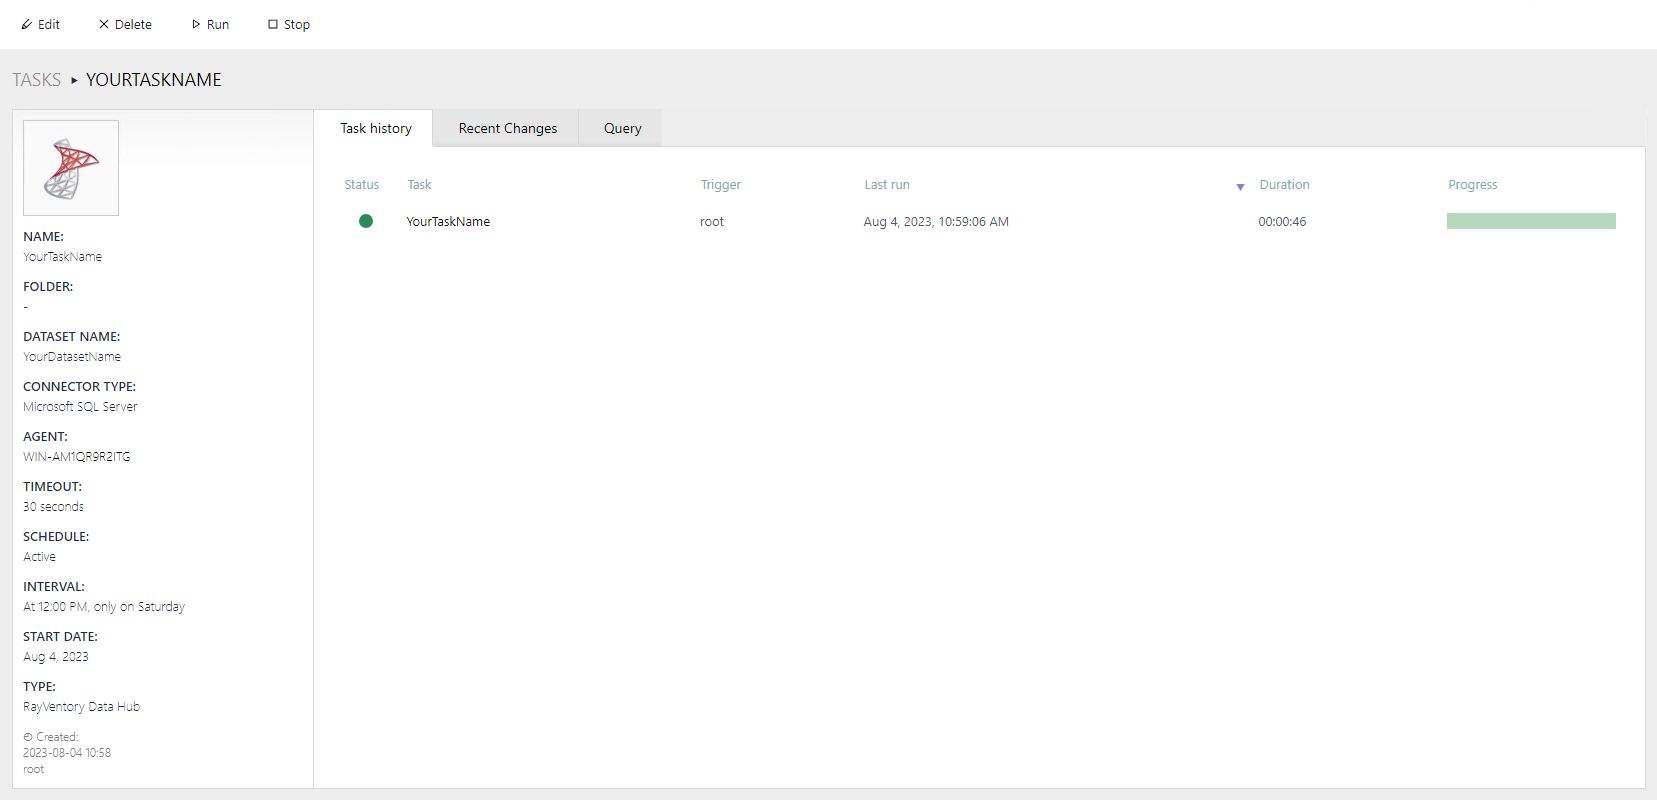
In the Task details view for your task, all information about the task will be shown. It is also possible to manually start the task in this view by using the Run button located in the top left corner of the view.
You have now successfully configured your first connector. Continue with the Setup Your First Data Visualization chapter in order to learn how to visualize the data that is collected by this connector.