This chapter is about network communication security of the RVIA Data Service and how it is securely set-up related to Docker. Due to architectural differences, the Docker variant of the runner does not provide built-in TLS support for the RVIA Data Service. To protect your device inventory data on its way to the runner, the use of an encrypting reverse proxy is recommended. In the following Docker compose configuration, we will use the HAProxy tool to create the TLS-secured communication channel.
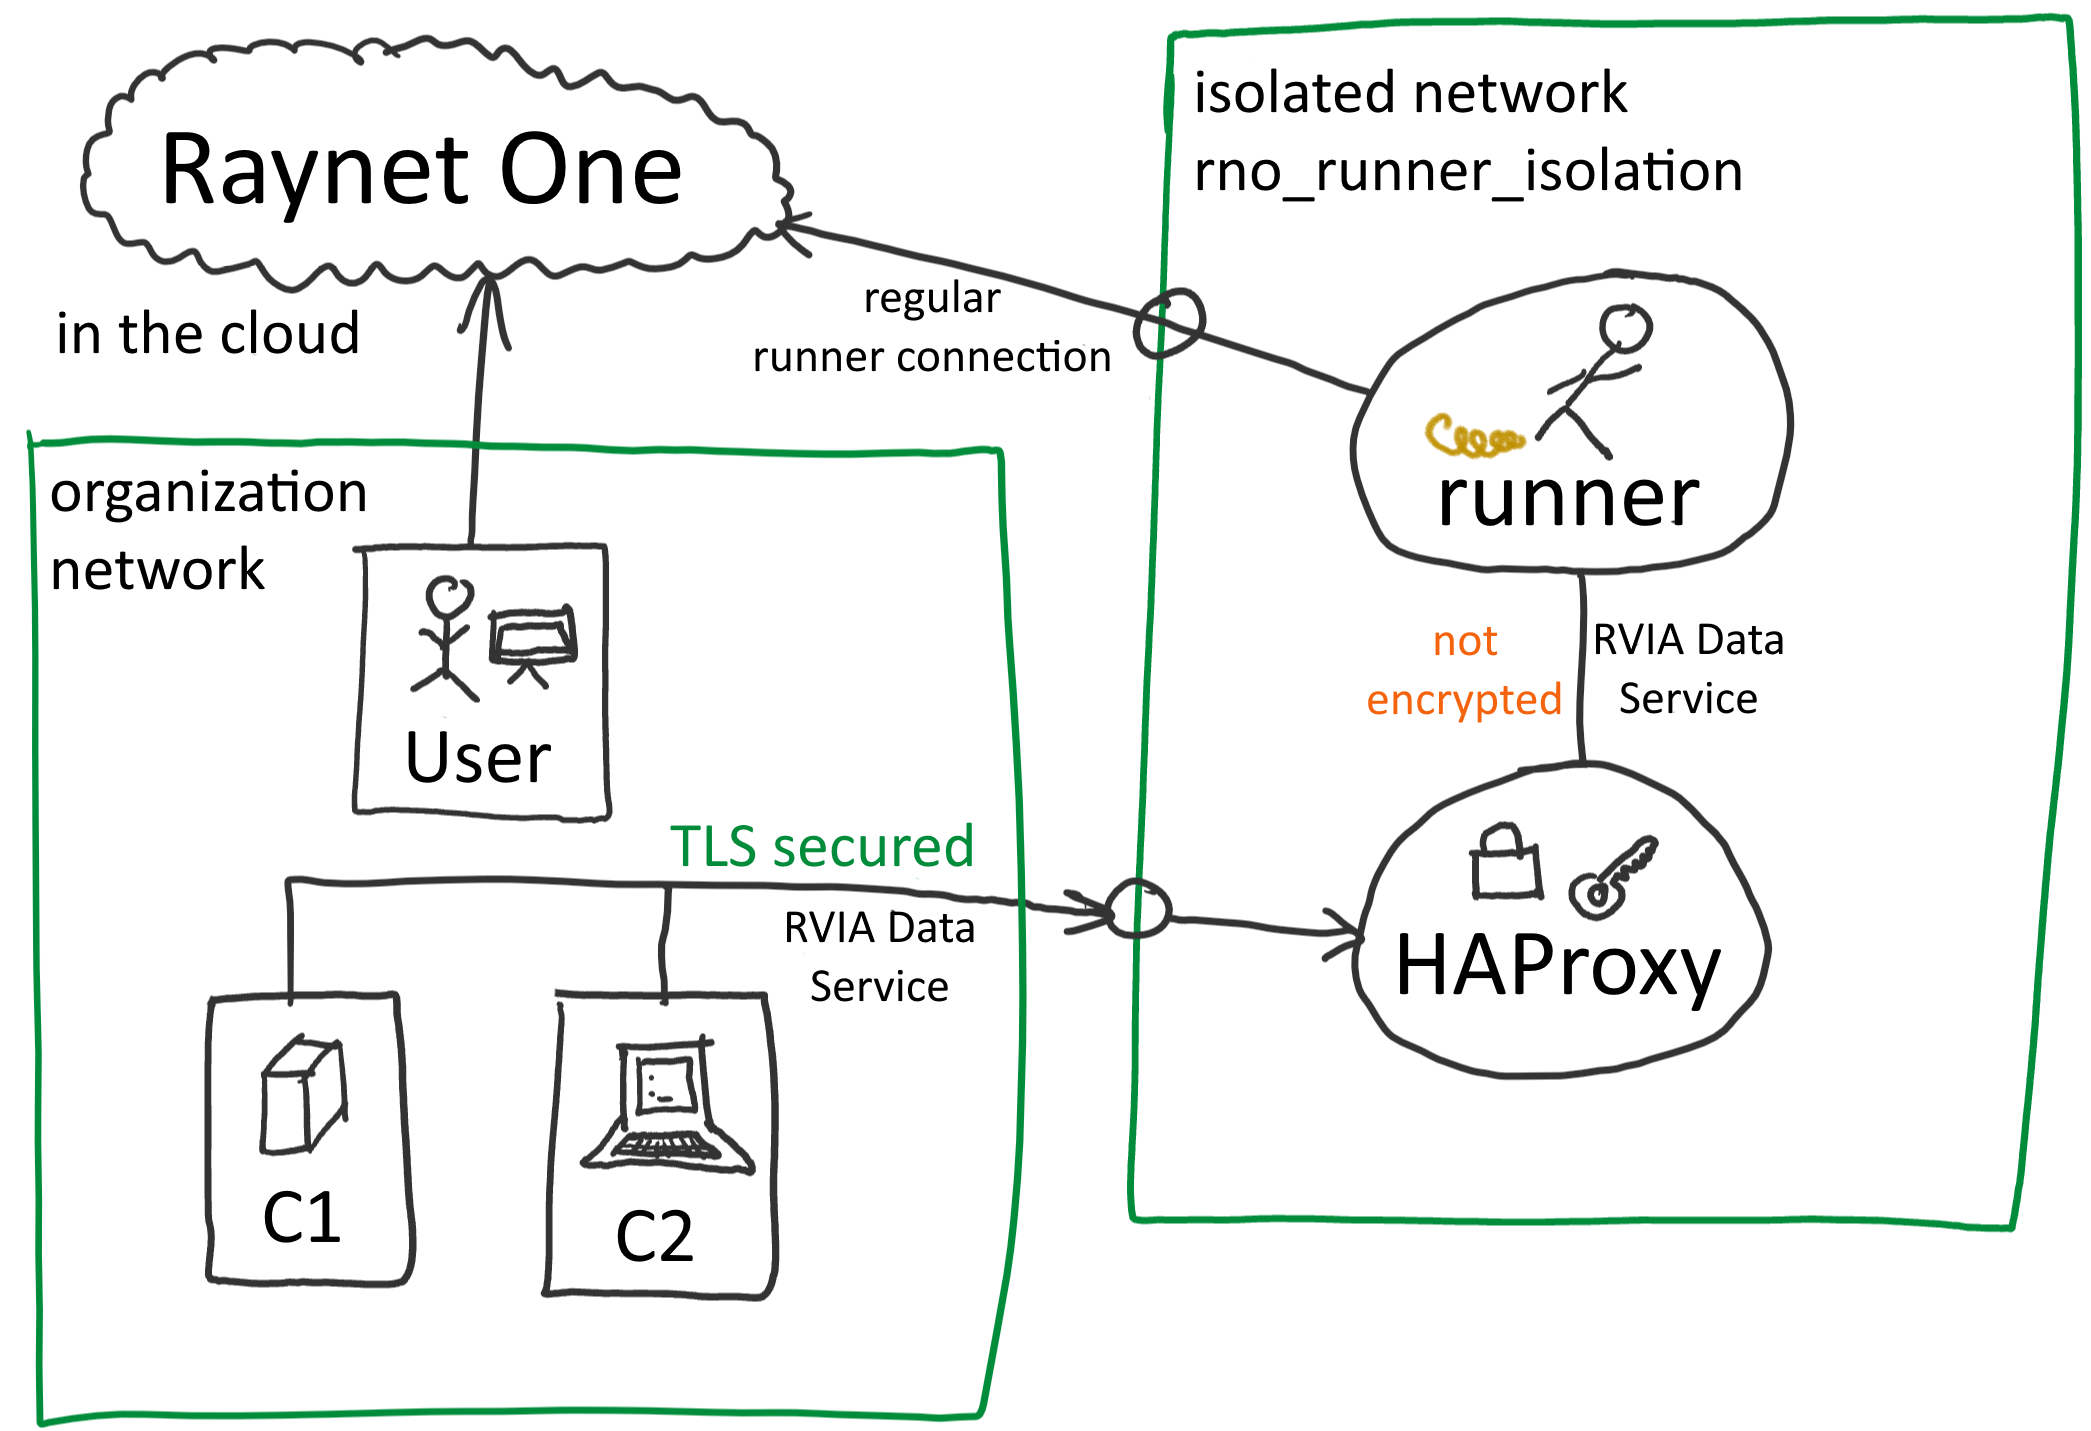
General networks inter-connectivity overview about the runner, the organization's network and Raynet One's system. The web interface can be hosted anywhere, along with its architecture. There are two important describable networks involved: rno_runner_isolation from Docker (to the right) and the organization's network (bottom left). Essentially, the inbound network communication between those two networks is restricted. An IP subnet routes traffic to the users of its own space, removing the risk of leaking unencrypted data to outsiders. In the following Docker compose configuration, the rno_runner_isolation Docker network allows communication of the RVIA Data Service endpoints through the TLS-encapsulated endpoint as provided by the HAProxy application.
View the PKI chapter for more information about digital system security.
In the following, there are templates provided for integration into your Docker-based runner configuration. After the templates, you can find the step-by-step guide.
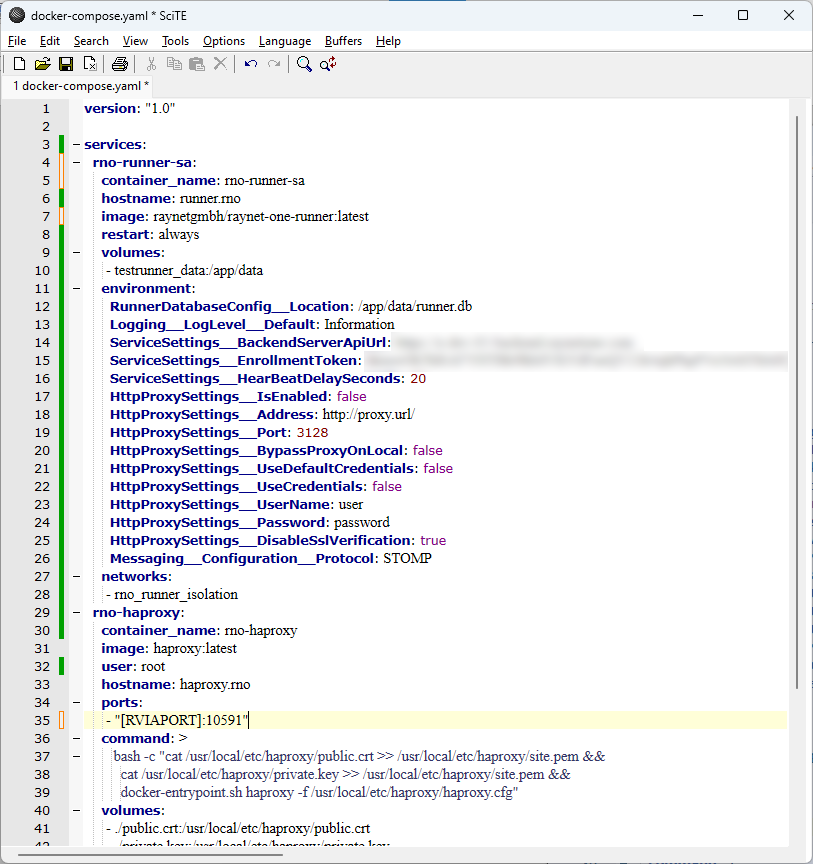
Docker compose template portion for HAProxy integration
services:
rno-haproxy:
container_name: rno-haproxy
image: haproxy:latest
user: root
hostname: haproxy.rno
ports:
- "[RVIAPORT]:10591"
command: >
bash -c "cat /usr/local/etc/haproxy/public.crt >> /usr/local/etc/haproxy/site.pem &&
cat /usr/local/etc/haproxy/private.key >> /usr/local/etc/haproxy/site.pem &&
docker-entrypoint.sh haproxy -f /usr/local/etc/haproxy/haproxy.cfg"
volumes:
- ./public.crt:/usr/local/etc/haproxy/public.crt
- ./private.key:/usr/local/etc/haproxy/private.key
- ./haproxy.cfg:/usr/local/etc/haproxy/haproxy.cfg
networks:
- rno_runner_isolation
File template haproxy.cfg
global
log stderr local0
log stderr local1 notice
stats timeout 30s
daemon
# Default SSL material locations
ca-base /etc/ssl/certs
crt-base /etc/ssl/private
# See: https://ssl-config.mozilla.org/#server=haproxy&server-version=2.0.3&config=intermediate
ssl-default-bind-ciphers ECDHE-ECDSA-AES128-GCM-SHA256:ECDHE-RSA-AES128-GCM-SHA256:ECDHE-ECDSA-AES256-GCM-SHA384:ECDHE-RSA-AES256-GCM-SHA384:ECDHE-ECDSA-CHACHA20-POLY1305:ECDHE-RSA-CHACHA20-POLY1305:DHE-RSA-AES128-GCM-SHA256:DHE-RSA-AES256-GCM-SHA384
ssl-default-bind-ciphersuites TLS_AES_128_GCM_SHA256:TLS_AES_256_GCM_SHA384:TLS_CHACHA20_POLY1305_SHA256
ssl-default-bind-options ssl-min-ver TLSv1.2 no-tls-tickets
defaults
log global
mode http
option httplog
option dontlognull
timeout connect 5000
timeout client 50000
timeout server 50000
listen L
bind :10591 ssl crt /usr/local/etc/haproxy/site.pem
server runner runner.rno:[RVIAPORT]
Substitution parameters
•[RVIAPORT]: The port of the RVIA Data Service. You configure it in the wizard at the very beginning. By default, the value is 591.
Requirements
•A certificate authority to issue the runner service endpoint certificate.
•The TLS certificate issued to the runner's hostname common-name (CN) by the certificate authority, including the public and private keys, split into public (public.crt) and private (private.key) key files. The certificate application/purpose must include Server authentication.
•Docker-based runner configuration prepared as described in the dedicated chapter (be sure to have the latest version!)
•The runner Docker container is stopped.
•The runner is added and authorized in the web interface.
Steps
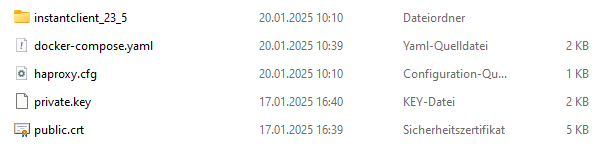
1.Merge the Docker compose configuration from above with the one you already have for your runner.
2.Put the haproxy.cfg file into the Docker compose file folder.
3.Substitute the parameter as explained above in both the merged Docker compose configuration and the HAProxy configuration file.
4.Put the public.crt and private.key files into the Docker compose file folder.
5.Execute $ docker compose up inside of the Docker compose file folder.
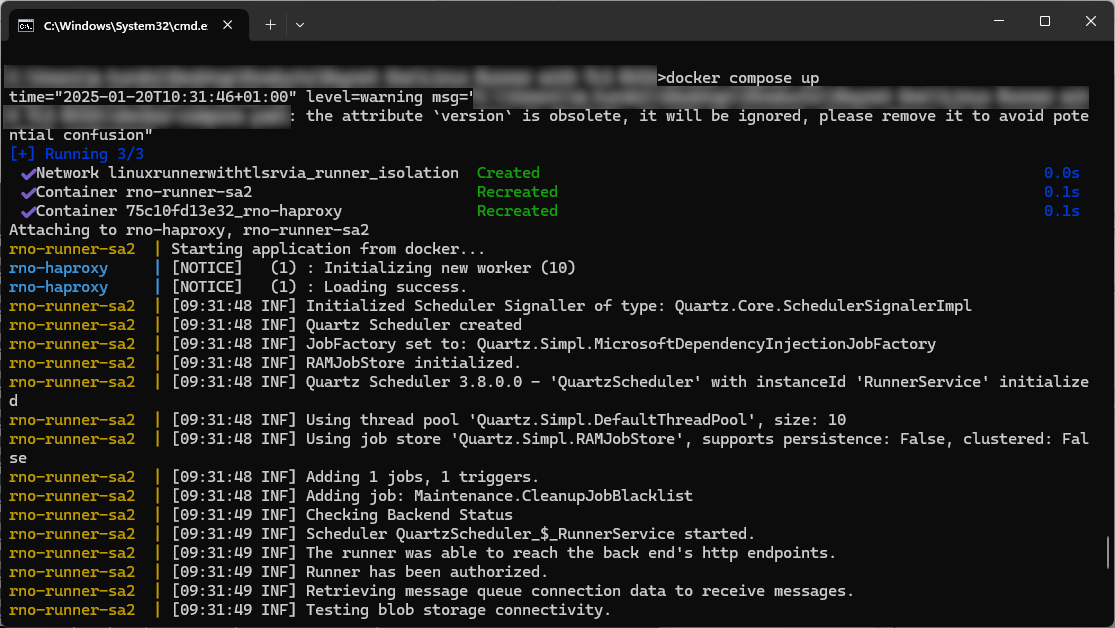
6.Wait for the container to start up properly. There are various potential problems, for example port or container name collision. Troubleshoot them using best practices.
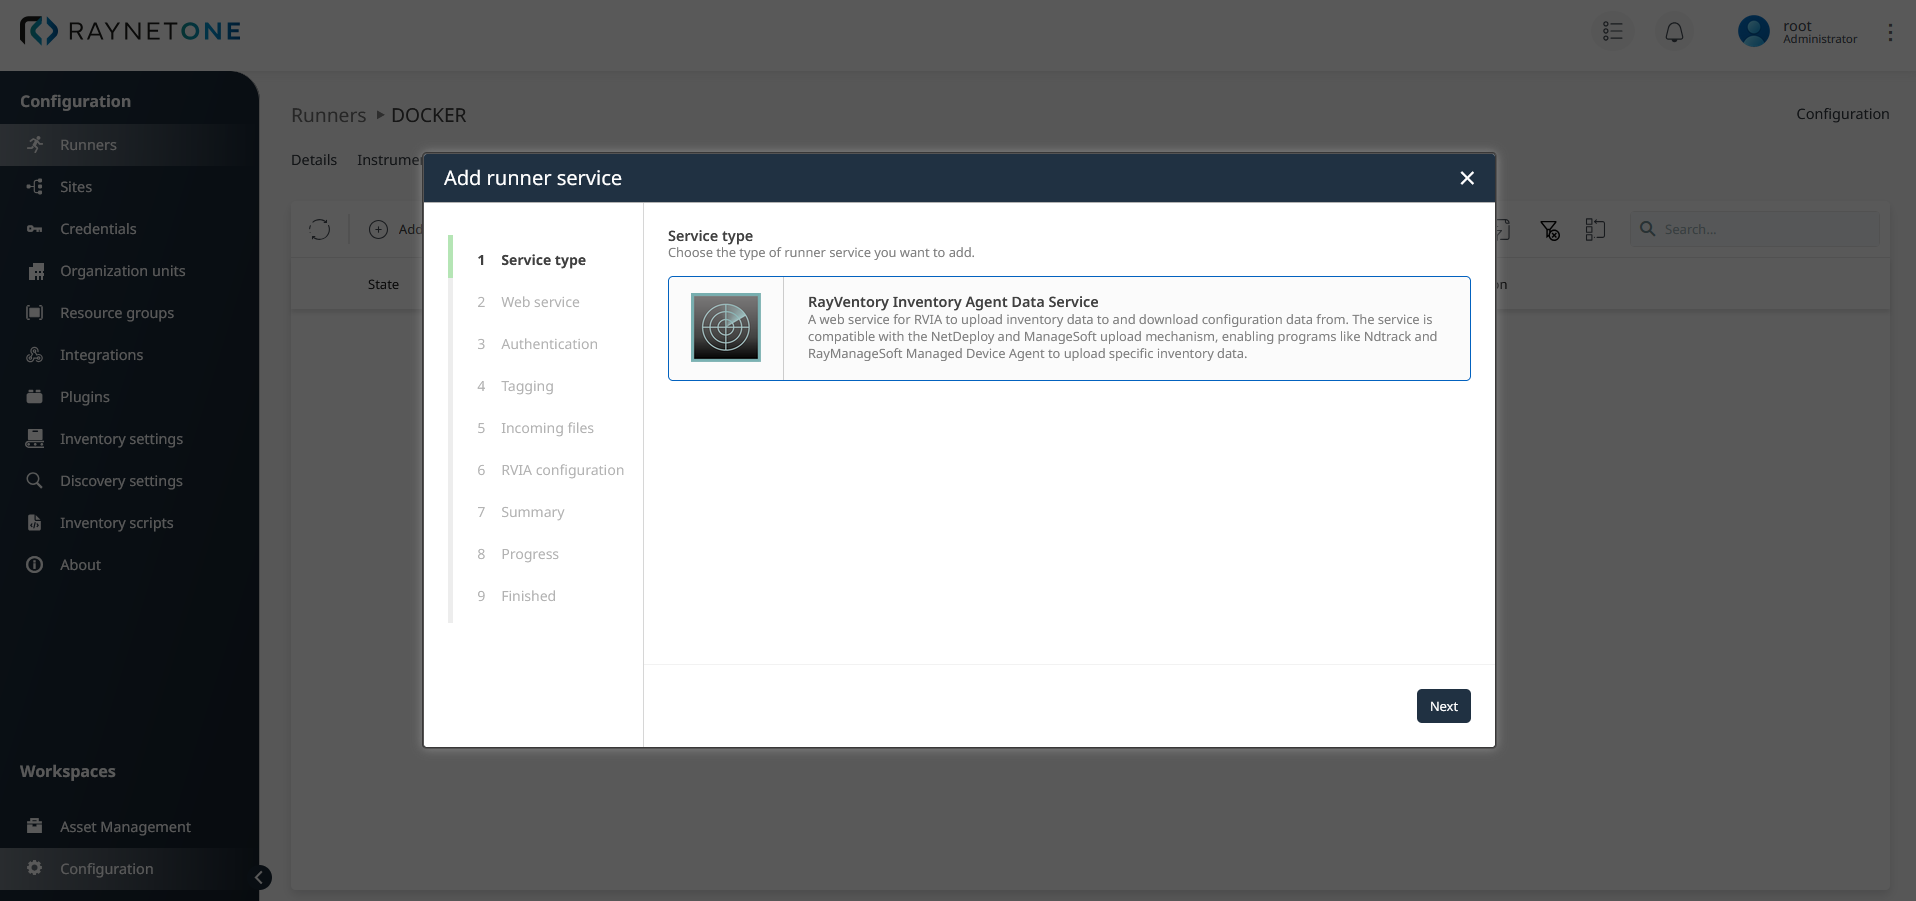
7.Add the RVIA Data Service to the runner. Note that you can't assign encryption keys directly through the wizard. Put the [RVIAPORT] substituted value into the service port field. Finish the wizard as appropriate.

8.Import the certificate authority hierarchy, the signing hierarchy of the runner service TLS certificate, to the RVIA device(s). This step is required to make the RVIA device trust the server endpoint of the runner device. See the PKI chapter for more details.
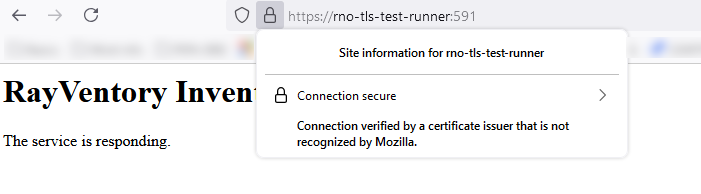
9.Connect to the HTTPS runner service endpoint from the RVIA device using a web browser (for ex. Firefox) to verify the proper validation of runner service endpoint connection security. If the browser fails to verify the connection's integrity, there can be many issues involving PKI or correct procedures in importing certificates to the operating system certificate store. Check that your certificate is valid. Follow guides targeted specifically for your operating system to import the signing hierarchy certificate authorities.