Since Raynet One is a heavily data-driven product, lists are used in many places. They display critical data, enhancing your IT visibility. Learning how to use them at their full potential is key.
Let's take a look at the most important points related to the list views.
Sorting the columns
A left mouse click on any column name performs sorting of the list contents according to the column's values. Sorting the list allows you to find critical data more easily.
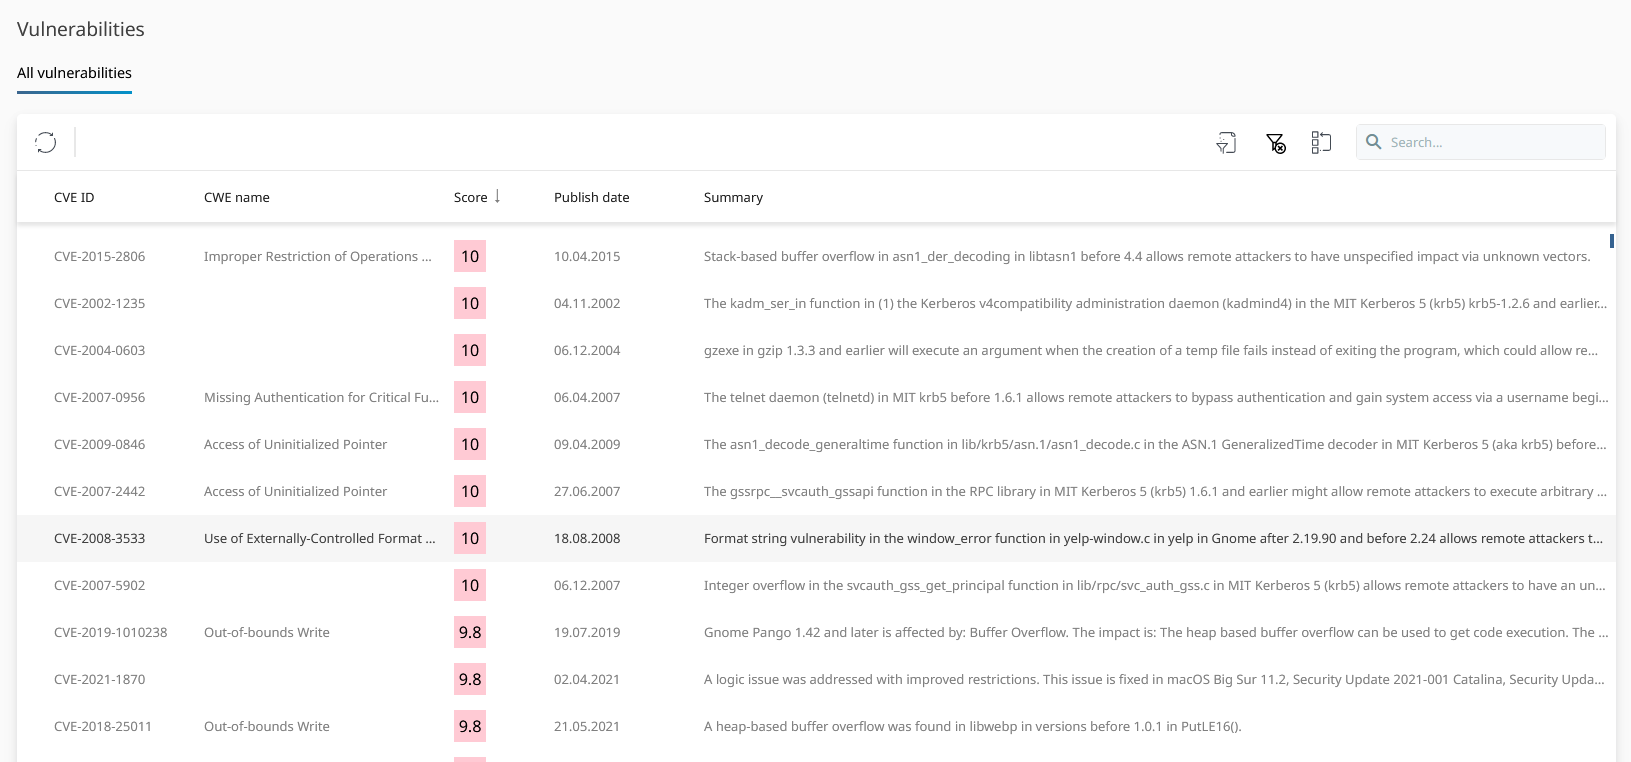
Find the most critical vulnerabilities of your IT landscape by sorting based on the vulnerability score of all detected vulnerabilities. You mustn't wait for the hacker to teach you how IT security works. Take the secure IT infrastructure investments into your own hands!
Use the Shift key to sort multiple columns at once. All columns with the visible up or down arrows after their column name form the sorting-set. Each column of the sorting-set sequentially contributes to the sorting. Each later column sorts within the equivalent set of rows of the previous one. Thus, you can get a deeply structured view on your data using the perfect sorting strategy for each of the diverse list views!
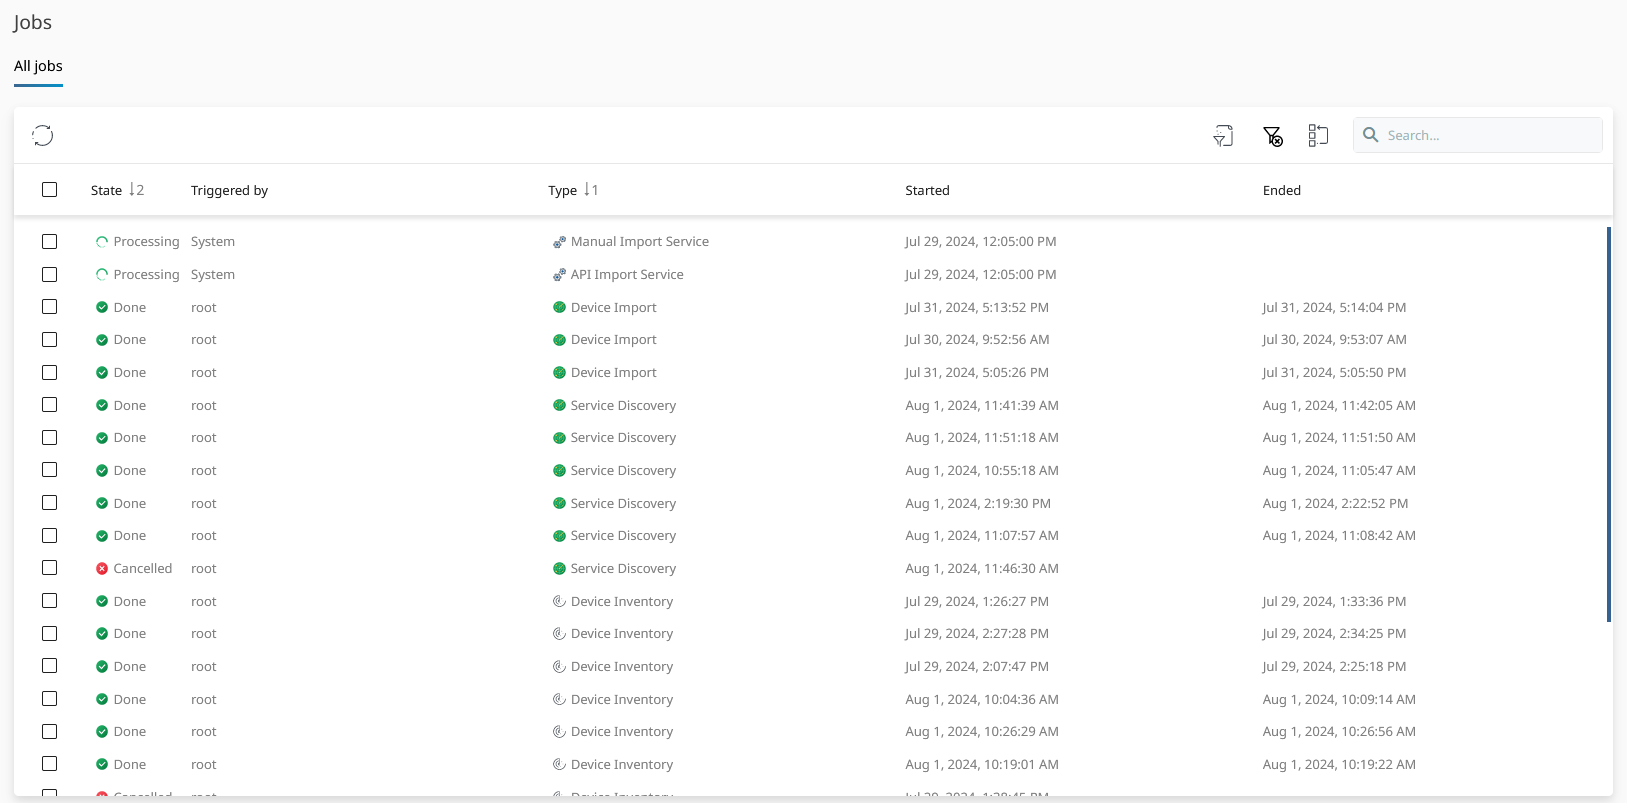
The jobs list is first sorted by job type, second by the job state. This results in groups of job types which are further down grouped by job state. Groups on the same level are sorted among each other and according to the column sorting direction (either ascending or descending).
Filtering the columns
Restricting the set of visible data is a good way to focus on data that really matters. This is why list views provide a powerful bunch of column-based filtering methods. When faced with a list view, enable the column filtering controls by clicking on the Filter button.
![]()
The filter button as found in the menu panel of list views.
You are then provided with input boxes below the column names of the columns that support filtering.
![]()
The Name, Vendor, Version and Type columns of the Software list view support the filtering operation. Each of them is set to the Contains filtering strategy (default string-based filter function).
Typing into any of the input boxes restricts the visible data to match the filter function and the filter parameter. The filter function is indicated by the icon at the front inside of the input box. The filter parameter is the text-content of the input box. The available set of filter functions depends on the type of data in the column's cells. For example, if the column's cells are limited to numeric values, numerical filtering functions like smaller than or greater than are available.
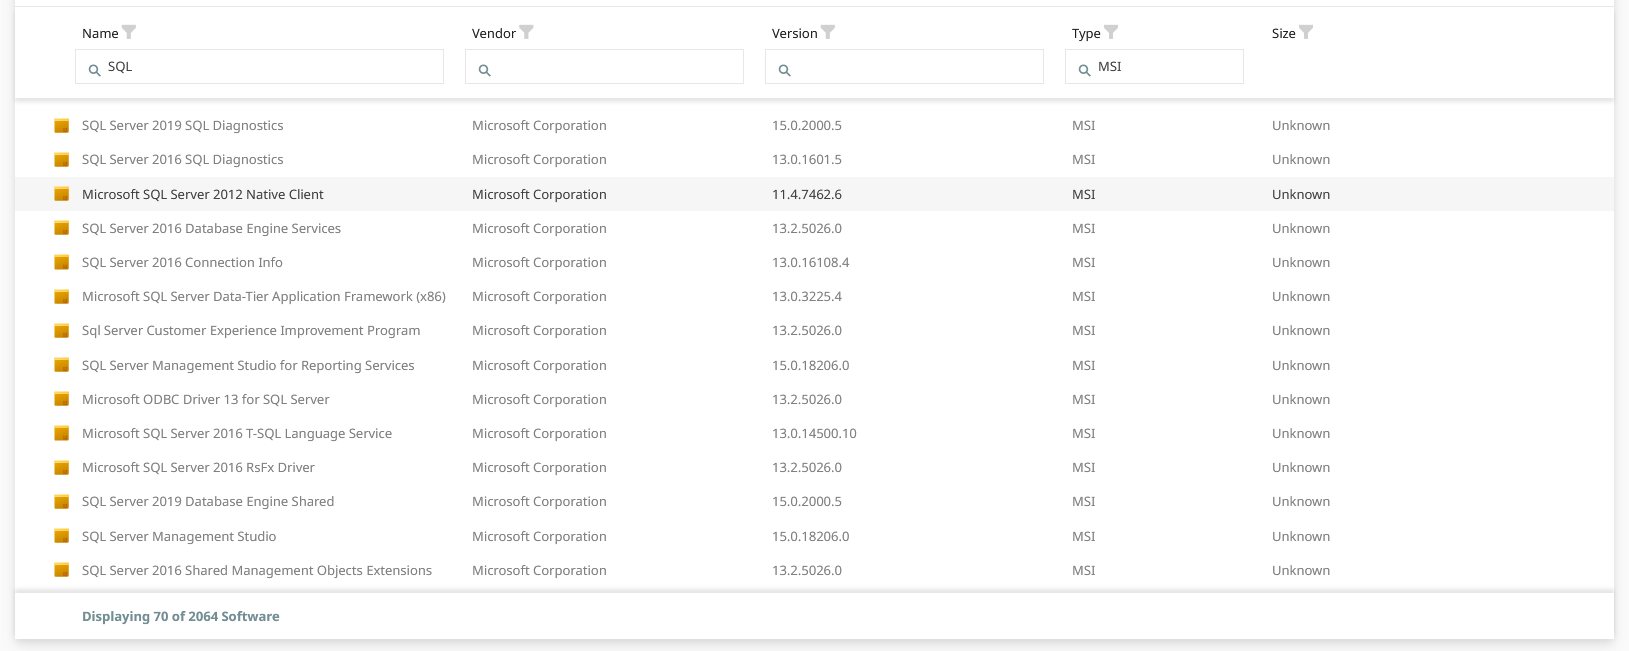
The list of software is restricted to products installed by MSI and containing the string "SQL" in their names. You can see the filter parameters in the input boxes.
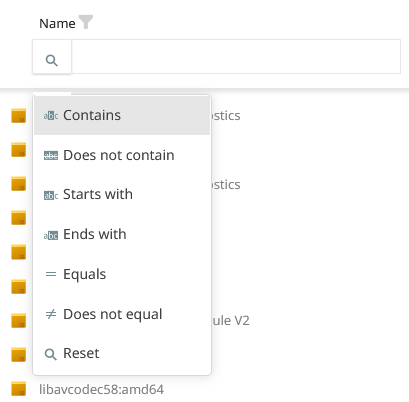
String-based columns are the most basic and frequent. They provide filter functions that work on finding the filter parameter character sequence at various points inside of the column's values. Also, they differ in the way that content other than the filter value is allowed.
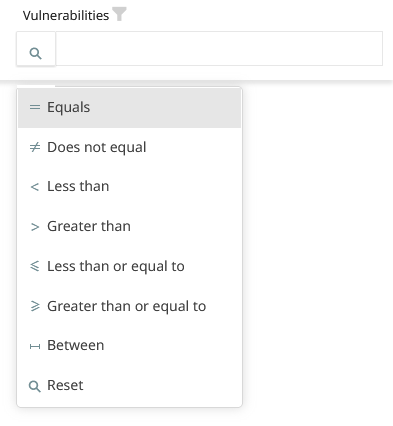
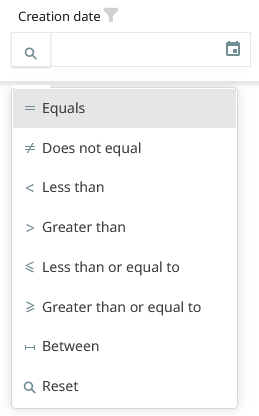
Examples of columns that support mathematical filter functions. Numbers and dates can be compared to be either equal, smaller or greater. A date is smaller than another if it is earlier in time than the other.
Searching list contents
Many list views have the search box at their top right. It is used to filter the list content by a case-insensitive search string found anywhere in the cell values across all supported columns. It is the most convenient way to find data of interest quickly. Type any string into the search box to start your search. This is a simpler albeit similar way to filter the data-set than column-based filtering.

Following company policy to mark devices with Oracle databases on them, you can find them using a quick search inside of their device name!
Reordering the columns
The column order of list views is not fixed. You can reorder the column order via drag & drop. Simply left click on the column name and keep the left mouse button pressed. When you start moving your mouse, a copy of the column name also starts to float. Drag the column name to the desired drop location. You can either put it in-between two columns, at the start or at the end.

Design the list's layout the way you truly want! Comfortably designed column layouts help you get a good overview of your data. In the above view, the Name column is moved between the IP address and Operating System columns as the device name is deemed very important.
Adding and removing columns
There may be more data available in list views than initially meets the eye. There is a set of available list columns for each underlying data type. Not all list columns have to be displayed in the list view. The inclusion of columns is decided by the general usefulness of the data provided, across interests common to all users. All remaining columns are found inside of the Column Chooser. You can open it using the respective button.
![]()
The Column Chooser button. Click on it to open the panel of hidden columns.
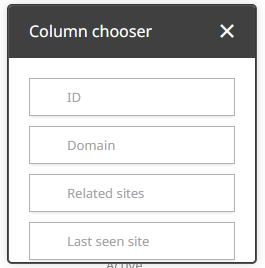
The Column Chooser itself. It is a small window with a scrollable view of hidden column names. You can drag & drop columns between the column panel of the list view and the column chooser. This way columns can be either added or removed from view. Design the list views to your liking by restricting it to the properties that matter the most!
Resetting the list layout
Returning to a well known default view is easy for list views. Clean up any list view layout by clicking on the Reset button.
![]()
The list-view Reset button. It looks like a funnel with a circled cross on the bottom right. It is used to reset the contents of the filter input boxes and the filter functions.
This button removes any applied column-based filtering, being both the contents of the filter input boxes and the selected filter functions. The sorting as indicated by the arrows next to the column names is reset to default. Some list views do start out with a sorting configuration for convenience, which is restored by the reset. The list contents are refreshed, behaving similarly to the list refresh button. If there are selected items in the list, the selection is cleared.

This list view of vulnerabilities appears to be configured for a very specific purpose. After extracting the data of interest, returning to the default view sounds like a good idea! Use the Reset button as a helpful means.
Refreshing the contents
Data displayed in Raynet One is subject to change. You can refresh the data in the list views by clicking on the Refresh button.

If there is a discovery job running, new devices may arrive in the Devices list at any moment, most decisively after the job's completion. Refresh the list to get the complete list of devices, along with their up-to-date properties!
Selecting list items
Many list views, for example the Devices or the Networks list, provide actionable resources. You can select items of list views in multiple ways.

Save time by selecting the right devices for your actions. Repeating the same action in separate actions on singular devices is not efficient. Instead, design your workflows to perform actions on groups of devices. The same grouping principle should be followed for all kinds of resource types available.
Resizing list columns
List views have a varying number of columns. The list view is divided into column sections horizontally. In between the column sections, on the column name bar is the tiny strip used for column resizing. Left-clicking on it and holding the mouse clicked invokes the column resize action.

The areas enclosed by red rectangles estimate the tiny strip. Try moving your mouse cursor onto those indicated areas on the list views of the web interface.
To find the location just in between the columns, try slowing down your mouse cursor movement. Carefully move your mouse cursor starting from the middle of the column name to either the left or the right, keeping the mouse over the column name bar. The mouse icon will change to the special column resize icon.

Alternatively, try clicking on the column name and dragging it. A floating column name box will appear. The left and right borders of the floating column name box hint at the location. Drop the column name at the same location you picked it up from so that the column order does not change. Try the column resize action using the hinted location. The special mouse icon may not be visible but the column is still resizable at the cursor's location.

The blue box is the allocated area of the column name. Column resizing can be invoked around the left and right borders.
As a last resort, there is a faint indication of the surrounding area of the tiny strip. It is displayed at the right of the column name area if the mouse is hovering over the area.

The indication is found in the marked area. It is a tiny gray bar. A keen eyed viewer will notice it.