With valid credentials and at least one explorable network being available, you can now start your first discovery run. In general, during discovery, the runner scans your managed environment for devices, databases and networks, collects this data, assembles and displays it in standardized list views. Thus, discovery always sets the framework for inventory jobs which depend on this data framework being available and structured.There are several ways to start a discovery one, e.g. via an automated device schedule Devices (see chapter Devices for details). However, for your first discovery, there will be an instruction for a one-time discovery run.
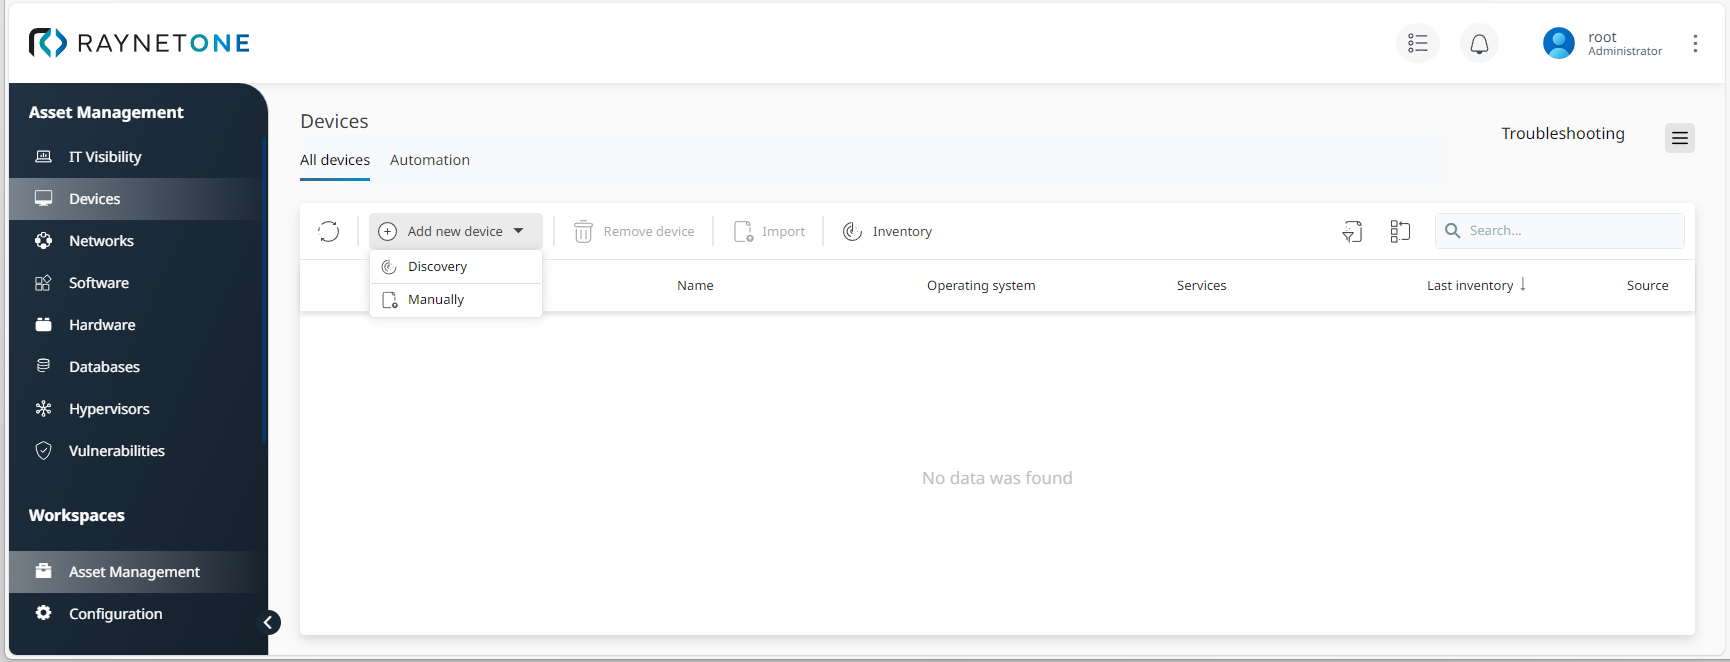
1.Navigate to the Devices view in the Asset Management workspace. Then click on Add new device and select Discovery to open the Device discovery wizard.
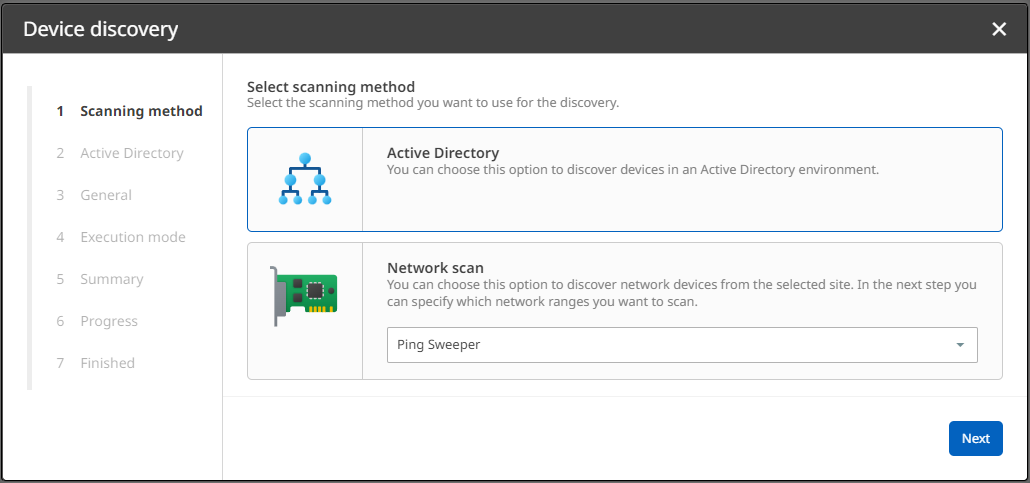
2.Select your scanning method according to your managed environment. In this case, it will be Active Directory. Then click on Next to proceed.
3.Fill in the field Distinguished Name, then select stored credentials and a runner. If required, you can also define a host filter (optional), then proceed.

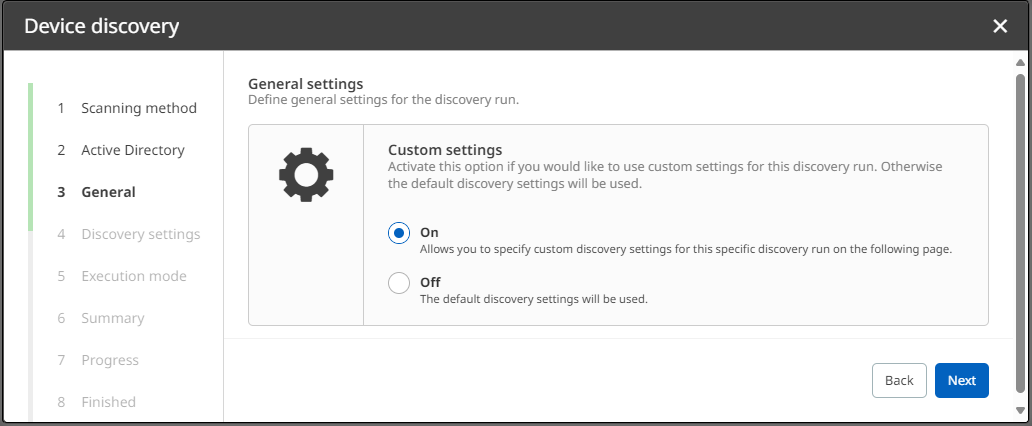
4.Enable or disable custom settings for this run. In this example, custom settings will be enabled. Otherwise, skip the next step.
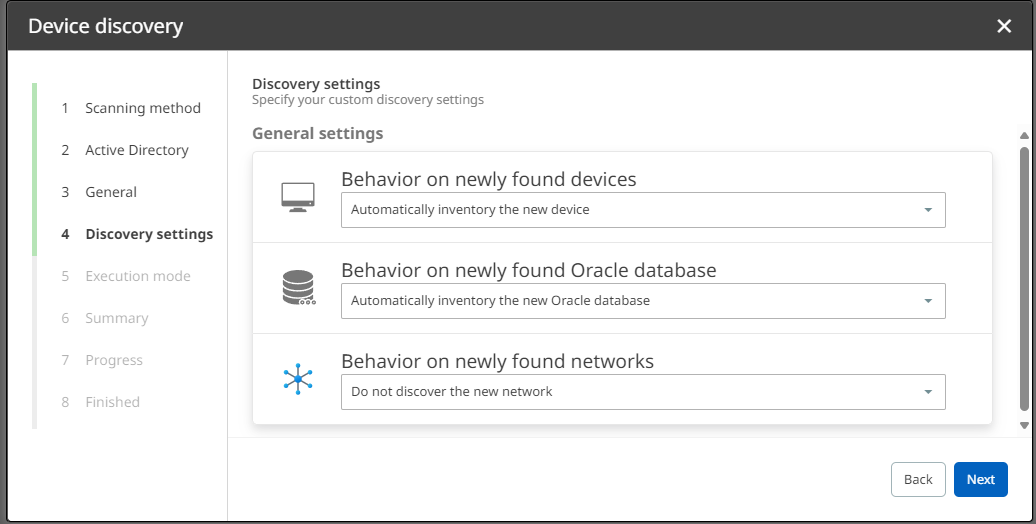
5.Define individual discovery settings for the current run and click on Next to proceed.
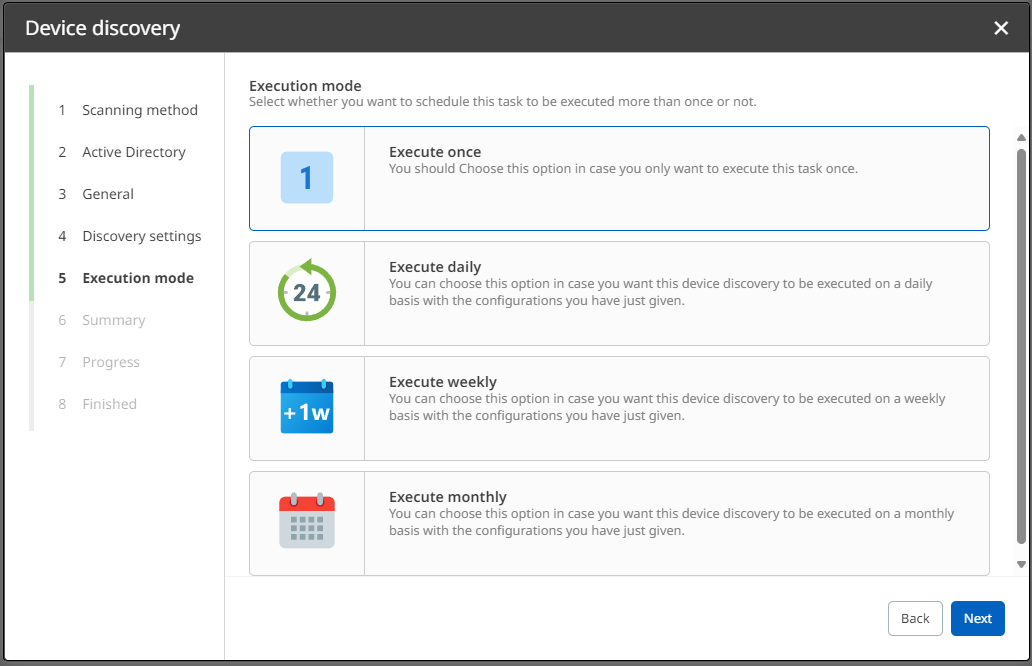
6.Define an execution mode for scheduling your discovery run. In this example, it will be triggered once. However, you can set exact trigger times daily, weekly or monthly according to your requirements.
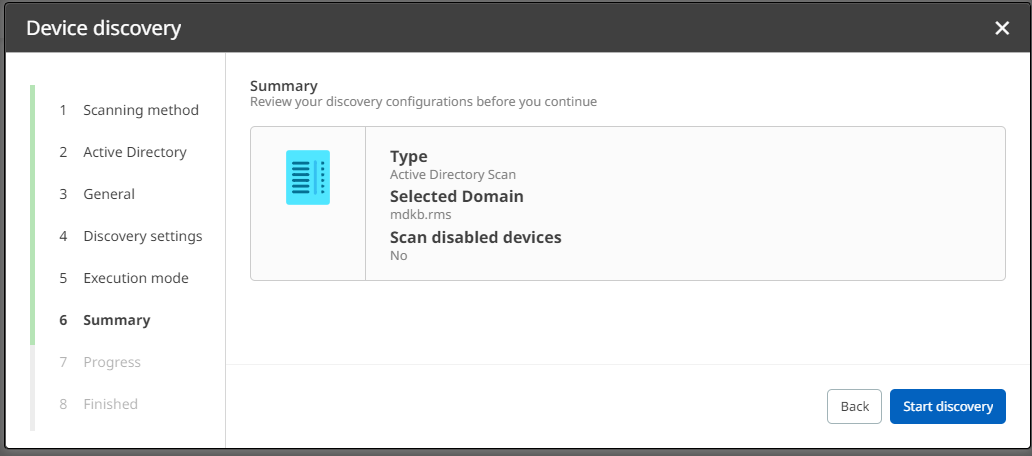
7.Verify the summary of your configurations. If they are correct, click on Start discovery. Otherwise, you can always go back to previous steps.
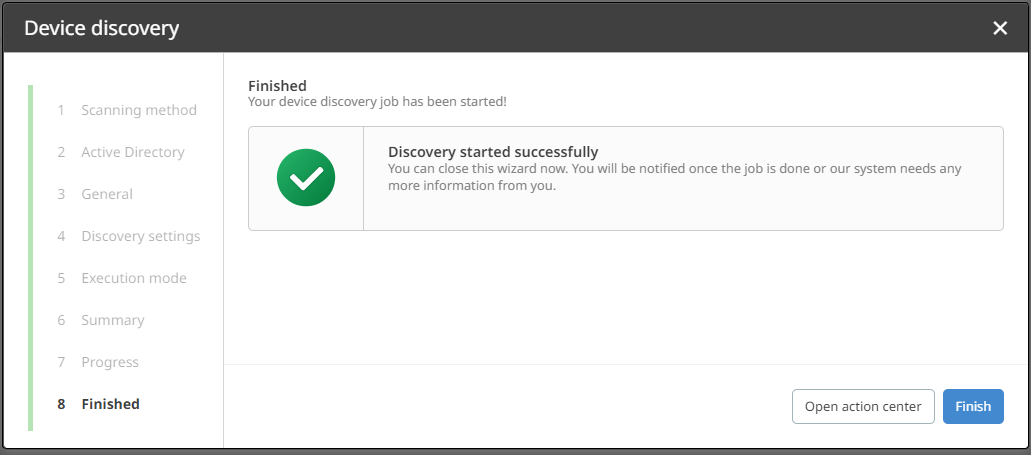
8.Click on Finish to finalize the process. Alternatively, you can open the Action Center to view details on your discovery run first.
|
Be aware: |
|
Tip:
|