Phases are the key object in a workflow process. They describe the steps through which a task goes through to achieve the target state. Hence it is very important to recognize these steps, sub-steps and dependencies between them, before starting with the phase configuration.
Phases Configuration Page
The Phases configuration page in the RayFlow web interface is divided into two areas: Phases and Datafields.
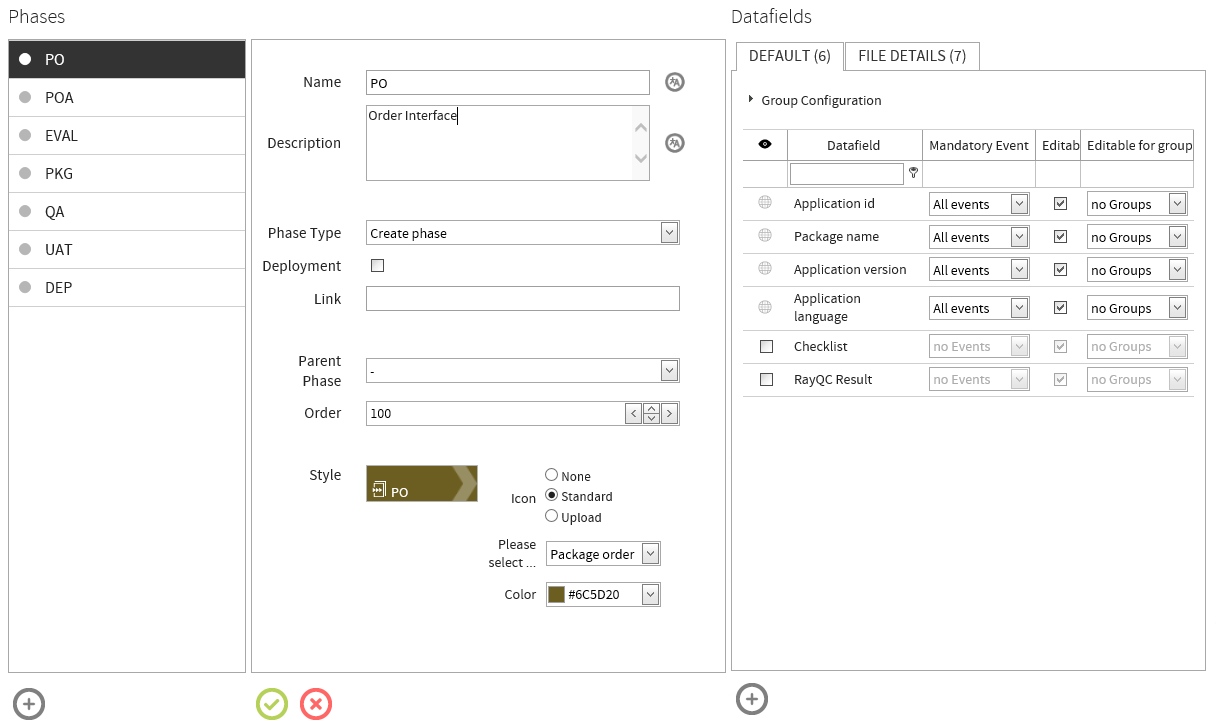
As shown in the image above, under the Phases area the existing phases within a project are shown. When a phase from this list is selected, its related configuration is shown to the right. Under the Datafields area a list of datafields is shown. Here a user can define behavior properties of the datafield within that selected phase.
Phase Management
This section of the chapter describes how a new phase can be created, the phase configuration options, and the datafield configuration for a phase.
Creating a new phase
Create a new phase by clicking on the “Create new Phase” icon. This icon is available at the bottom of Phases area.

Clicking on this icon will show the “Create New Phase” dialog. Specify properties of the phase in this dialog.
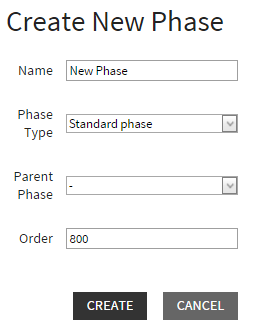
•Name: Short name of the phase. This name is shown on the phase in process navigation bar.
•Phase Type: The type of the phase is required to be selected from the drop down list. A phase can have one of the following types:
Create Phase
Create Phase or Data Entry phase is a unique phase and is only used to fill in the required data as the initial entry point for tasks into the workflow process.
First Phase
As the name suggests, the First Phase represents the first phase of a workflow process.
Standard Phase
All the subsequent phases and sub-phases represented in RayFlow as tasks and sub-tasks are classified as Standard Phase.
Last Phase
Last phase is a standard phase which represents the last step in a workflow process
•Parent Phase: In case of a sub-phase, a parent phase of the sub-phase is selected. This property is available as a drop down field with all existing phases shown as options.
•Order: The order number of the phase. This order number represents the position of the phase in a workflow process.
After specifying the properties of the new phase, click on the Create button to add this new phase to the Phase” list. Additional configuration options for a phase are described under the Phase Configuration topic.
Phase Configuration
When a phase is selected from the phase list which is available under the Phases area, the related phase properties are shown on the right side.
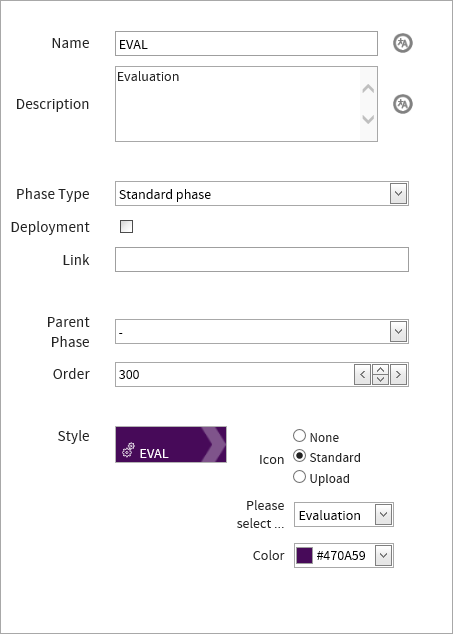
In addition to the properties defined while creating the task, two additional properties are available to be configured:
Description: Allows a user to provide a brief description of the phase. As the name of the phase is shown in the phase icon, it cannot be too long. Hence there is a description of the phase, which provides more information on it.
Deployment: When the deployment checkbox is activated for a phase, then a deployment icon is added to each of the files added to the task within that phase. If the Deployment Settings are correctly configured, then clicking on this icon will send the file to the deployment agent for distribution to the target clients.
Style: This configuration item allows a user to define the visibility style of a phase within the process navigation bar. This item has two parts:
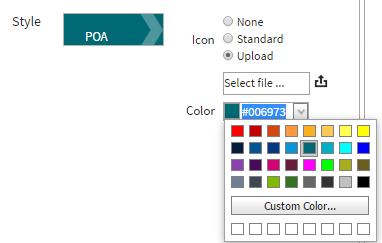
•Icon: A user can use an icon that should be shown in the phase tile. It is not mandatory to provide an icon, but if desired, a user can either select an icon from the built-in icons or upload and use a custom icon image.
•Color: Allow a user to select the color of the phase tile. This item is supported by a color selector tool.
Saving and discarding the changes
Save changes in the phase configuration by clicking on the Save changes icon. This icon is only activated when a change is made to any of the phase property.

Discard the changes by clicking on the Reset changes icon.

Datafield Assignment
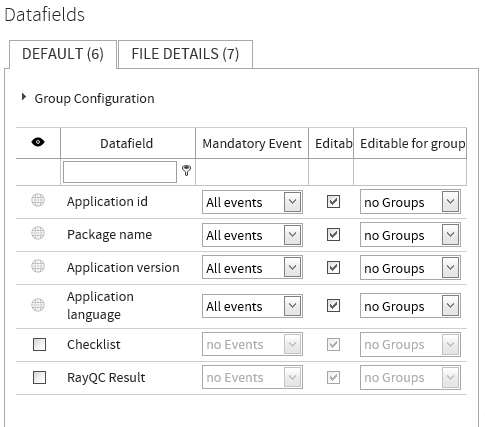
A list of datafields is shown under the datafields area of the Phases configuration page. This area allows the user to define the behavior of a datafield within the selected phase. Additionally, datafields which are not global in nature can also be assigned to the selected phase through this area. More information on datafields and its visibility options can be found in the Datafields chapter of this document.
Visibility of a Datafield
A global datafield is shown in all phases of the workflow process. Such datafields are shown with a globe icon. A datafield which is not global is shown with a checkbox. Selecting this checkbox will assign the datafield to the selected phase.
More information on datafields and its properties can be found in Datafields chapter of this document.
Mandatory Event
For a datafield, selecting an event from the drop down list under the Mandatory Event column will make the datafield mandatory for that particular event, e.g., in case a user wants input to a datafield to be mandatory, if a user wants to change its status to finished. For more information on events, please refer to the Workflow chapter of this document.
Editable
A user can control the possibility to edit a datafield within a phase. A datafield for which the Editable property is not set cannot be edited in the selected phase. An editable datafield can be edited by all users with edit permission to the selected phase. However, if only a certain permission group is selected from the Editable for groups drop down menu, then only that user group will be able to edit that datafield and others will not.