User management in RayFlow is done via the Users section of administration feature. This section provides its user with the necessary tools to accomplish following tasks:
"Users" Section Interface
The Users section interface is divided into three major areas:
•All Users: All the users belonging to projects (to which the current logged in user (administrator)is a member) are listed under this area
•All Projects: All the Projects to which the logged in user is a member are listed under this area
•User Properties: Permission groups and notification e-mail profile can be assigned to a selected user, under this area
Tools
Tools for user management are present at the bottom of the users section.
 |
 |
 |
 |
 |
 |
 |
Create new user |
Edit user |
Import User from AD |
Disable user |
Edit project |
Save |
Reset |
User Management
Adding New Users
To add a new user, click on the Create New User tool. The Create New User wizard is shown:
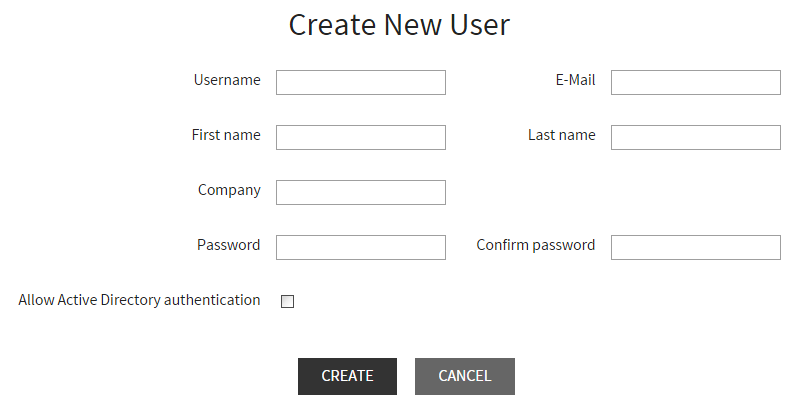
A user needs to provide input to following properties in this wizard:
•Username: Login name of the user
•First name: First name of the user
•Last name: Last name of the user
•Company: Company of the user
•E-mail: E-mail ID of the user
•Password: Provide a password for this user
•Confirm password: Re-enter the password
Current password strength: Length must be a minimum of 8 and a maximum of 15 characters. Password must contain at least one special character. It may contain 0 or more alphanumeric characters.
| • | Allow Active Directory Authentication: Enable user for active directory authentication |
Click on the create button to finalize adding this user to the All Users list.
More information on active directory authentication can be found in Working with Active Directory Users chapter.
Assigning a User to Project
To assign a user to a project, simply choose the user and then mark the checkbox next to the target project, which is listed under the All Projects area.

Editing User Properties
There are two types of user properties:
•Basic: Basic properties refer to the general properties of the user. A user can enter these properties while creating a new user. These properties are also shown on the My Profile page
•Advanced: Advanced properties include permissions, groups, and notification profiles assigned to a user. Advanced properties are discussed under the User Properties topic of this chapter.
To edit the basic properties select the target user from the All Users list and then click on the Edit User tool. This will show the user properties in Edit User wizard.
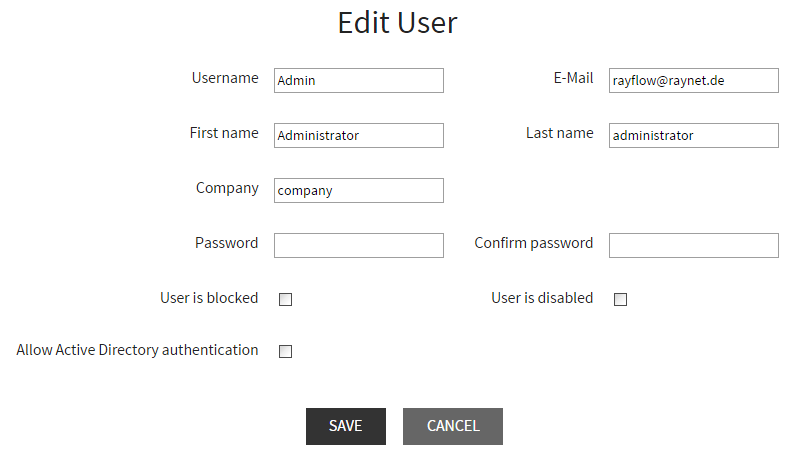
In addition to the properties defined in the Create New User wizard, additional properties are shown in the Edit User wizard:
•User is blocked: Enabling this property will block a user from logging in. After trying to log in with a wrong password for six consecutive times, a user is automatically blocked.
•User is disabled: Enabling this property will deactivate a user. The disabled user will no longer appear in the All Users list.
Disabling an Active User
To show disabled users in the All Users list, enable the Show disabled users checkbox. Enabling this option will add all users to the All Users list that had been disabled. They will be identified by a black trashcan.
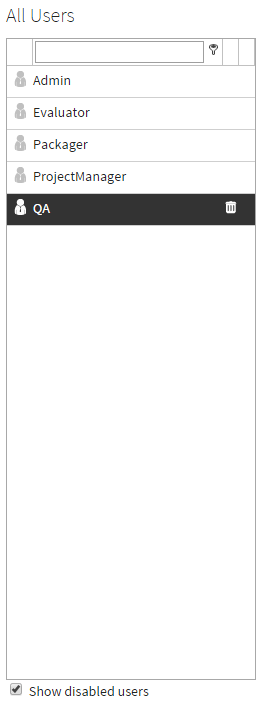
To disable a user select an active user from the All Users list and then click on the Edit User tool. Properties of the selected user are loaded in the Edit User wizard. The checkbox Enable the User has to be disabled to disable the user.
User Properties
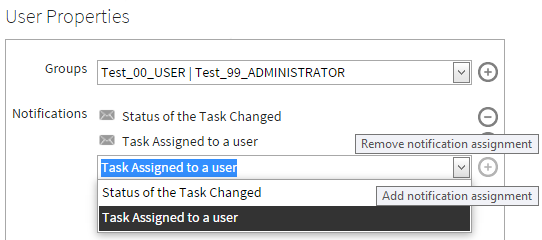
Permission group and notification profile are part of the User Properties area. Administrators can assign a user to the permission groups. Additionally, a new user group can also be created directly via this area. Furthermore, a user can be added to a notification profile, hence enabling him to receive notification e-mails depending upon the trigger configured for the added profile.

Assigning a Permission Group to a User
To assign a permission group to a user:
1. Select a user from the All Users list. Under the User Properties area and select the group(s) to be assigned.

Creating New User Group
To create a new user group from the User Properties area, select the add group tool, which is available next to the groups drop down menu.

This will show the Create New Group wizard.
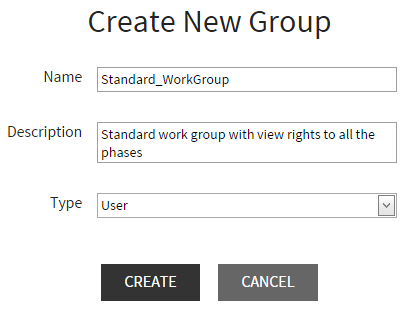
Specify the properties of the new group and click on the Create button to finalize adding the group to project. For more information on permission groups please refer to the Groups chapter of this document.
Adding User to a Notification Profile
A notification profile defines the trigger for sending out the notification e-mail to target users. A user can create this profile either via the Notifications feature in administration or through the My Notifications feature under the profile.
Notification profiles created via the aforementioned features are available as drop down items in the User Properties section. A user can simply select the target profile from this drop down list and click upon the Add Notification Assignment icon to finalize the assignment. Contrarily, to remove an assigned profile, a user should click on the remove assigned profile icon, which is available to the left of each assigned profile.
