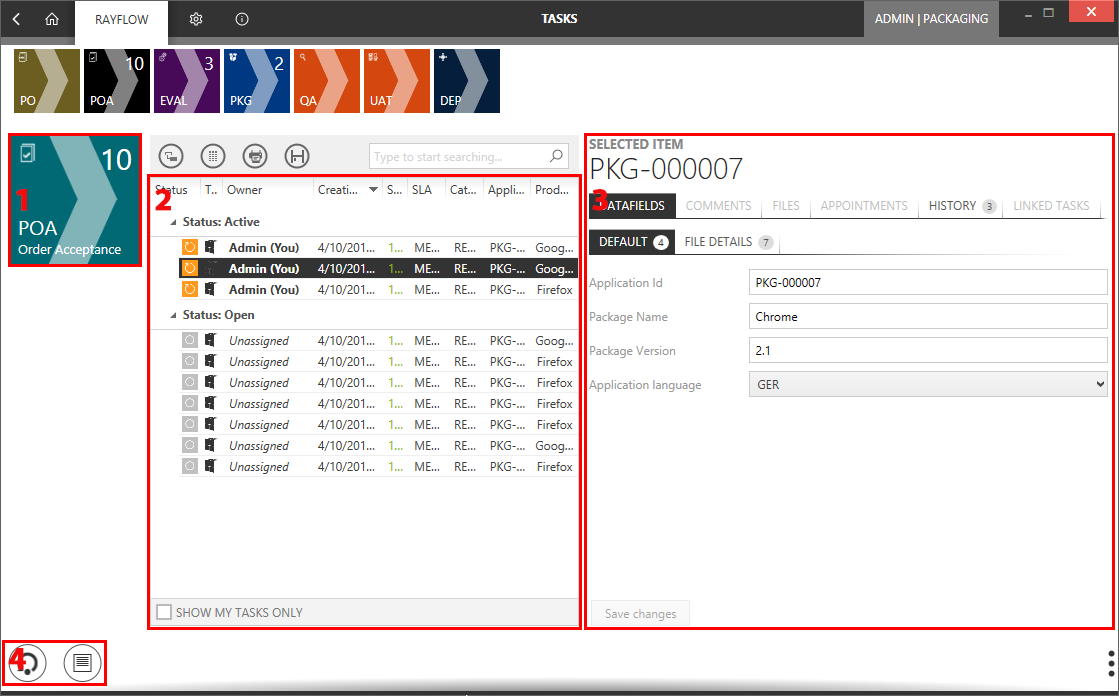
Each of the phase within the workflow, opens in the Tasks window. This window contains a list of tasks, which are currently associated with the respective phase. The window can primarily be divided into 4 major areas:
1.Selected Phase
4.Refresh button and the Hide/Show button
•Selected Phase: Phase that is currently open in the Tasks window
•Task Library: The Task Library lists the tasks that are currently assigned to the selected phase
•Task Details: The Task Details area includes all the details related to the selected task in the library. Furthermore, a user with permission to edit a task can edit its properties and add new information in form of comments and files. The task viewer is subdivided into four tabular sections: Datafields, Comments, Files, Appointments and History.
•Save Changes: This button gets activated when a property related to a task is modified. To finalize the changes, a user is required to click on this button, before continuing.
•Show my tasks only: If selected, the task library is filtered to show only tasks which are assigned to the current user
•Refresh button: Clicking on the Refresh button will update the window with the changes in the RayFlow server.´
•Hide/Show button: Can be used to hide or show the selected phase on the left.
Task Details
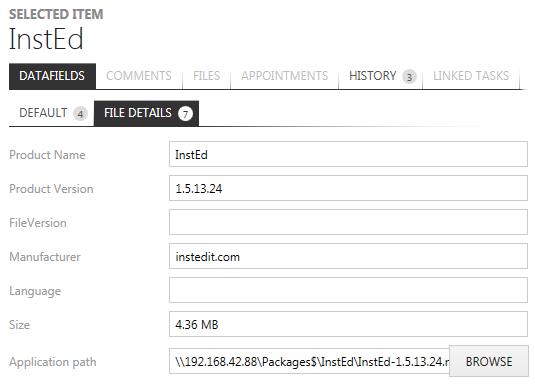
DATAFIELDS
Beneath the Datafields tab, all the available properties that are related to the selected task are shown. Based on the data fields configuration in the RayFlow web interface, a property field can either be mandatory or optional within that phase.
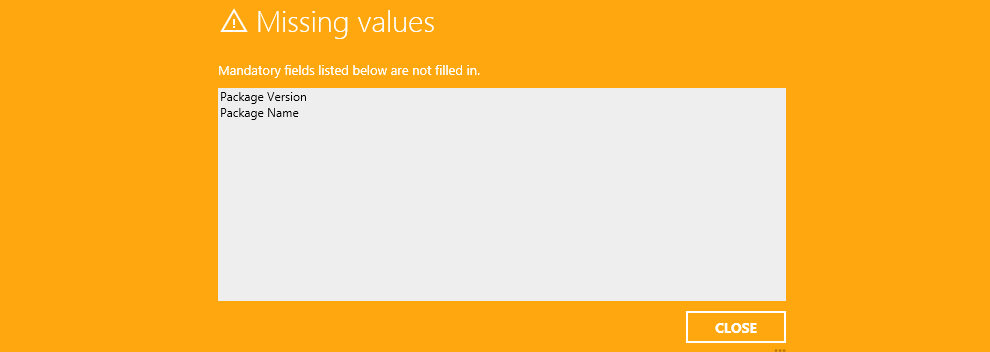
A user must provide an input for the mandatory fields to finalize that task in the current phase in order to either move it to the next phase of reject it to the previous phase. When a user attempts to finalize the task without filling in a mandatory field, the Missing values warning is shown. The Missing values warning will show the mandatory fields in which a value is missing.
Editing Property Fields
The following are the prerequisites to be able to edit property fields of a task:
•The user needs edit permission for the phase, in which the targeted task is currently located
•The task must be assigned to the user
When a property field is edited, the Save changes button is enabled. To finalize and save the changes made, a user must click upon the button. In case, the user forgets to save the changes and tries to leave the current view, a message is prompted, asking if the changes should be saved or discarded.

COMMENTS
The comments section of the task viewer consists of a comment viewer and an editor. The comment viewer lists the comments made by different stakeholders of the task. A comment is shown along with the user who has posted the comment and the time at which the comment was posted. Furthermore, users have the ability to enlarge and shrink the comment, to best suit their visual comfort.
To post a comment:
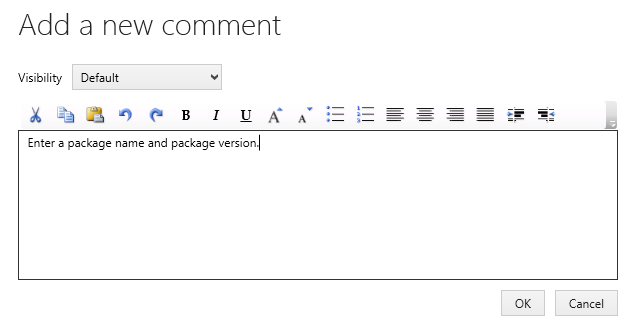
A user can post a new comment related to a task by selecting the Add new comment... button. This will prompt a Add a new comment dialog. After adding the desired comment, select the OK button to finalize adding it to the task.
FILES
The files section of the task viewer lists the file(s) that are uploaded under the task. This section not only displays the file name but also the user who uploaded it and the time when it was added.

Next to the file there are two options open and save as. Users can define the behavior of the open option by going to Settings > behavior > File handling. The save as option allows its user to save the file to the desired location.
|
Warning: Since the maximum file size for uploads is limited by the IIS configuration, the maximum size of a file is 2097151 KB (~ 2 GB)! |
APPOINTMENTS
Appointments related to the selected task is shown under the APPOINTMENTS tab. Each of the appointment is paired with its status, time stamp, user stamp and phase.
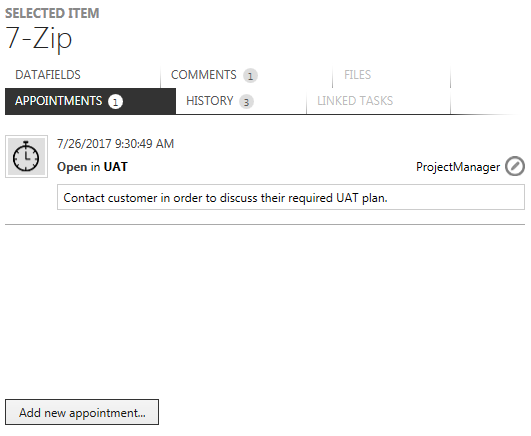
Adding a new appointment
To add a new appointment to the selected task, first select the APPOINTMENTS tab and then click upon the Add new appointment... button beneath it. This will open a Add new Appointment dialog. Fill in the properties related to the appointment and then click upon OK button to finalize creating the appointment.
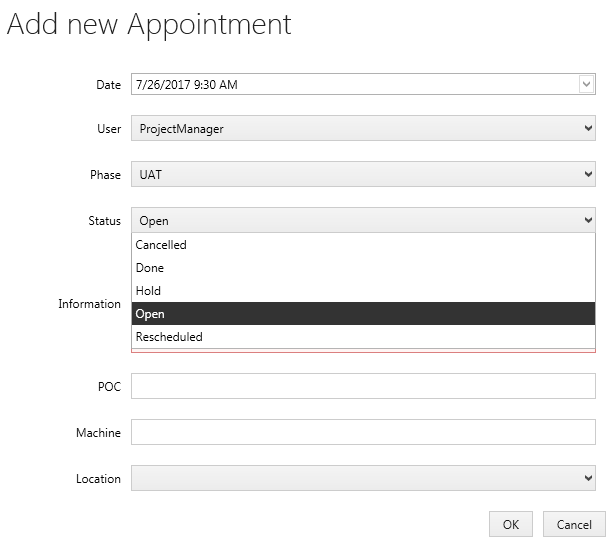
Further information relating to appointments and its properties can be found in the RayFlow Web Administration and Configuration guide.
Editing an existing appointment
To edit the properties of an existing appointment, click on the Edit Appointment icon, next to the User property of an existing appointment.
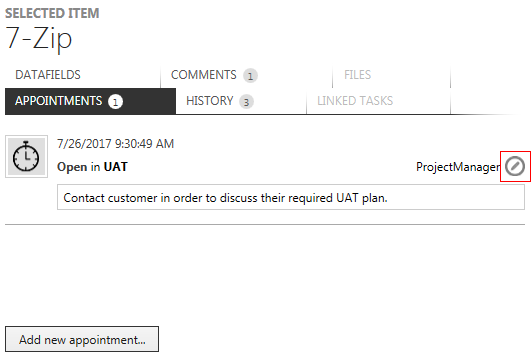
This will open the selected appointment in edit mode through the Edit Appointment dialog.
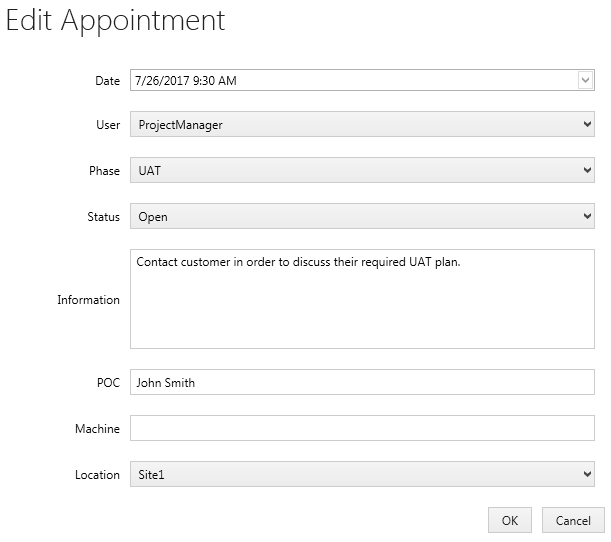
Edit the appointment properties and then click upon the OK button to finalize changes made to the appointment.
HISTORY
The history section of the Task Viewer displays the history of the tasks status changes.

