This section of the document describes various functional options which are available to users to work with tasks within the library:
Tasks Library Context Menu
When right-clicking a task within the Task Library, a context menu is shown.
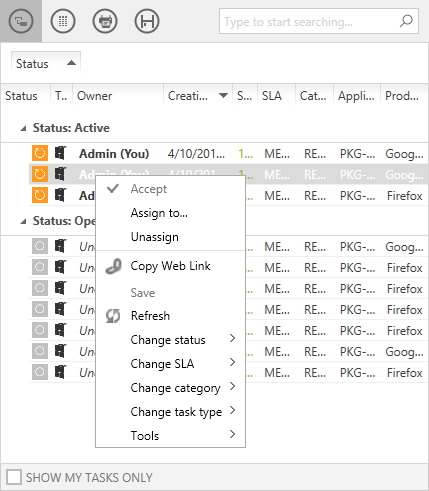
The context menu allows a user to execute the following functions:
•Accept: Allows a user to accept an assigned task
•Assign to: When selected, opens the User Selector. Select a user from the Selector to assign the task to that user
•Unassign: When selected, the status of the task is changed back to open
•Copy Web Link: The web link to the task is copied. This web link can be used to directly load the task in a web browser
•Save: Save the changes made to the task
•Refresh: Refresh the task properties
•Change Status: Change the status of the task
•Change SLA: Change the SLA of the task
•Change Category: Change task category
•Change Task Type: Change task type
•Tools: Open an associated tool
•Deploy: Deploy package on the target deployment tool
Please note that a functional option in the context menu is enabled or disabled, based on the status of the task and permissions that the logged in user has on the task.
Tasks Library Tool Bar

Advanced Sorting
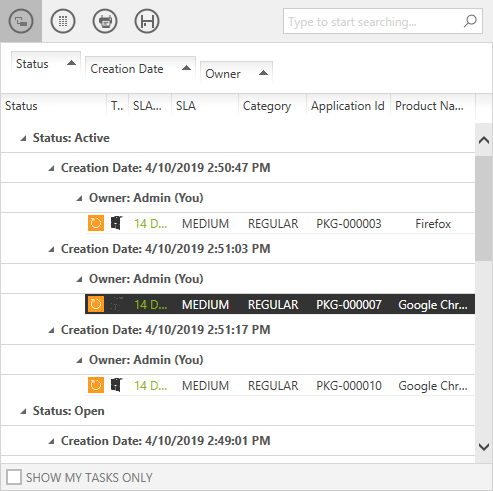
Advanced sorting allows a user to sort tasks within the library based upon the task properties. To use this function, click upon the Advanced Sorting tool in the toolbar.

Selecting this function will open the sorting bar. Within this bar, a user can drag and drop task properties and based upon its placement with respect to the other properties, the tasks within the library will be sorted. As shown in the image below, when a user drags a property from the column header to the sorting bar, blue arrows are shown to indicate the placement of the property.
To manage columns of the tasks library list
The position of each column can be changed by dragging it to the desired place. While dragging, blue arrows indicate the target position when the column is dropped at this point.

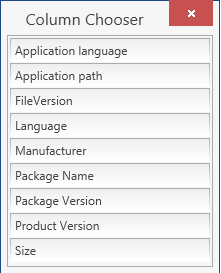
Click on the Column Chooser icon to display the Column Customization menu. It contains all available columns that are not displayed in the current list setting. To add a column to the view, simply drag it from the menu to the header section of the library. To remove a column, drag the column header to the column menu.
To print the Tasks Library view contents

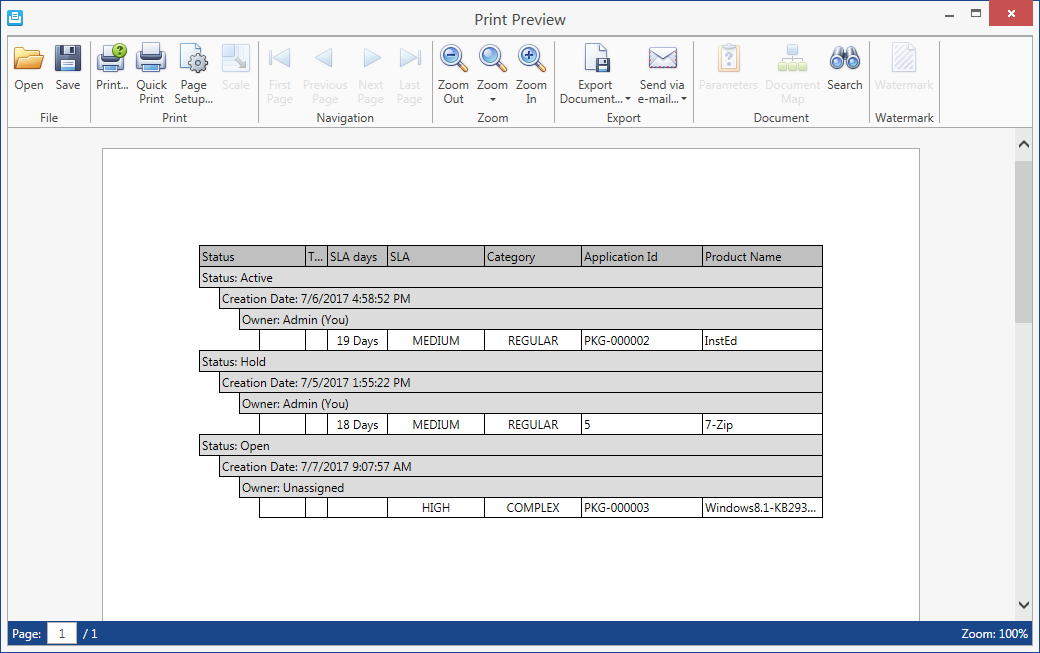
To print the currently displayed content of the Tasks Library view, hit the Print icon. A Print Preview dialogue is shown, which allows a user to select the desired printer and printing options.
To export the tasks library view contents
Exporting the Tasks Library view contents can be handy for communication on certain items or structures.

The currently displayed contents of the Tasks Library view can be exported to the following formats:
•Excel
•HTML
•CSV
To export data:
1.Click on the export icon.
A dialogue opens, in which the desired format and target location for the export can be selected.
2. Click OK to start the export.
To filter the Tasks library content
Either use the column value filter to reduce the displayed library content to a certain subset, or use the keyword search field.

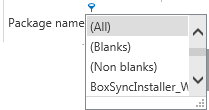
To filter contents by column values, move the mouse pointer over a table header. The filter icon appears. Click on the filter icon to see the set of value options available in this column. Select one of the entries to reduce the displayed library contents to those projects that have the selected column value.
If the column filter is active, the filter icon is permanently displayed in the column header. Open the filter options to see the currently active filter value named above the list of available values. To remove the filter, click on the (All) option or simply select the Cancel icon ( ) within the filter ribbon available at the bottom of the library.

Column filters can be combined from several column headers.
For advanced filtering, use the Filter Editor of the Tasks Library. Using this editor, the user can write and customize the query to filter the library.
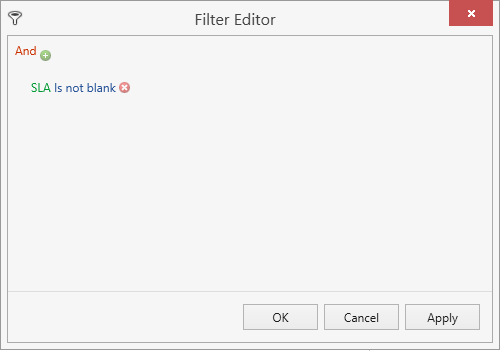
The Filter Editor can either be called through the column header context menu or from the filter ribbon by selecting the edit icon ( ).
).
To filter the Tasks Library by a keyword, enter it into the input field at the upper right corner of the list actions area. Click on the magnifier icon or hit enter on your keyboard to search for the keyword within all displayed project properties. To deactivate this filter, remove the keyword and use either the magnifier icon or the enter key on your keyboard.
Group Panel Context Menu
To show the Group Panel, select the Show Group Panel option from the Column Header context menu. When right-clicked upon, a context menu is shown:
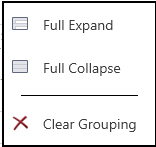
The context menu is disabled when there is no grouping of library contents. When enabled, the Full Expand option expands the grouped library contents, the Full Collapse option collapses expanded groups and the Clear Grouping option clears any grouping in the library.
Refresh

The contents of the Tasks Library are not refreshed periodically, but automatically after certain events (e.g. when you change a package status). To refresh the list content manually, use the refresh button available on the bottom-left corner of the task window.