On the sidebar, click on Configuration > Normalization rules. Then select an existing normalization rule by marking it in the circle located in the front of the row and click on the Edit button located on the top of the page. The Edit normalization rule dialog will be opened.
The Edit normalization rule dialog is divided into the General tab and the Advanced tab.
General Tab

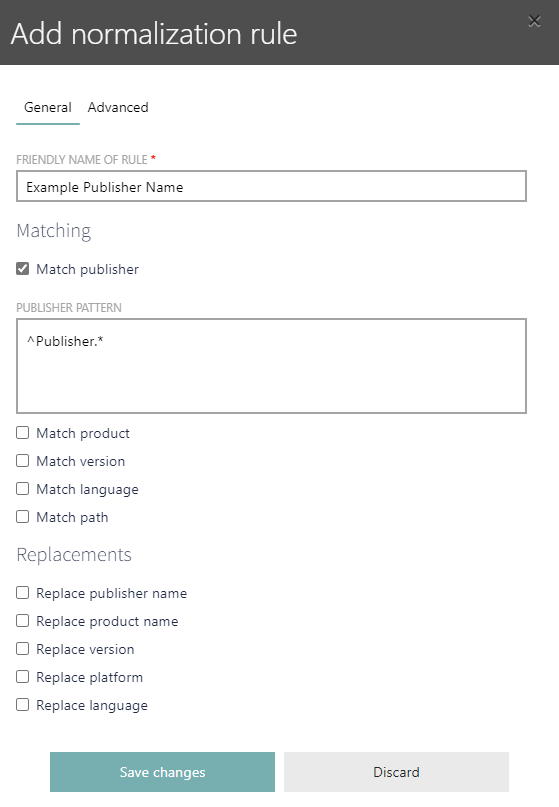
The following information can be found in the General tab of the Edit normalization rule dialog:
•Friendly name of rule: A human friendly name describing the rule.
•Matching: This defines the options that will be selected by the rule. The selected options can be defined using regular expression.
oMatch publisher
oMatch product
oMatch version
oMatch language
oMatch path
•Replacements: Select one or more of the options in order to replace it for all results received. It is possible to use variables when defining the replacement (for example: {product} for the product, {platform} for the platform, {major} for the major version number, etc.).
oReplace publisher name
oReplace product name
oReplace version
oReplace platform
oReplace language
It is possible to select multiple match and replacement options for one rule.
Advanced Tab

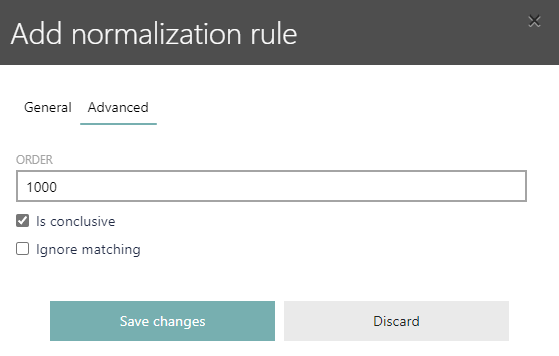
The following information can be found in the Advanced tab of the Edit normalization rule dialog:
•Order: Used to define priority of the rule. The higher the number the higher the priority.
•Is conclusive: If this checkbox is checked, once a rule has a match, the execution is stopped.
•Ignore matching: If this checkbox is checked, matching fingerprints will be ignored. If unchecked, the fingerprints will be recognized.
•
After all relevant information have been added, click on the Save changes button to save the changes to the normalization rule.