RayQC uses the result of Checkpoint and Data Field element types to calculate the result state of the whole checklist. Therefore, if a Data Field is missing, or a Checkpoint result has not been inserted yet, a checklist is not complete, and thus cannot be PASSED.
In order to set user input optional for elements without actual influence for the checklist result, for example for items which collect additional meta-data, there are two item properties:
•Evaluate this element for Checkpoint elements
This option is active by default, which leads to the standard behavior of using the Checkpoint result for the overall checklist result calculation.
Deactivating this setting leads to the removal of any result expectation for the item. Therefore, in the Checklist Viewer interface, there is no bold font style for both result options.
Additionally, optional Checkpoint results may still be used to define conditions that control the availability of other checklist items. If no result is selected, the conditional statement cannot be evaluated, which means that the conditional element will not be displayed at all. If a user selection is present, the conditional statement is evaluated according to the standard condition execution ruleset.
|
Note: It is not possible to activate the exception option when the Evaluate this element option for an item is not enabled. |
•Allow this Data Field to be empty for Data Field elements
This setting has no visual effect on the items box within the Checklist Viewer interface. However, if it is activated for a Data Field element, the checklist evaluation can be terminated without providing any result content for the element.
Both are handled the very same way: The irrelevant checklist item is displayed within the general checklist flow, and users may very well specify a result. However, if an optional value is not set, the checklist can be finished, and therefore result in PASSED or FAILED.
To Activate This Option
1.Within the Checklist Editor, scroll to the item that has to be defined as optional.
2.Select the element with a left-click, and open its properties tab from the Details pane at the right-hand side.
3.Activate the Allow this Data Field to be empty checkbox
4.Save the changes made to the checklist and switch to the Checklist Viewer mode.
5.Leave the manipulated item untouched, and set all other checklist item results to evaluate to true. The checklist result is automatically set to PASSED even though the optional item has not been answered.
6.Enter a result (text or Yes / No decision) for the manipulated item. Observe the unchanged checklist result state.

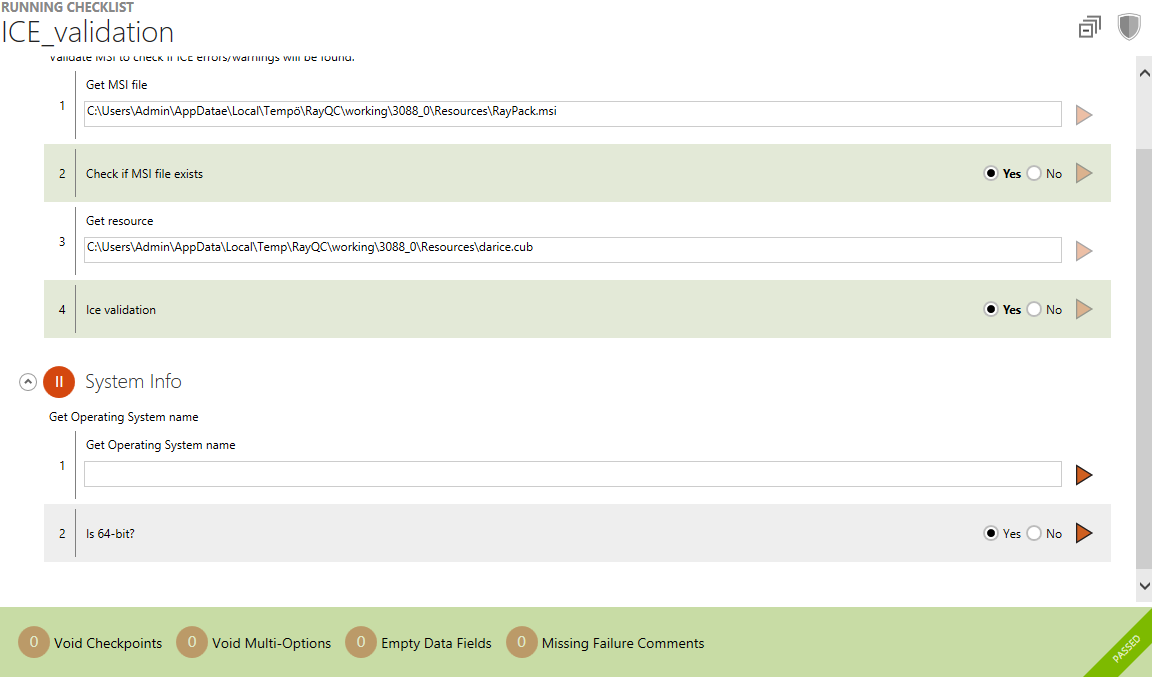
The screenshot above shows a checklist with two optional items:
Number 2 in the second group is an optional Checkpoint element, number 1 is an optional Data Field. Both are not answered and yet the checklist result PASSED is available.