Testing areas section
In the Testing areas section users can decide if they want to perform either collision or os readiness checks or both. This can be done by simply selecting or deselecting the respective areas. If an area has been deselected, it is grayed out. By default, both areas are selected.
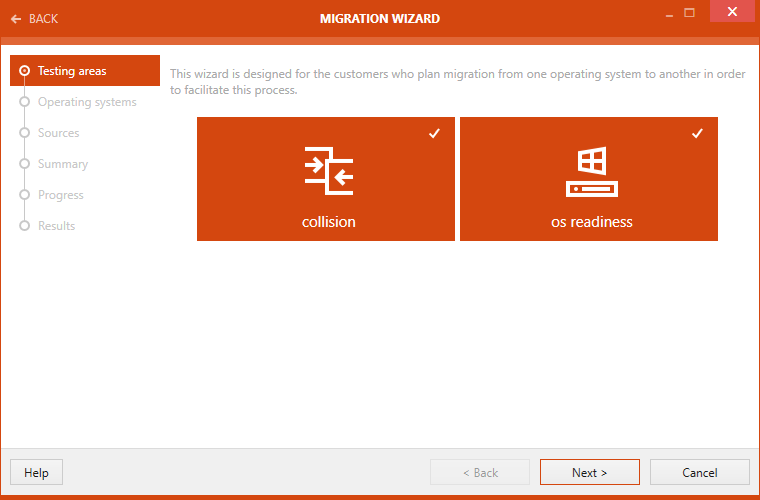
After the Testing areas have been selected, click on the Next > button to proceed.
Operating Systems Section
The Operating systems section will only be available if os readiness or both have been chosen as testing areas. If only collision has been chosen, this step will be skipped.
In this section select the target operating system. It is possible to select multiple operating systems. The operating systems are selected by clicking on them. The selected operating systems are highlighted like shown in the screenshot below.
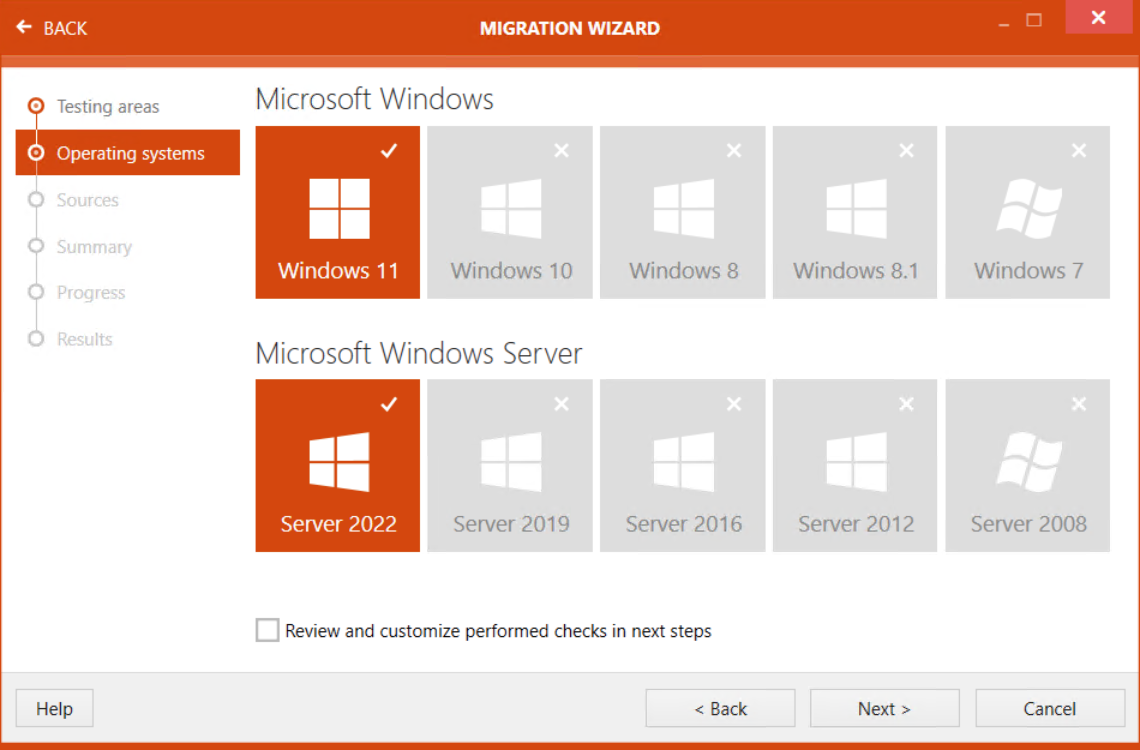
After all operating systems for testing have been selected, click on the Next > button to proceed.
Sources Section
In the Sources section, the packages for testing are selected.
The Select Folder window is opened by clicking on the Browse button [...]. In the Select Folder window, browse to the folder that contains the packages for testing. Click on the Select Folder button.
All packages, including any transforms, contained in that folder are now available for testing. A package can be deselected by unchecking the checkbox next to it. Underneath the list of packages that are contained in the folder, there is a Select all and an Unselect all option.
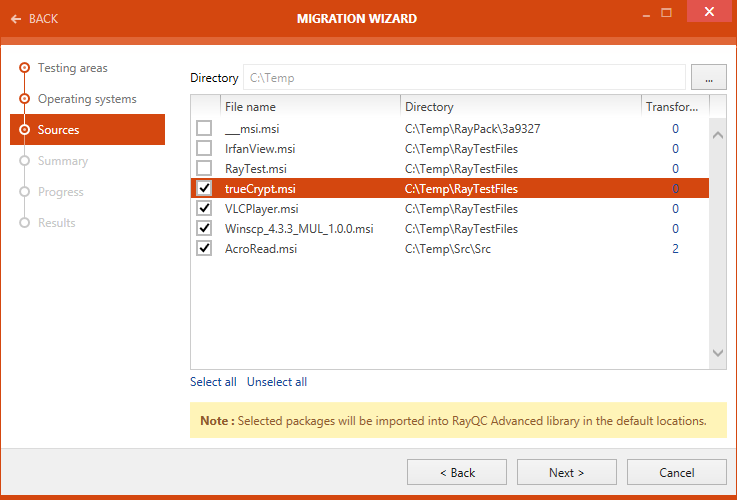
When all packages for testing have been selected, proceed by clicking on the Next > button.
|
Note: In case of software collision tests, all software that has been imported into the RayQC Advanced library is chosen as target packages (including the newly imported packages from the Source screen). |
|
Note: All packages imported via the MIGRATION WIZARD are located in the migration folder in the Software library tab. |
Summary Section
Summary section is now available. Test criteria are summarized under this section. This summary includes information on the testing areas, the directory and a list of the files against which the test will be carried out.
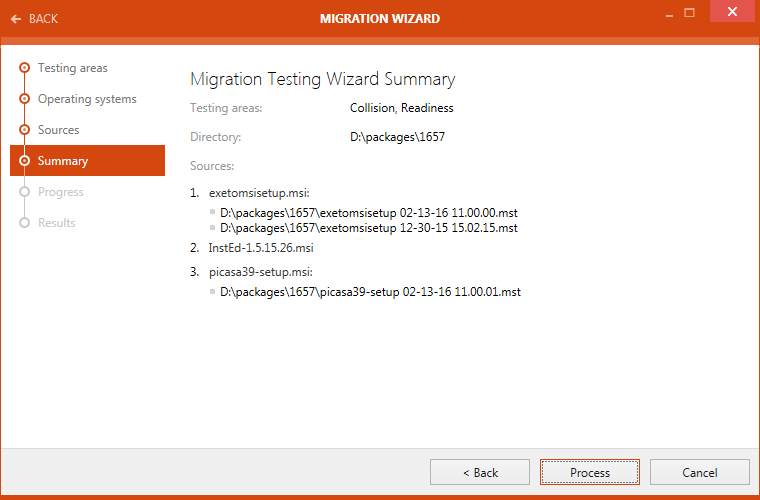
Click on the Process button to start executing test.
Progress Section
The Progress section will be shown as long as the test is being executed. The progress of the test is shown.
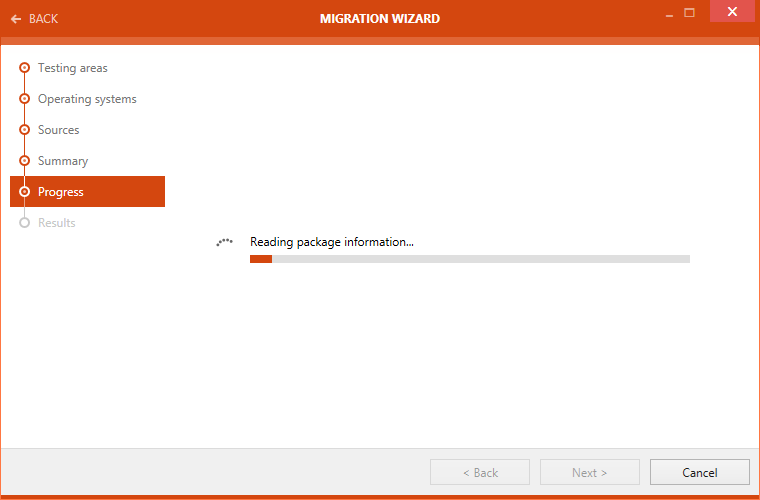
When the test has been finished the screen will automatically change from the Progress to the Results section.
Results Section
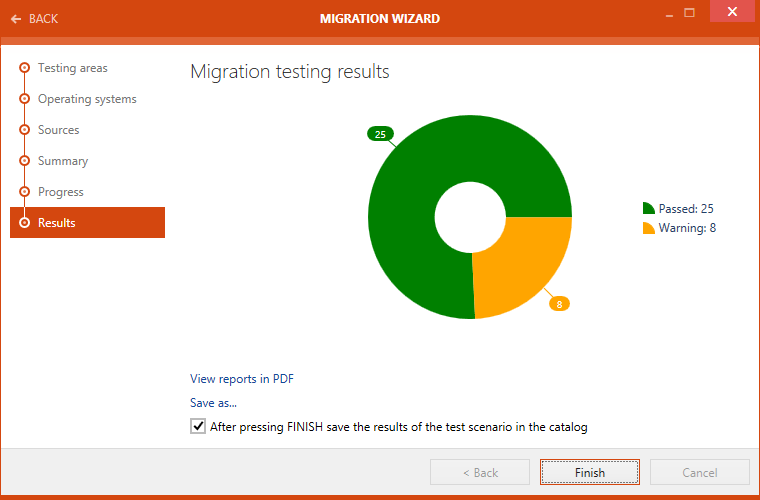
After the testing is finished, the result will be shown in the Results section. There are different options available:
•View reports in PDF: Click on this option to open the test result in .pdf format.
•Save as...: Click on this option to export the test result in one of various available formats. Possible formats are: .pdf, .docx, .doc, .html, .xps, and .xml.
If the After pressing FINISH save the results of the test scenario in the catalog option is checked the results of test will be saved in the catalog after clicking on the Finish button. Untick the option if the result should not be saved in the library. By default the checkbox is ticked.
Click on the Finish button to close the MIGRATION WIZARD.
|
Note: After Finish has been clicked there will not be a redirection to any screen. |