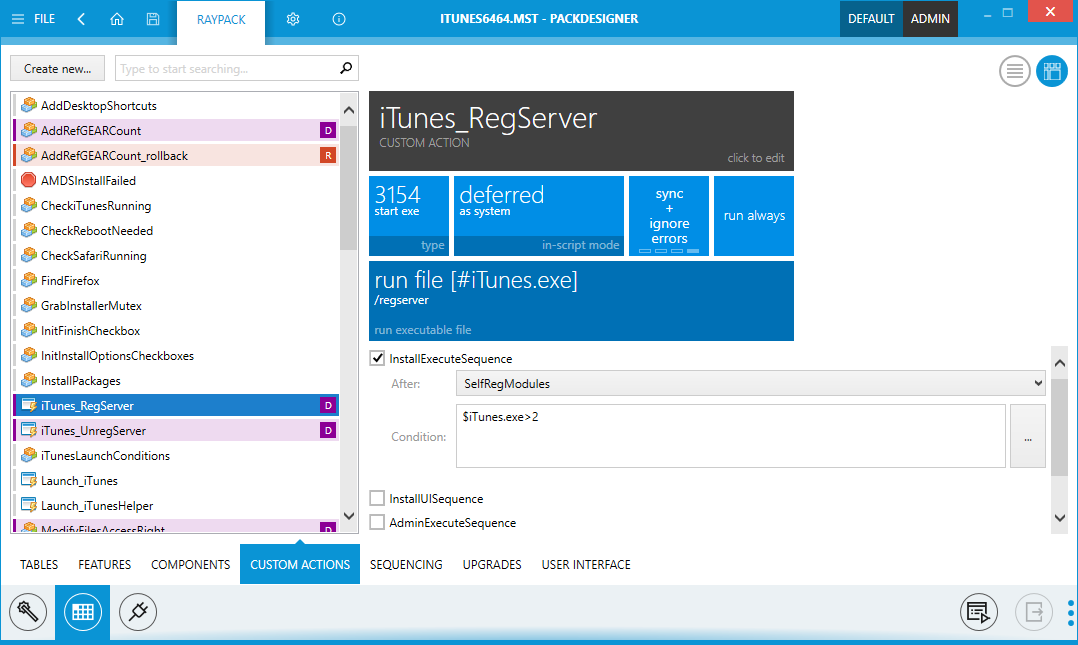
The CUSTOM ACTIONS view is designed to provide an easy to handle interface for packagers who need to implement advanced routines and procedures for the fulfillment of complex packaging requirements. Custom action logic itself is hard enough to handle, therefore the interface has to support the packagers as well as possible.
The CUSTOM ACTIONS view is separated into a navigation area on the left-hand side and a details pane for action settings on the right. This details pane is equipped with two basic view designs. RayPacks innovative tile based view, and a classic view - based on a table structure with label and value columns. Users may switch between these views on the fly by clicking the controller buttons in the upper right corner of the view.
![]() The default setting: View custom actions in a tile based details pane (as shown in the screeshot above).
The default setting: View custom actions in a tile based details pane (as shown in the screeshot above).
Switching to this view is done by clicking on the tile icon on the right.
![]() The classic view: View custom actions in a table based details pane.
The classic view: View custom actions in a table based details pane.
Switching to this view is done by clicking on the row icon on the left.
The list area of already existing custom actions displays the name and the type icon for the custom action. Custom action objects are by default ordered by their name. The type icon indicates purpose and procedure of the specific custom action.
![]() VBS script
VBS script
![]() Set folder
Set folder
![]() JS script
JS script
![]() Executable
Executable
![]() Error message
Error message
![]() DLL
DLL
![]() Set property
Set property
Additional icons are displayed on the right of a custom action name if the run-mode is not set to the default (immediate).
![]() Deferred
Deferred
![]() Rollback
Rollback
![]() Commit
Commit
Please refer to the specific help topics to read details about standard manipulation options for custom actions.
Searching for Custom Actions
The pool of custom actions stored within a complex software packaging project can actually be quite voluminous. Therefore we added a search functionality to this view. To filter the list of custom actions to those containing a specific keyword within the custom action name, users simply use the search field above the list area. The live search starts to filter the list as soon as a key is entered, narrowing the result list down with every additional key. This intuitive way of searching is used in several RayPack views, since it is considered to be the fastest, most convenient, and intuitive method to filter lists and tables.
To deactivate the keyword filter, users simply remove the search string from the input field. There is no need to hit Enter, the display update is executed immediately.
Sequencing of Actions
Position, condition and sequence of each Custom Action can be controlled directly from this view. A set of checkboxes is responsible for 5 available sequences:
•InstallUISequence
•InstallExecuteSequence
•AdminUISequence
•AdminExeucteSequence
•AdvtExecuteSequence
After checking a checkbox, two additional fields are shown for each of affected sequences:
•After: This option determines the relative element after which the action is executed.
•Condition: This option determines the condition of execution
