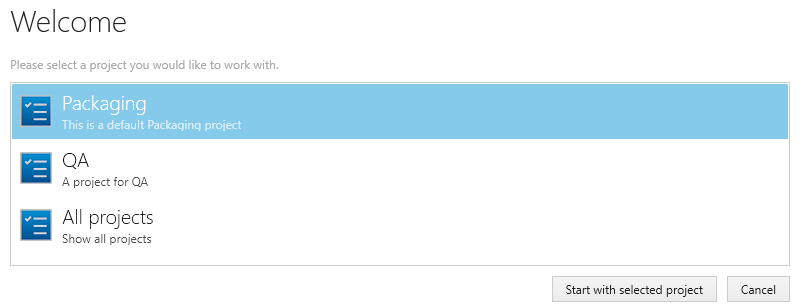
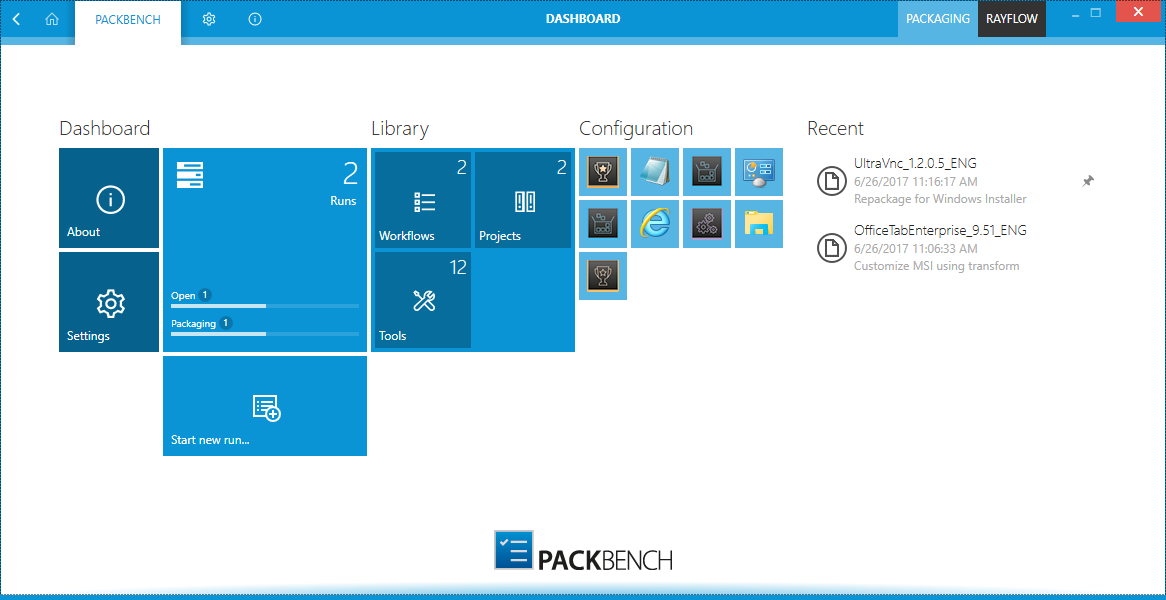
Once PackBench is installed on a machine, launching the program executable form the application installation directory (e.g., C:\Program Files (x86)\PackBench\PackBench.exe) invokes the PackBench Welcome screen. Select the target project and click on the Start with selected project button to open the project and continue to the home screen.

If the connection to the database is not available when PackBench is started, the following error message will appear. It is possible to launch PackBench in an offline mode by clicking on the IGNORE button. If this is done, only the settings and the about tile will be available and all other tiles will be grayed out. Furthermore, a red warning which states could not connect will be shown in the upper right corner where normally the selected project is shown. By clicking on this warning, PackBench will try to connect to the database again.

For those who have been previously working with other RaySuite applications, the layout of the home screen should be familiar, since it is a common interface type for all products of the RaySuite family.

Once PackBench is up and running, the application screen contains some basic areas which are always available, even though the actual content of an area varies from view to view.
The Main Toolbar
Throughout PackBench the Main Toolbar is shown. Depending on the contents of the view shown, the Main Toolbar adds or removes menu items dynamically. The items shown below are always present on the Main Toolbar.

Home
With this button it is possible to return to the Home Screen.
View History
With a left-click on the arrow button, users navigate one step back within the history of recently opened views. Right-clicking the arrow displays the recently visited views and allows to return to a specific view from that list.
This view history is limited to those views without project relation or with relation to the currently opened project. Thus, returning back to a view is not possible if it is called for a project that is no longer opened.
View Title
The view title specifies which content is currently shown as part of the active application context module.
Window Title
The window title displays the current scope of activity.
PROJECT
The currently active project is shown here. Left-clicking on the project opens the Welcome screen where the active project can be chosen.
RayFlow
Shows the name of RayFlow user currently connected within this instance. Read more about using PackBench with RayFlow in chapter Working with RayFlow.
Standard Window Controls
The standard window controls allow to minimize, maximize, resize, and close the application window. The availability of each control follows the Windows schema for standard controls as known from any desktop application.
Application Context
This shows the main application context status which is PackBench.
SETTINGS
Loads the Settings view for PackBench.
ABOUT
Contains information about the currently active product instance.
The Content Area
The content area is the core for the actual application activity. According to the active application context it contains the dashboard (as shown in the screenshot at the beginning of this topic) or other functions of the application.