Once the Raynet One Data Hub Server is installed on a machine, launching the Web browser and navigating to the Server’s URL will navigate to the login screen of Raynet One Data Hub.
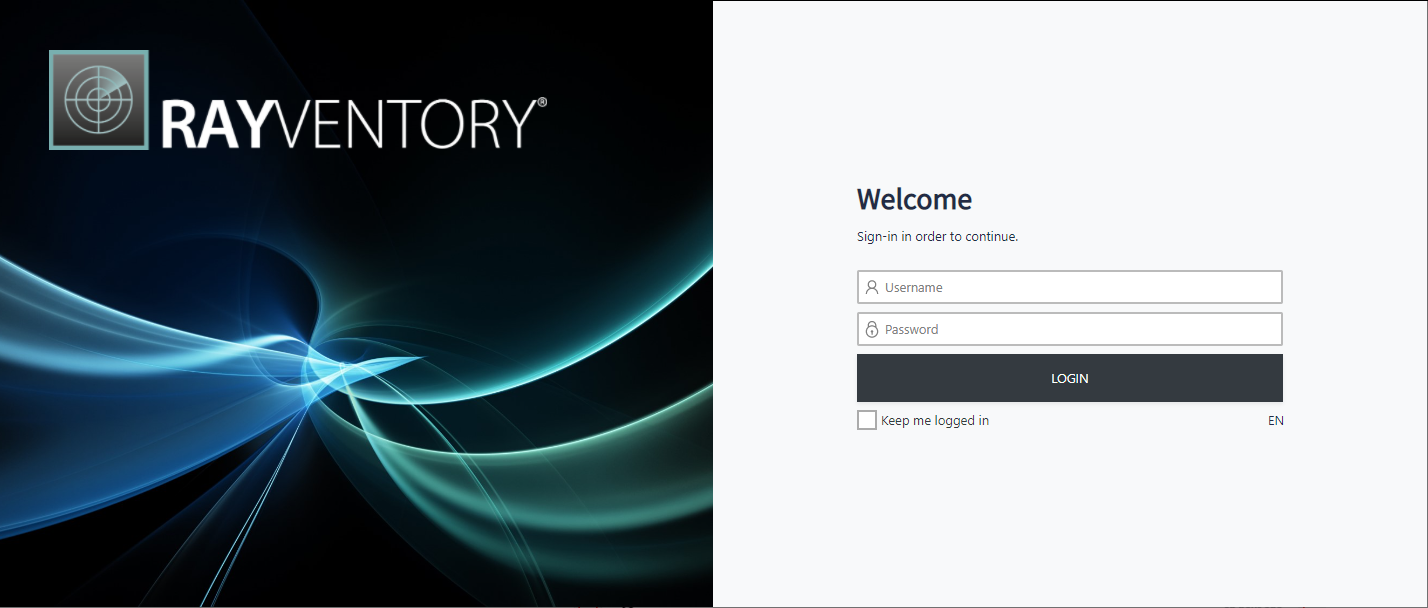
Enter your username and password and confirm them by pressing the LOGIN button. After a successful log-in the page redirects to the Home screen. You can also configure Raynet One Data Hub to remember your credentials, by selecting Keep me logged in before signing in. This will remember the session for next 7 days (the value can be further configured in the server settings appsettings.json, section TokenManagement -> rememberMeRefreshExpiration).
|
Note: While Raynet One Data Hub does not save your password directly, it is still not recommend to use this checkbox, especially when signing-in from a shared or untrusted machine. |
The login screen let you also change the UI language, which will be remembered for the session. In order to change the language, press the language caption (for example EN) and select the desired one. In this version, English, German, French, and Russian are available.
Working with Multiple Tenants
After the default installation, a default tenant is installed and pre-configured. Later on, more tenants can be added to add a separation layer between different projects, customers or other purposes. A user can have access to one or more tenants. The selection of the tenant happens initially after signing in. If your current user has access to more than one tenant, a selection dialog will be shown after a successful login (but before going to the Home screen).
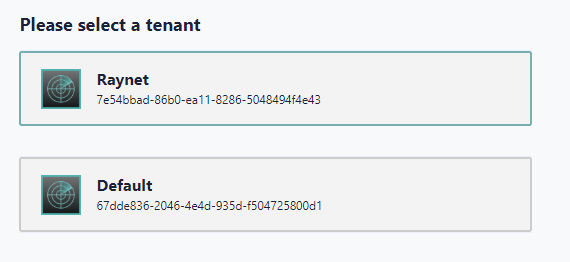
Click on the tile representing the required tenant/project and confirm by pressing LOGIN to jump to the Home screen.
Chapter The header shows how to change the current tenant after the user is signed-in.