This tutorial describes how to create a report with a visual PDF signature.

Create a Report Layout
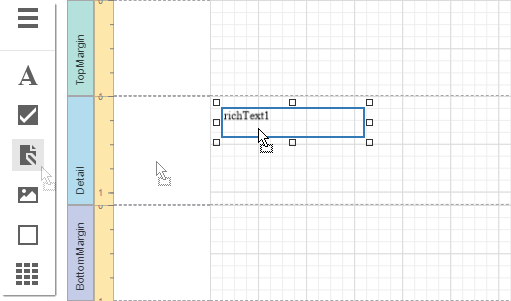
1.Drop the Rich Text control from the report controls Toolbox tab onto the Detail band.
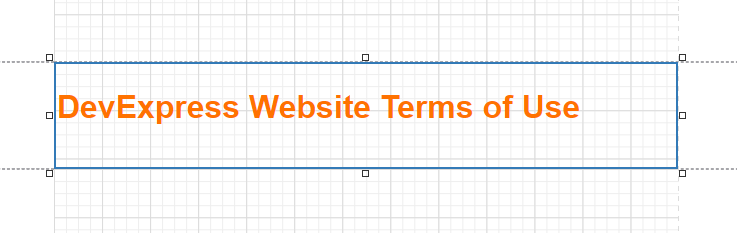
2.Double-click the control and insert the DevExpress Website Terms of Use text.
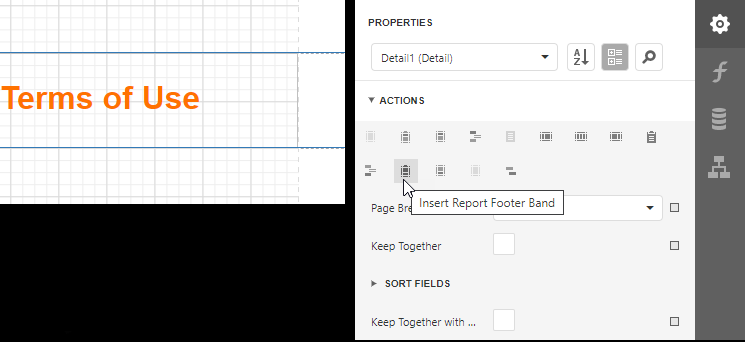
3.Select the Detail band. In the property grid, expand the Actions section and choose Insert Report Footer Band. Enable the footer band's Print at Bottom property.
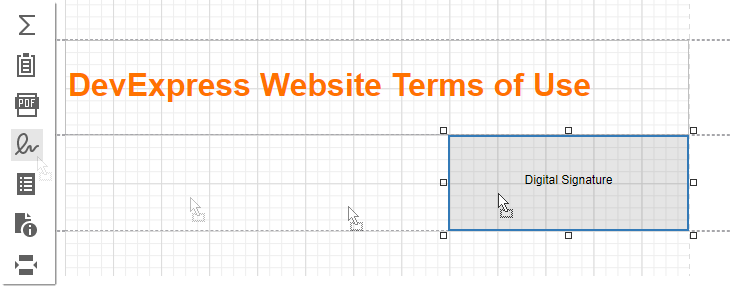
4.Drop the Pdf Signature control from the report controls Toolbox tab onto the Report Footer band.
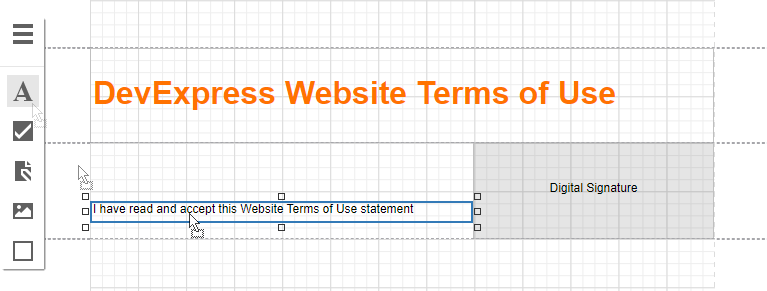
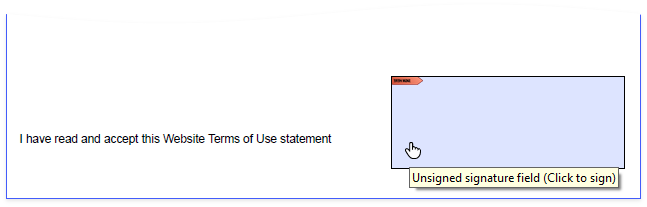
5.Place the Label control to the left of the Pdf Signature control and add the following text: I have read and accept this Website Terms of Use statement.
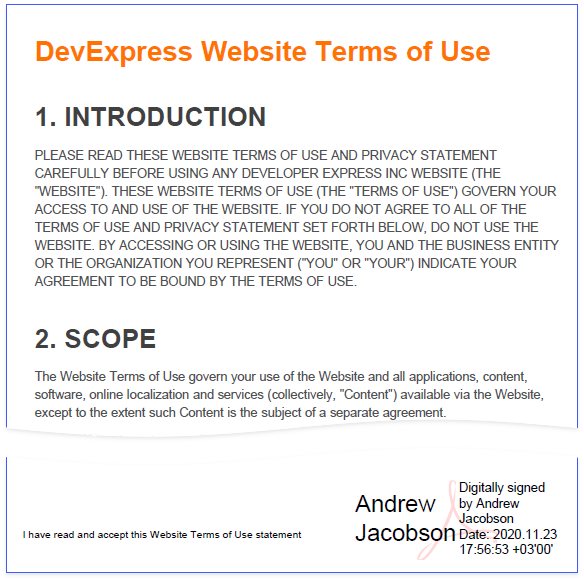
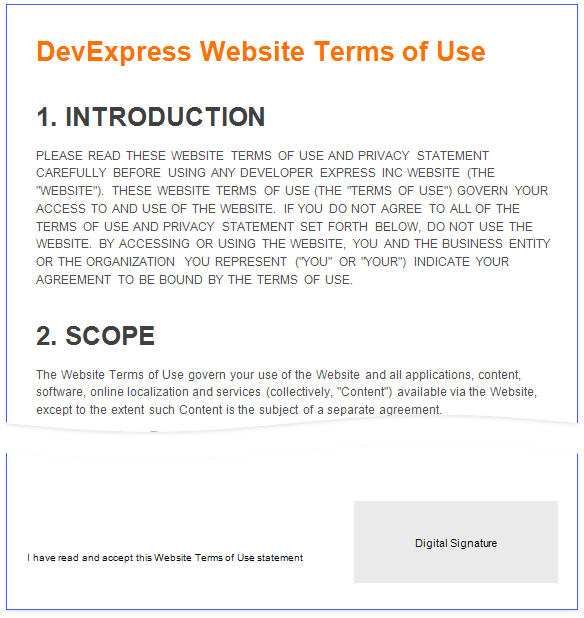
Open Preview to show the result.
Export and Sign the Report
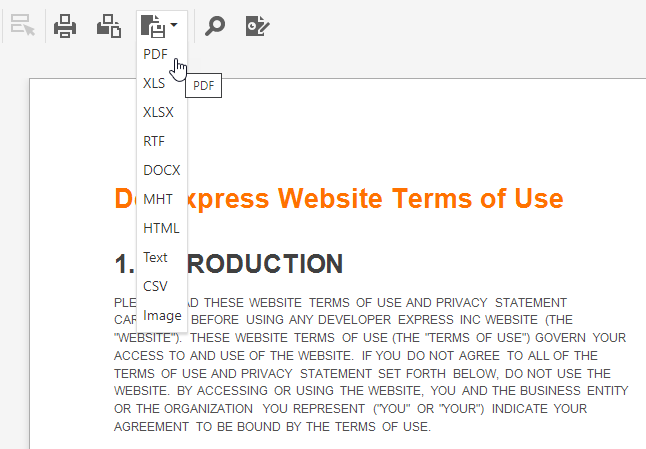
1.In Preview, expand the list with export formats and select PDF.
2.Open the exported document in a PDF editor and sign it.
Save and reopen the document to show the final result.