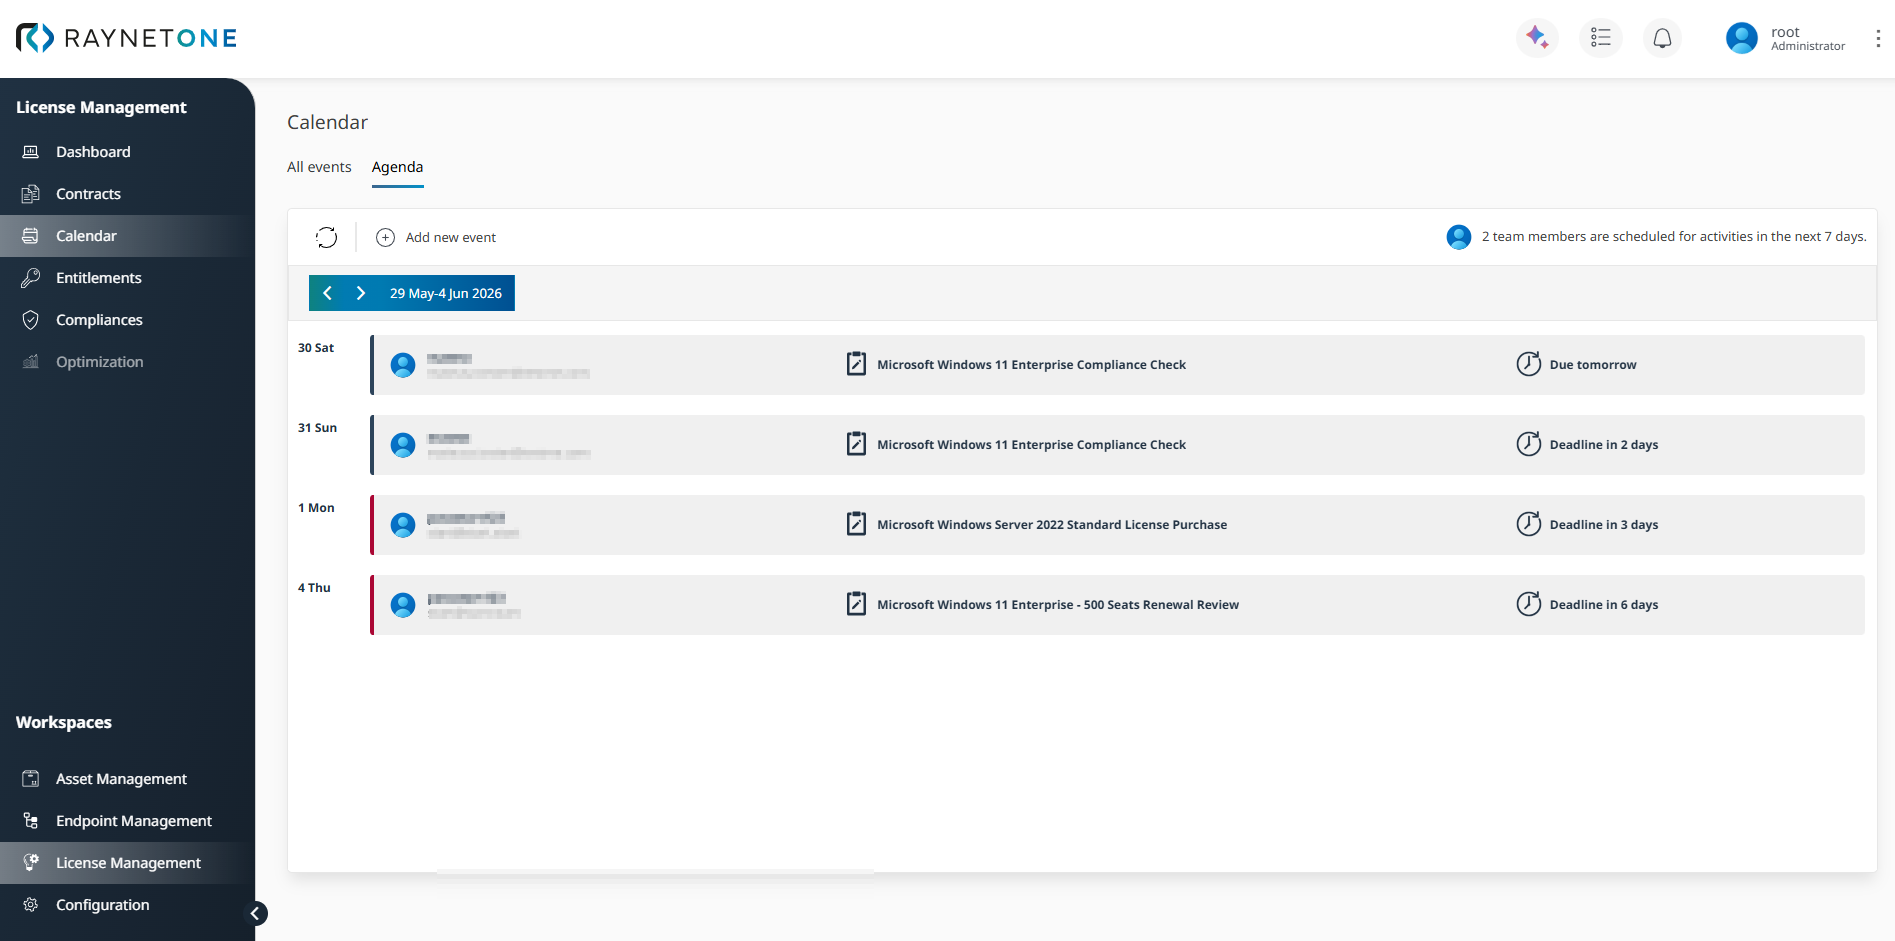
The Calendar in the License Management workspace provides a centralized, time-based view of all critical events across your license portfolio. It enables SAM teams to proactively manage renewals, expirations, contract uploads, and other time-sensitive activities to avoid compliance gaps and unnecessary costs.
Access via Workspaces > License Management > Calendar.
Calendar views
You can switch between the All events and Agenda tabs at the top of the Calendar page.
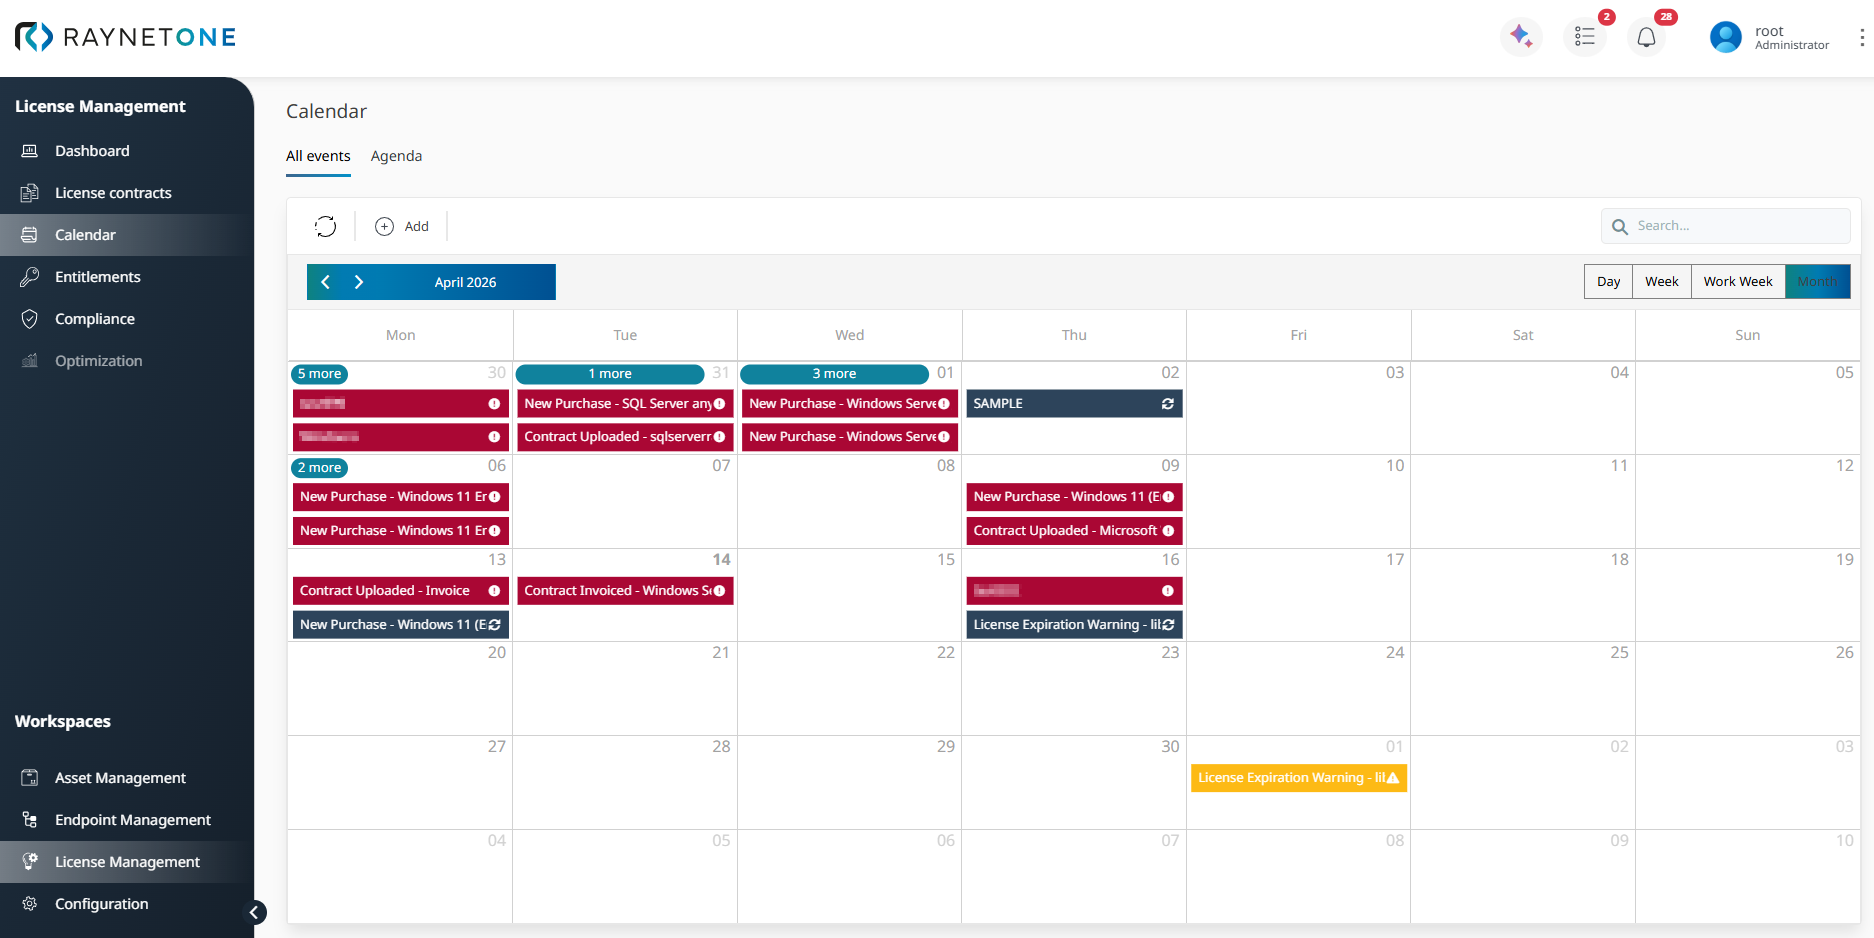
The All events tab displays license lifecycle events in a calendar format. You can switch between Day, Week, Work Week, and Month views to review events for different periods.
The Agenda tab provides a personal, chronological overview of upcoming events. It displays only events for which you are configured as a notification receiver. This makes the Agenda particularly useful for tracking events and deadlines that are directly relevant to you.
The color-coded indicators help you identify the event types:
•Blue: Status update
•Yellow: Action required
•Red: Activity log
Events are generated automatically from your license contracts and entitlements, including upcoming renewals, maintenance expirations, and contract-related milestones. You can also manually create events by clicking + Add in the toolbar.
The Calendar acts as an early-warning view for proactive license lifecycle management. It supports timely renewal planning, helps identify upcoming contract deadlines, and provides visibility into license-related activities that may affect compliance, costs, or budget planning.
Adding a manual event
You can manually create calendar events from both the All events and Agenda tabs. Both entry points open the same wizard and provide the same event configuration options.
To open the wizard, navigate to License Management > Calendar, select either All events or Agenda, and click + Add in the toolbar.
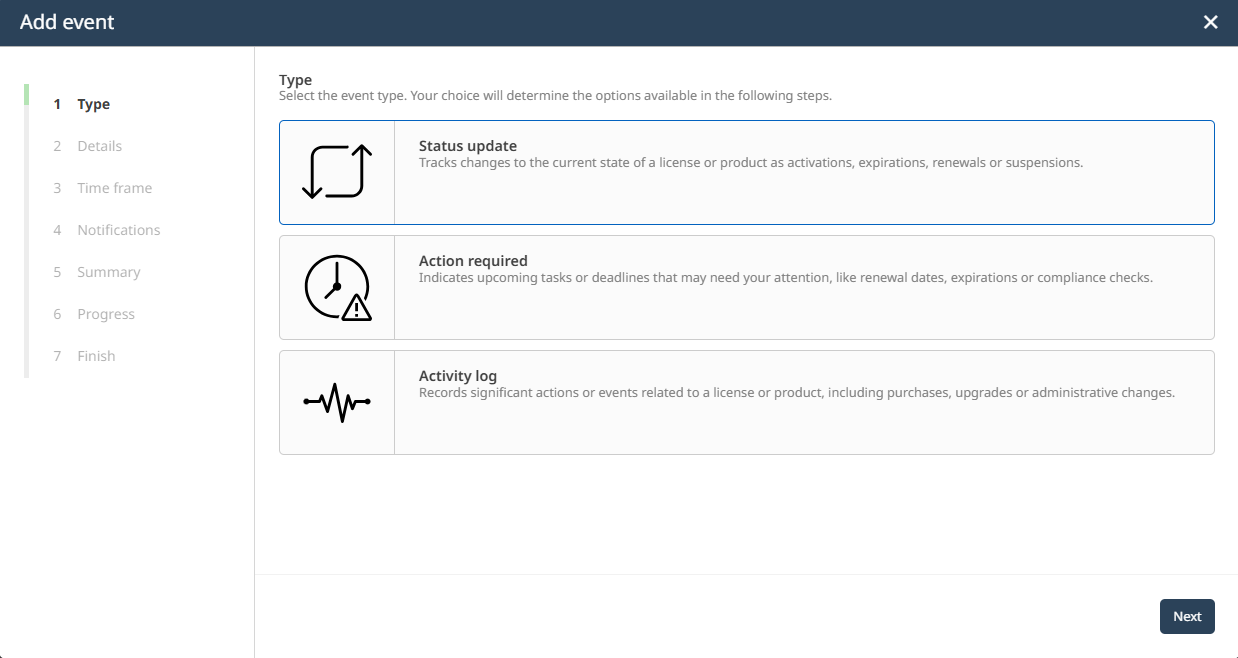
You can create three different types of manual events: Status update, Action required, and Activity log. All event types follow the same wizard-based process. The selected event type determines the event's purpose and label.
The wizard guides you through the following steps:
1. Type
Select the event type that best describes your purpose. Your choice determines how the event is labeled and categorized in the Calendar. The following types are available:
•Status update: Tracks changes to the current state of a license or product, such as activations, expirations, renewals, or suspensions.
•Action required: Indicates upcoming tasks or deadlines that need attention, such as renewal dates, expirations, or compliance checks.
•Activity log: Records significant actions or events related to a license or product, including purchases, upgrades, or administrative changes.
After selecting the event type, click Next to continue.
2. Details
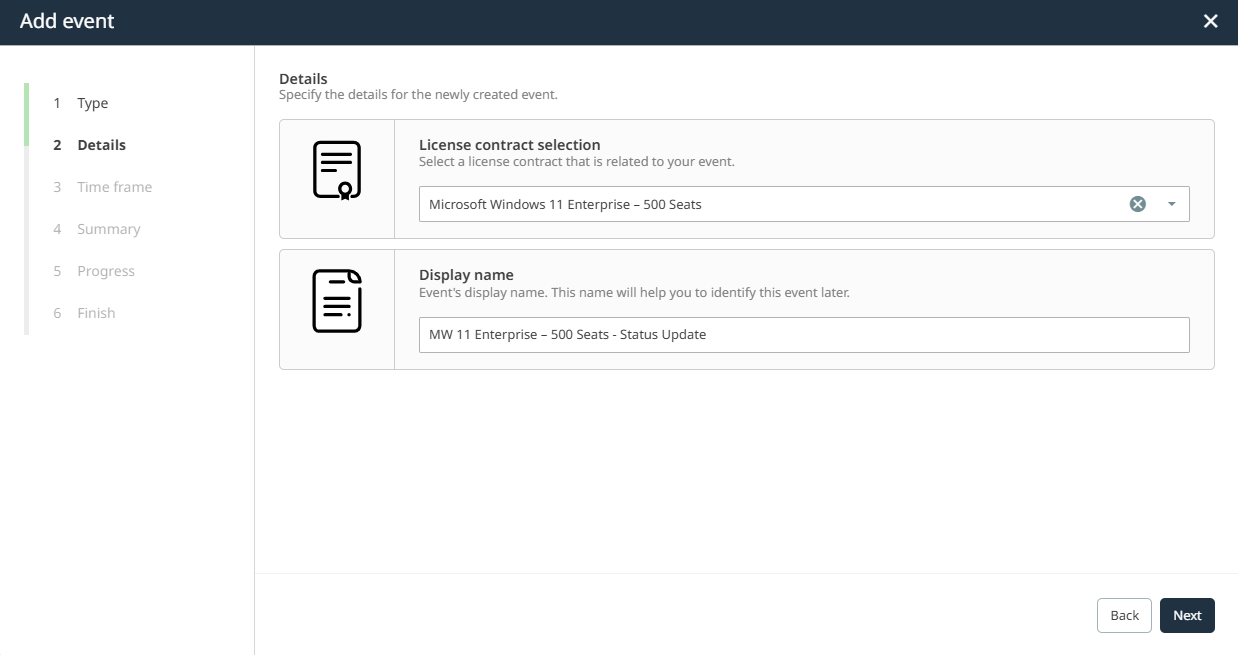
In the Details step, provide the core information for the event.
•License contract selection: Select a license contract that is related to your event (e.g., Microsoft Windows 11 Enterprise - 500 Seats).
•Display name: Enter a descriptive name to identify the event in the Calendar (e.g., Microsoft Windows 11 Enterprise - 500 Seats - Action Required).
Click Next to continue to the Time frame step.
3. Time frame
In the Time frame step, define when the event should take place and configure reminder notifications.
The following settings are available:
•Event date: Set the main date of the event (e.g., 01.12.2026).
•Remind me every day before the event ends: Activate the checkbox to receive daily reminders as the deadline approaches.
•Trigger time: Specify the time at which the event notification is triggered. To receive additional daily reminders before the event date, select Remind me every day before the event ends.
•Daily reminders: Get a reminder at the set time for the specified number of days before this event ends. Select the time and the days before the end date of the Event date.
•Timezone: Select the time zone used for scheduling and reminders. By default, your local time zone is selected.
 |
Best practice: |
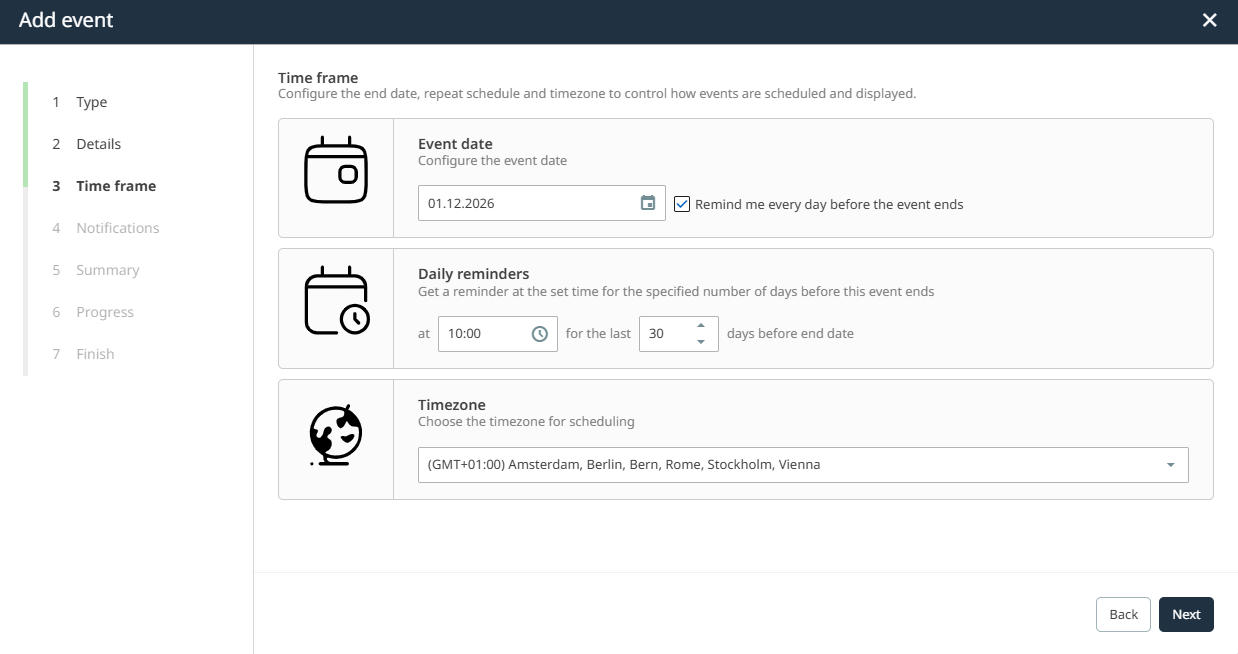
After configuring the Time frame and reminders, click Next to continue to the Notifications step.
4. Notifications
In the Notifications step, define whether reminder emails should be sent and who should receive them.
You can choose one of the following options:
•Do not send notifications
•Notify specific user groups when the event is approaching
If you select the second option, choose the appropriate notification receiver groups. Members of the selected user groups will receive reminder emails and see the event in their personal Agenda. Users who do not belong to one of the selected groups will not see the event in their Agenda.
|
Best practice: |
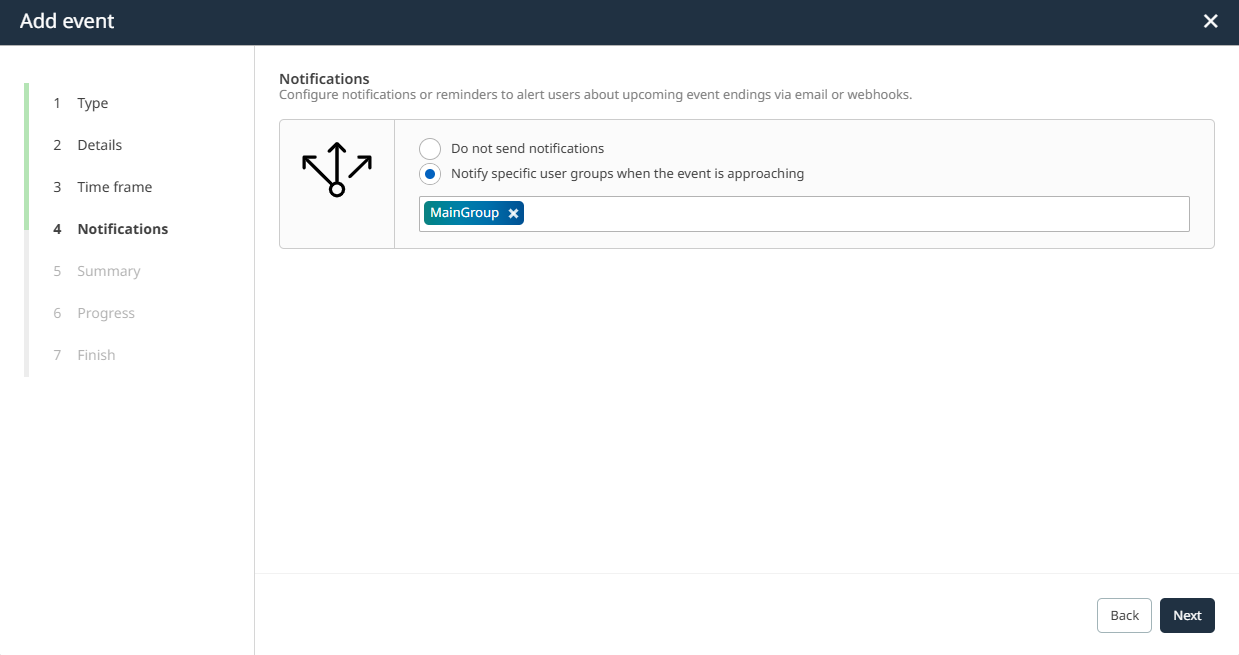
After configuring notifications, click Next to continue to the Summary step.
5. Summary
In the Summary step, Raynet One displays a final overview of all configured event details before the event is created.
Review the following information carefully:
•Type: The selected event type (Status Update, Action Required, or Activity Log).
•Display name: The name that will appear in the Calendar.
•Notifications enabled: Whether reminder notifications are enabled.
•Event date: The scheduled date of the event.
•Timezone: The timezone used for scheduling and reminders.
•Notification receiver: The user groups that will receive reminders and whose members will see the event in their Agenda.
•Interval: The number of days before the event date when reminders will be sent.
If everything is correct, click Next to create the event. To make changes, click Back and return to the relevant step.
|
Best practice: |
6. Progress
Raynet One processes and saves the event. This step usually takes only a few seconds.
7. Finished
The system displays the confirmation message:
Event successfully created. You can close the wizard now.
If you configured notification receiver groups, the event will appear in the personal Agenda of users who belong to the selected groups.
Click Finish to return to the Calendar, or click View details to open the newly created event.
The following figure shows the Agenda with upcoming events displayed in chronological order.