This chapter applies to users who rely on RayVentory Scan Engine (RVSE) running in their IT landscape. Via RVIA services, you can set-up the web server which the RayVentory Inventory Agent (RVIA) needs. It connects to it in order to deliver all collected discoveries and inventory. In Raynet One, the RVIA connection is managed via the built-in plugin called RayVentory Inventory Agent Infrastructure. Just like in the case of any platform plugin, it is entirely optional.
Here's how to set-up the RVIA runner service. We want to create the infrastructure endpoint which will wait for incoming RVIA client connections. Finally, we will verify its proper functionality.
Requirements:
•an authorized runner who is connectible-to by all RVIA clients in question
•connection security, for either Windows or Docker-container-based, per TLS cryptographical security certificate to assign as public certificate (the private key must be stored locally onto the runner machine)
•the RVIA data service is not added to the runner (yet)
•consult with your IT administration about the HTTP authentication mode, the port and IP address for the runner web service
•RVIA configuration file names and contents (see the RVIA Data Service chapter for more details)
1.Navigate to the Configuration workspace. Open the Runners view by clicking on the sidebar menu entry. Then, click on the required runner to open its details view.
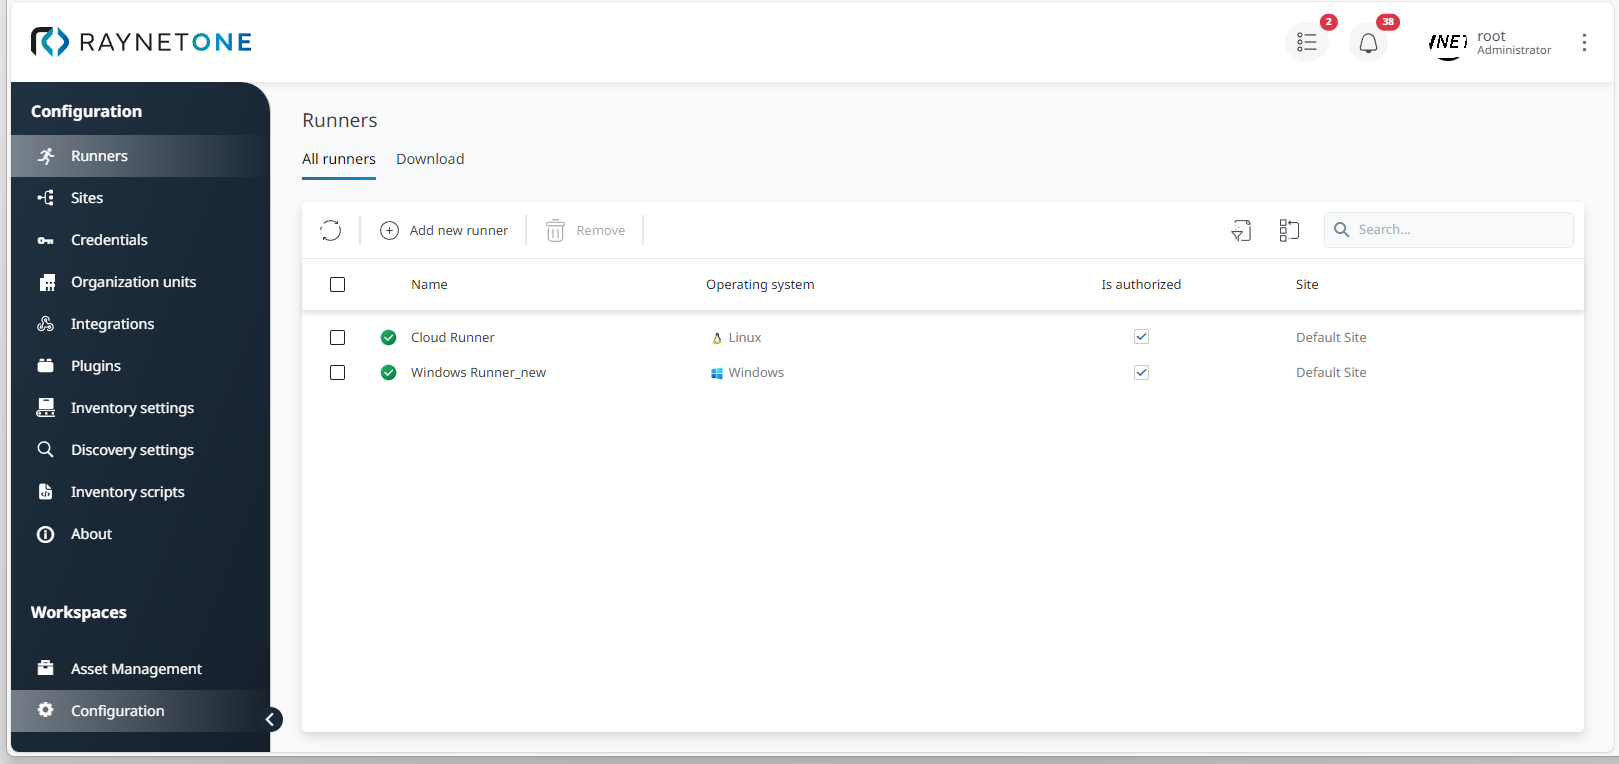
Runners overview which shows two runners. One runner is called Cloud Runner. It comes pre-installed with the platform if you have chosen so. The other runner is called WINRUN, named after the operating system type. Both Linux and Windows runners are able to host the RVIA data service.
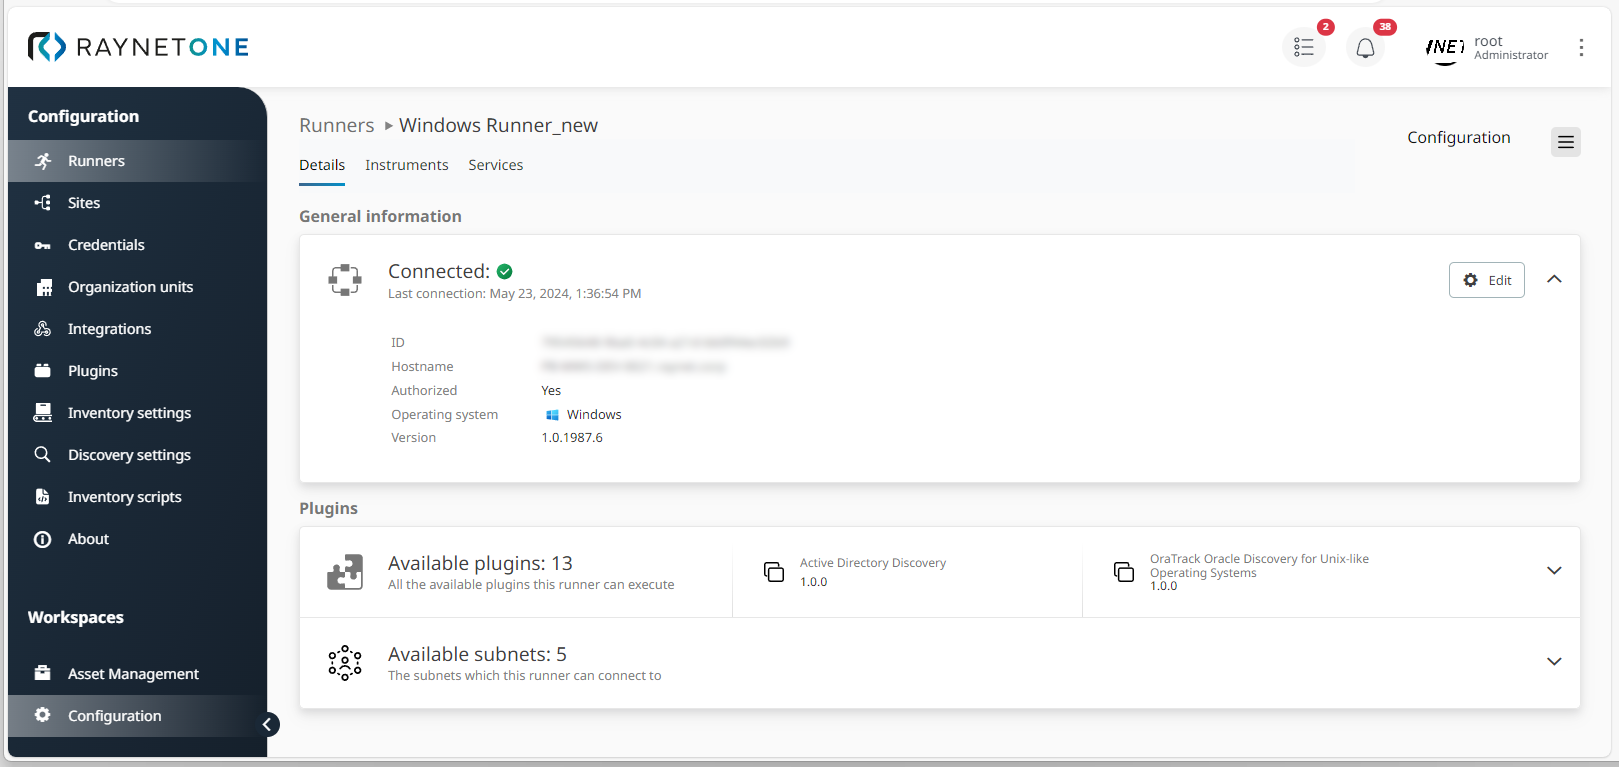
2.The runner details are shown. Click on the Services tab.
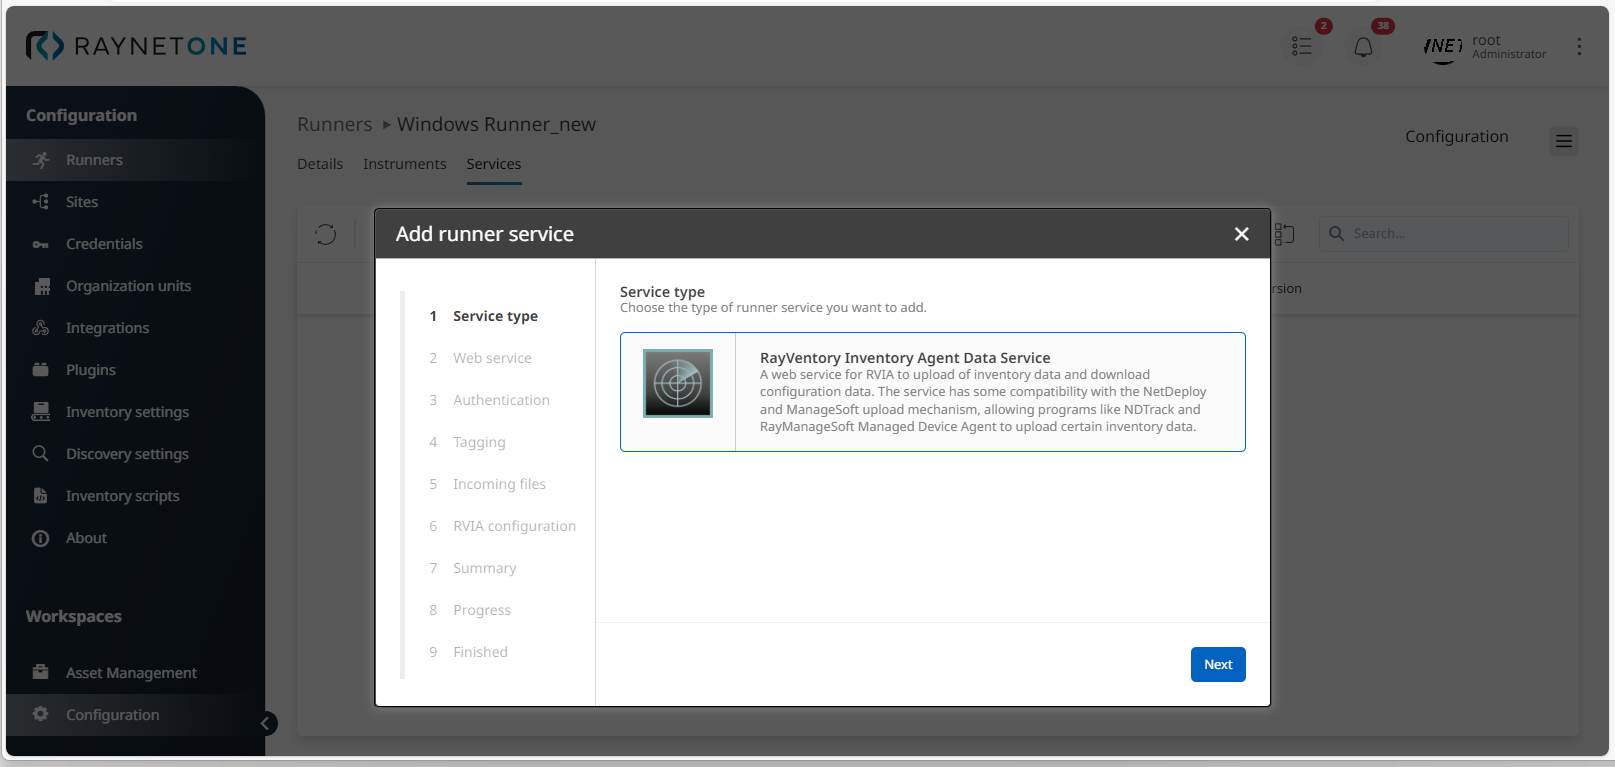
3.The list of all registered runner services is shown. The list view is empty. Click on Add service.

4.The Add runner service wizard is opened. The first wizard step is called Service type. The RayVentory Inventory Agent Data Service is selected by default. Click on Next to proceed.
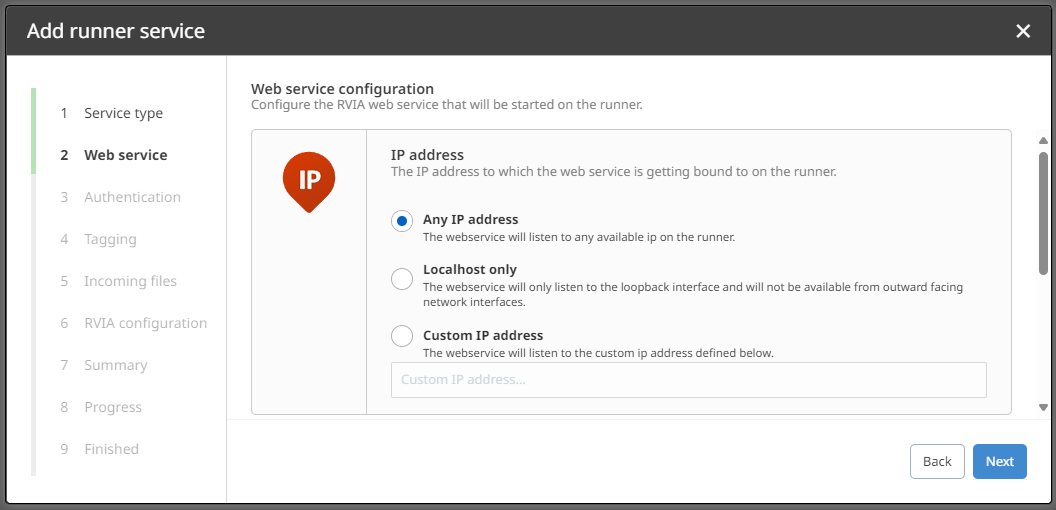
5.Under the Web service wizard step, you can specify connection parameters for the listener web service TCP endpoint. The default IP address option is to listen on any IP address. Leave this selection as is, unless otherwise instructed by your IT administration. In the SSL certificate section, click on the three-dots button ( ... ) to select the cryptographic public certificate from the requirements. Click on Next to proceed.
6.Determine your authentication settings under Authentication. You have the option to protect your endpoint from random unauthorized access. The basic credentials option sets the HTTP authentication mode. Connecting clients will be asked to provide an accepted username and password. Click on Next to proceed.
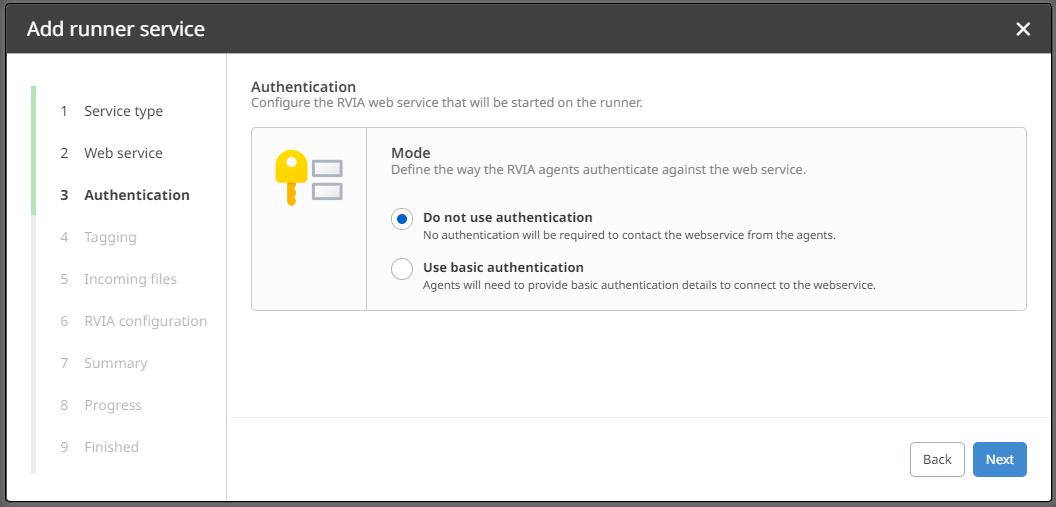
Authentication step of the Add runner service wizard. The basic authentication mode is selected. By selecting it, the input fields for both username and password are revealed.
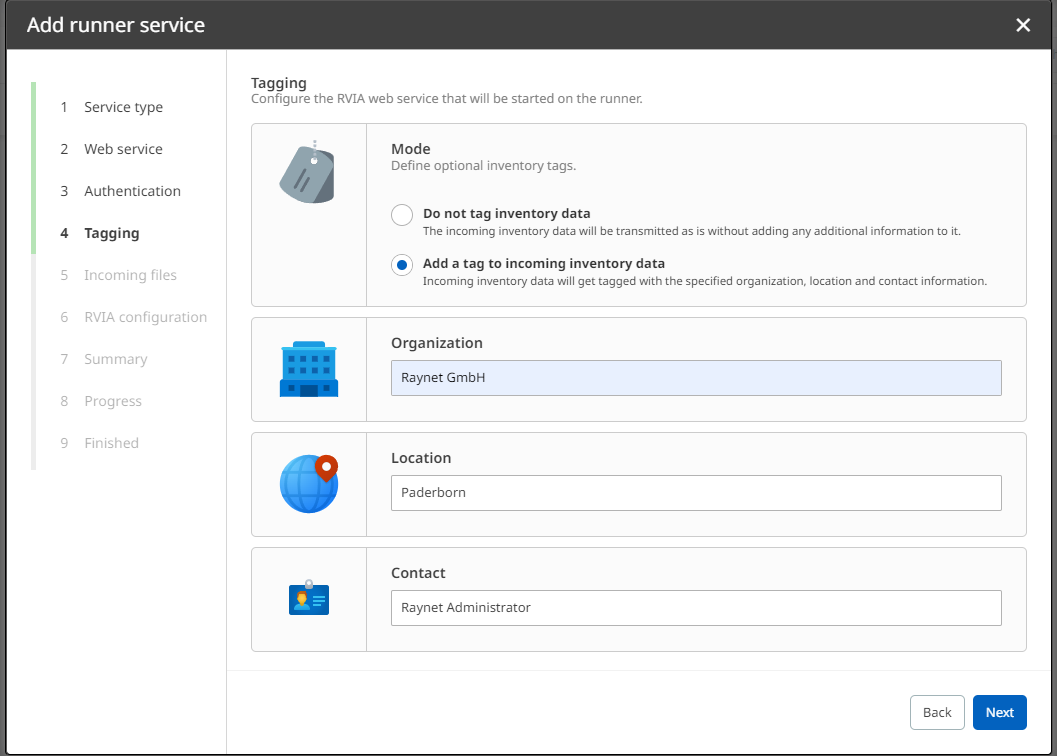
7.On the Tagging wizard page, click on Next to proceed. This feature is not implemented yet.
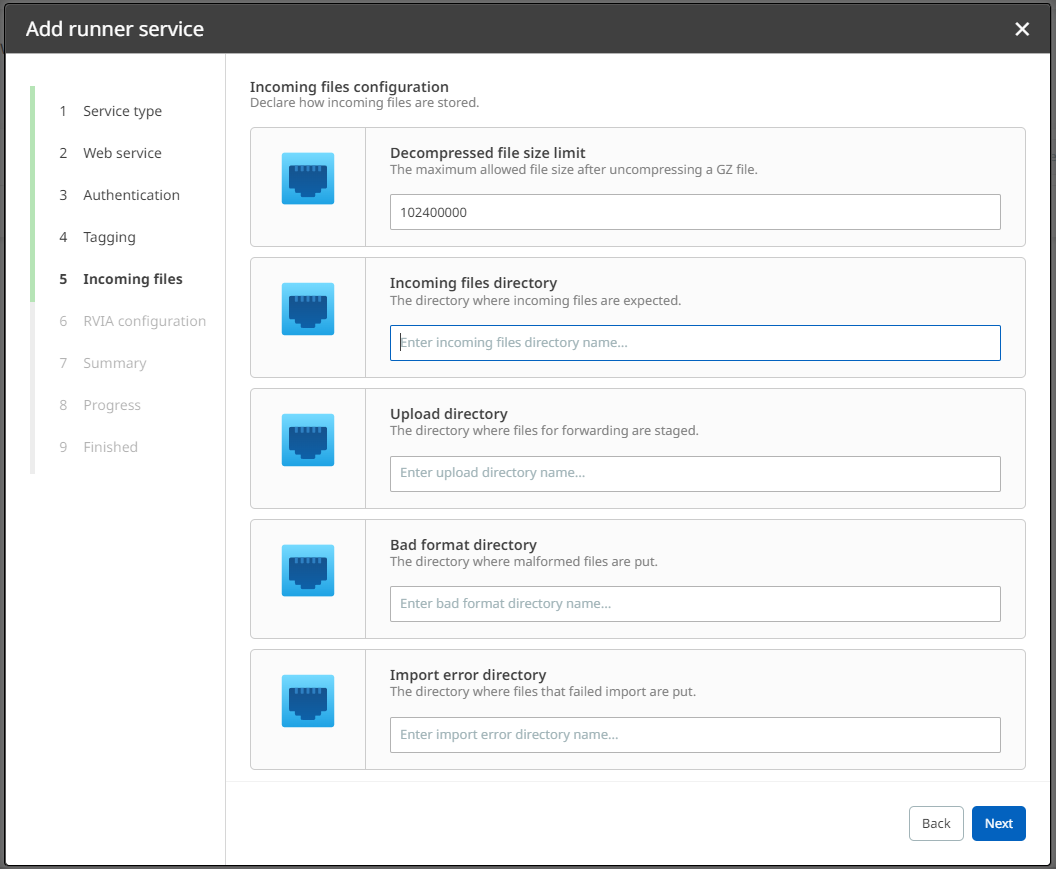
8.Under Incoming files, there are options for import process adjustment. Change the parameters to specify how the remote data should be received on the runner's side and which filesystem locations to use in various stages. Read the RVIA Data Service chapter for a complete explanation. Click on Next to proceed.
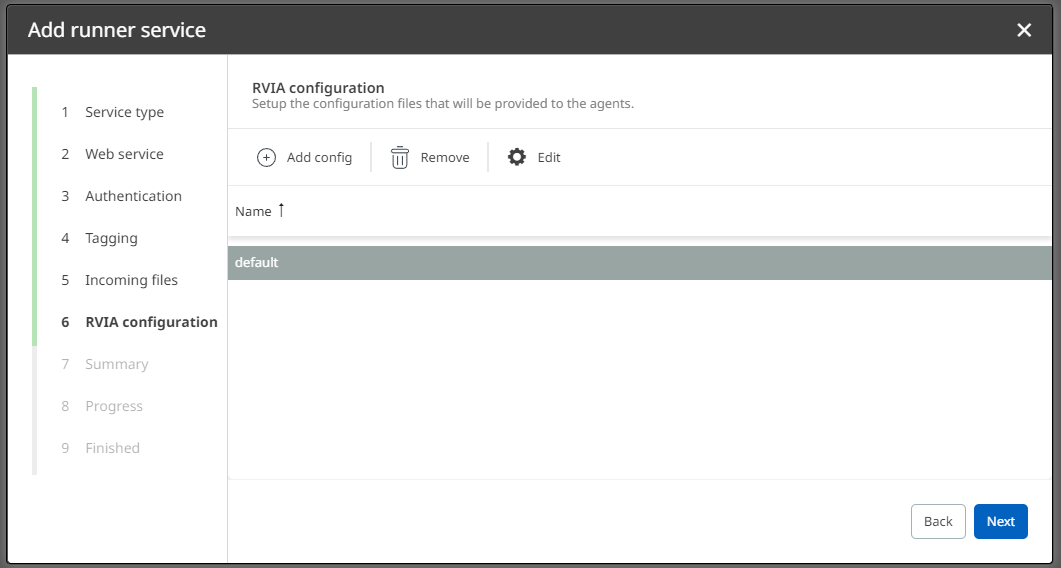
9.Under the RVIA configuration step, set the RVIA configuration from the requirements. You see a list of configuration files. All of them will be provided by the web service endpoint we configure. If you wish to provide no custom RVIA configuration, you can choose the good default one. Each connecting RVIA client chooses a RVIA configuration by name. The configuration file name is written at the end of the HTTP GET request URL. If there are additional RVIA configuration file names required by the set of deployed RVIA clients, click on Add config to add them. To edit configuration file content, select a list entry per left-click and click on the Edit button. Afterwards, click on Next to continue.
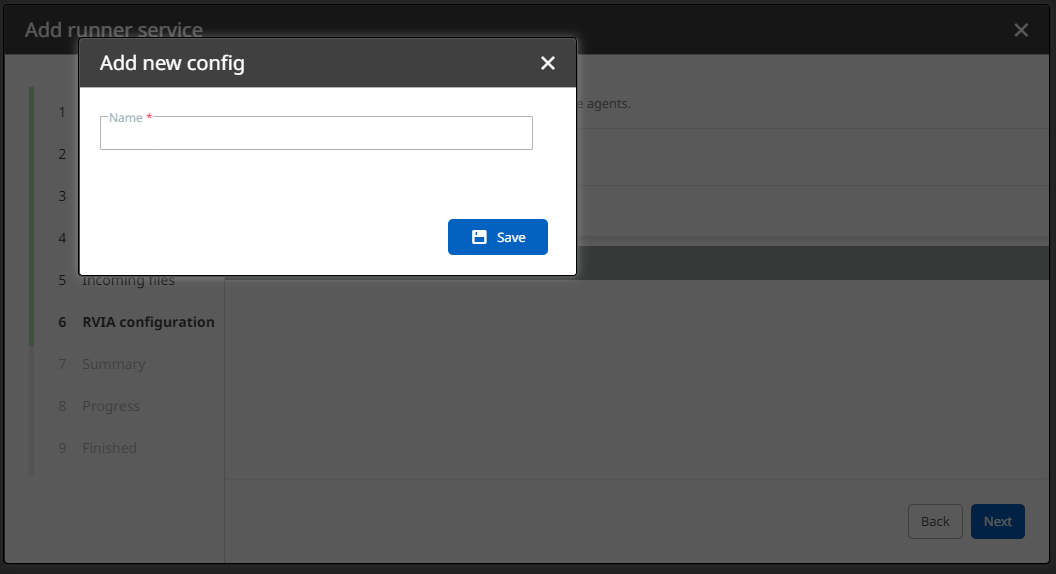
Provide the RVIA configuration file name in this input form. This name is essential to differentiate between various RVIA client configurations meant to be deployed across your entire IT landscape.
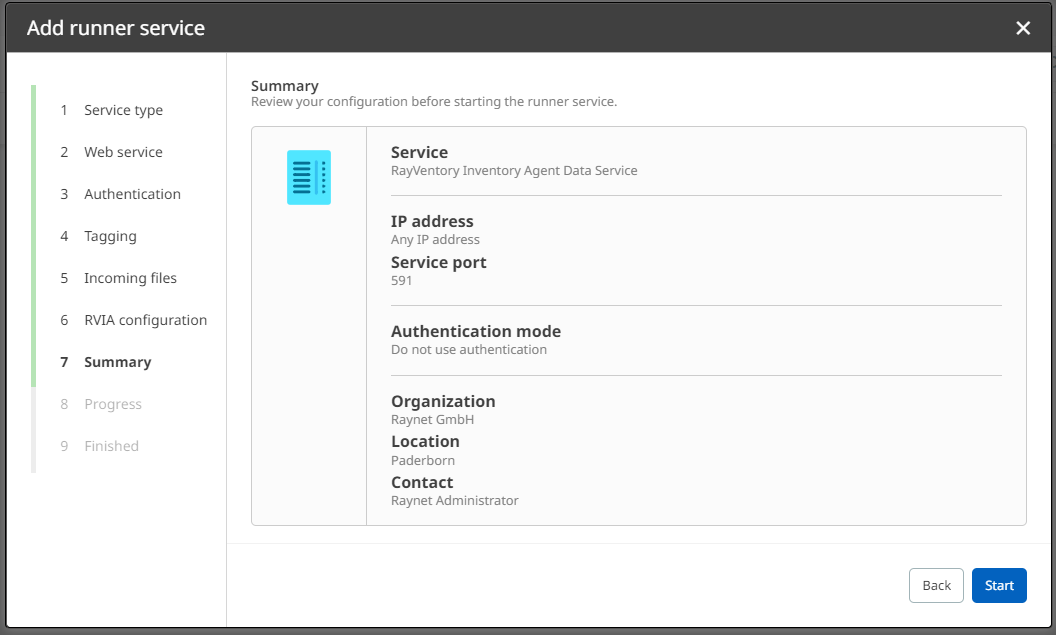
10.Check your chosen configuration in the displayed Summary. If it is correct, confirm it via Start. Otherwise, you can go back to revise.
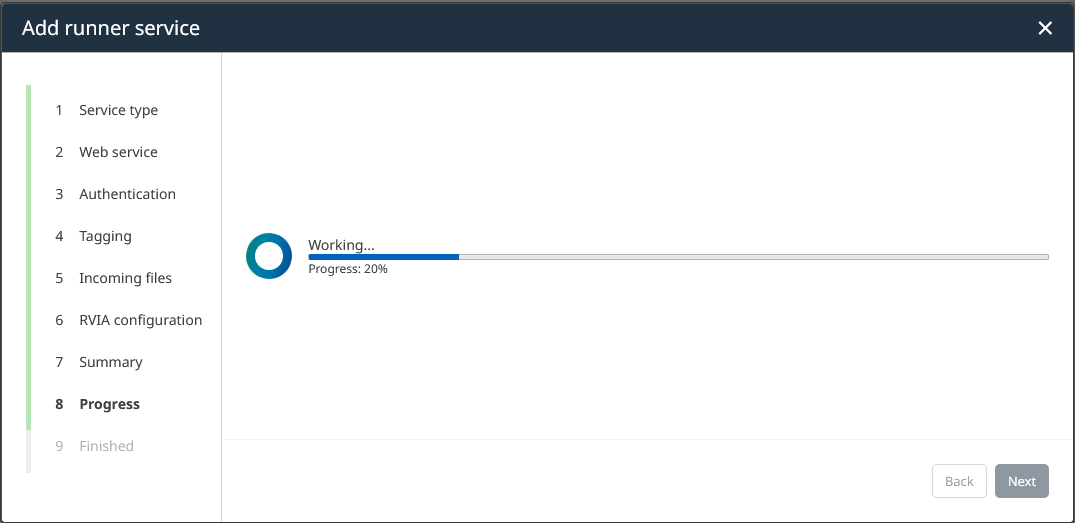
11.The Progress wizard page is shown. It is displayed during the system process of runner service addition. Various technical procedures are performed to set-up a correctly working HTTP web service endpoint. Please wait patiently until completion. You will be redirected to the next step automatically.
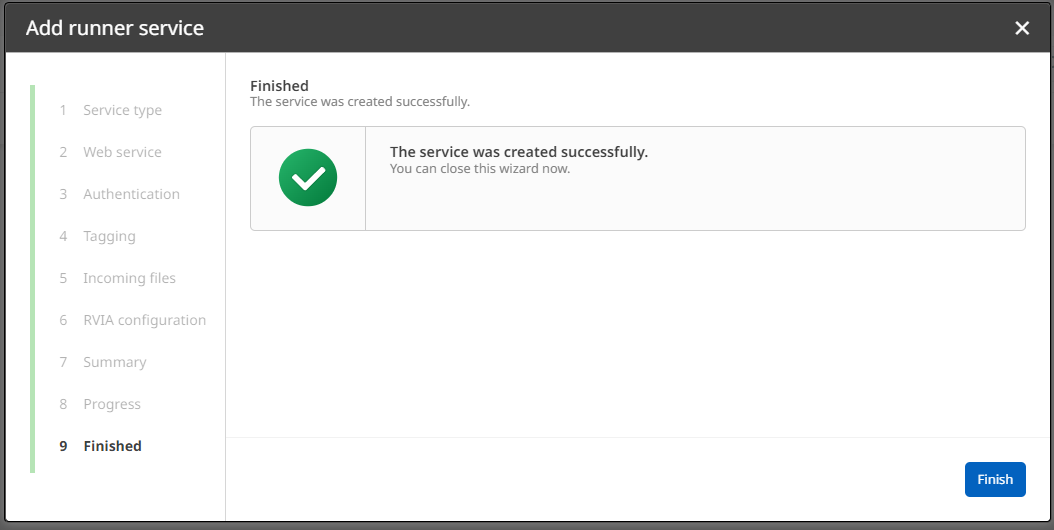
12.Upon successful addition to the runner's services, the Finished step is shown. Close the wizard by clicking on Finish.
13.You are returned to the list of all runner services. Check the listed entries to find an entry named RayVentory Inventory Agent Data Service. If it exists, the runner service has been added successfully.

14.Open the web site configured for the RVIA data service to verify its proper functionality. Use the domain assigned to the TLS security certificate and the configured service port. Prior to connection, you should establish PKI trust. If the web site is loaded successfully and the cryptographic security is confirmed by the browser's security technology, you are good to go. In any other event, consult with your IT administration for troubleshooting.
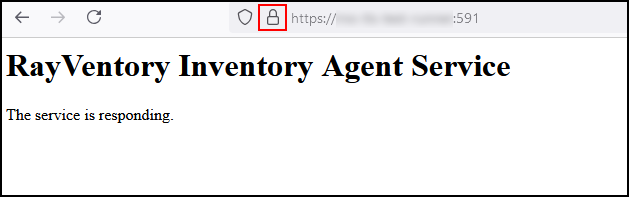
The Firefox web browser displaying the successfully loaded RVIA data service endpoint. It has fetched the web-site root page This document serves the purpose of easy and clear connectivity troubleshooting. This web browser performs TLS connection security checks. It displays any warnings about missing encryption or invalid certificate parameters prior to web page loading. The lock sign right next to the displayed URL indicates a properly secured connection. In this case, you're good to go.
The RVIA data service is now available in your runner's details view under Services. It is started immediately after addition. The service is operating in the background. As usual after platform object addition, you can view the service's specification. Left-click on the RayVentory Inventory Agent Data Service entry to open a page containing its run-time details. Stopped runner services can be edited.

List of all registered runner services after stopping the RVIA data service. Select stopped runner services to reveal options for modification, removal or restart.

Editing the stopped runner service called RVIA data service. You are able to add new configuration files, modify the content of existing ones or remove them. But, to configure a runner service with settings similar to the already created one, you have to remove the old and add the new one from scratch.
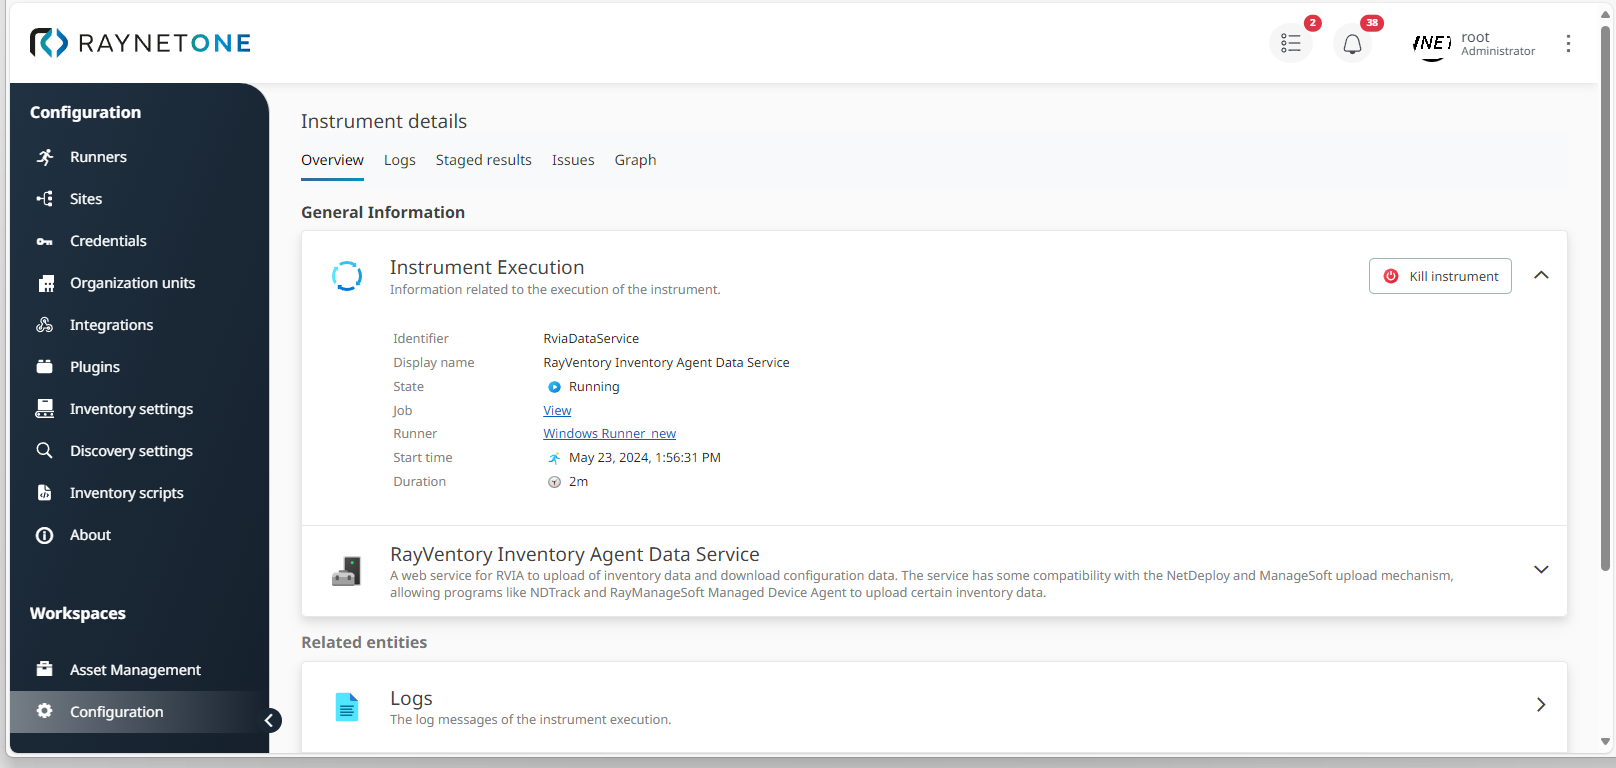
Runner service details redirected-to after left-clicking on the service list view entry. The RVIA data service amounts to a background web service for configuration provision and inventory data collection. Thus, this page shows the running instrument details.