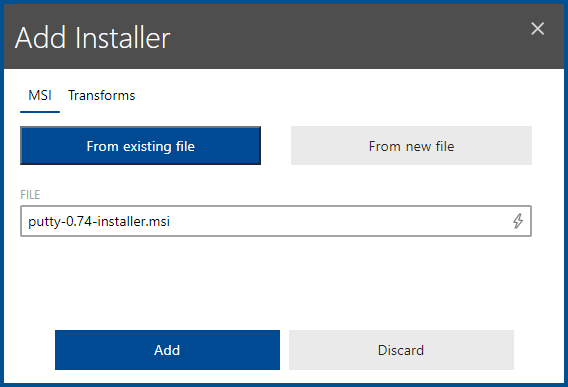
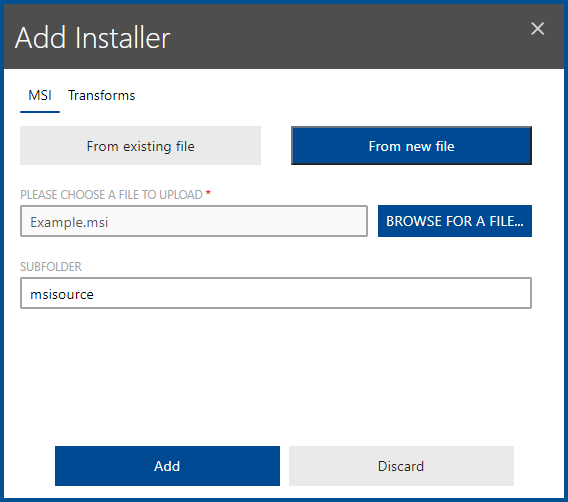
The MSI tab of the Add Installer dialog for Windows installers is further divided into two sub-tabs.
•From existing file: Is used to add an already existing installer to the package.
•From new file: Is used to add an installer that is not yet available in RayManageSoft Unified Endpoint Manager.
From Existing File
This tab of the dialog can be used to add an installer that already exists in RayManageSoft Unified Endpoint Manager to the package.

When clicking into the FILE field a list of the available installers will be shown and the target installer can be selected from the list. When the installer has been selected, it can either be added to the package by clicking on the Add button or it is possible to add Transforms to the installer by selecting the Transforms tab before adding the installer.
From New File
This tab of the dialog can be used to add an installer that does not yet exist in RayManageSoft Unified Endpoint Manager to the package.

A file to upload to RayManageSoft Unified Endpoint Manager and add to the package can be selected by clicking on the BROWSE FOR A FILE... button in order to open the file browser. Select the target file in the browser.
Furthermore, it is possible to specify a subfolder to which to add the file. The folder name needs to be added to the SUBFOLDER field. By default, the subfolder is called "msisource".
When the installer has been selected, it can either be added to the package by clicking on the Add button or it is possible to add Transforms to the installer by selecting the Transforms tab before adding the installer.