A Group in RayFlow is an object that is used to define the type of access to other objects, including phases, menu, datafields, and others. This chapter of the document describes how a user can create new permission groups, assign users to it, and use it to control visibility of menu items and phases.
Groups User Interface
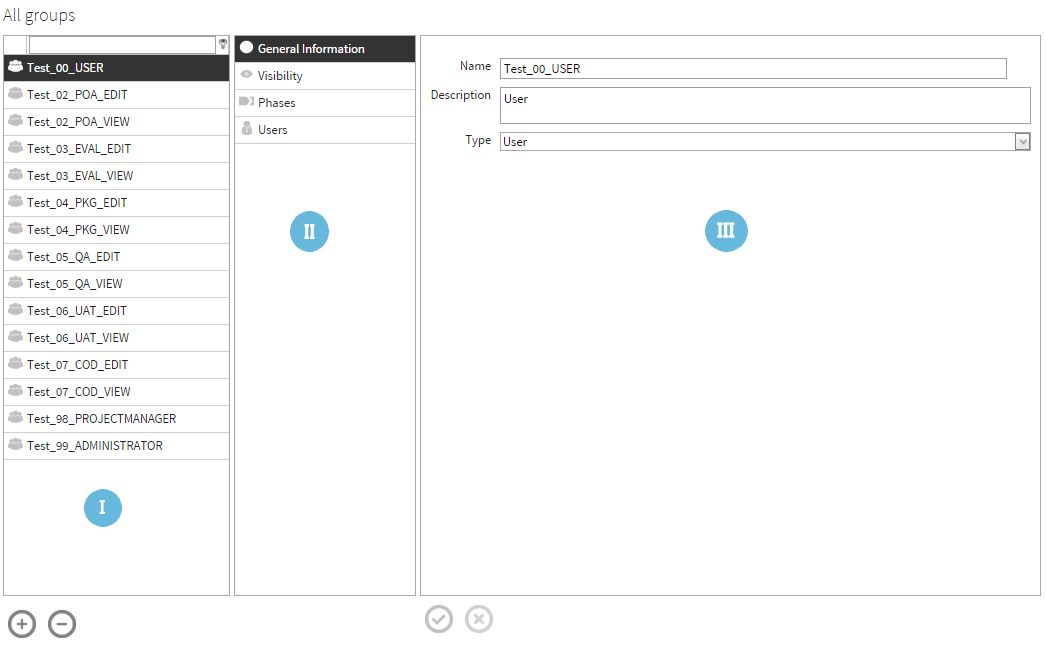
The Groups configuration page is divided into three areas including:
1. All groups: All the existing permission groups are listed under the All groups area.
2. Categories: To the right of the All groups area, the properties pertaining to each of the groups are categorized into following categories:
•General Information: General Information includes basic properties, including its name, description, and type, related to a selected permission group.
•Visibility: Allows a user to add/edit/remove menu items from a RayFlow project as well as to define visibility to them based on permission groups.
•Phases: A permission group can be assigned different permission types on phases in RayFlow.
•Users: Provides an ability to assign/remove users from a permission group
3. Properties: Properties and options pertaining to the selected category in categories are shown under this area
Saving and Discarding Changes
Any change made to a group property will active the Save icon and the Reset icon. To save changes made to the group property click on the Save icon. To discard changes click on the Reset icon.
 |
Save |
 |
Reset |
General Information
Basic information related to the selected permission group is shown as part of General Information category.

•Name: Name of the selected group
•Description: A brief description of the selected group
•Type: Currently a permission group can be of one of the following types:
oRoot (Only shown when the groups page is accessed by a root user)
oUser: A normal user group
oManager: View rights to all phases
oAdministrator
Following matrix shows permission matrix for the root, manager and administrator user:
|
Manager |
Administrator |
Root |
Access to Administration menu |
No |
Yes |
Yes |
Create/Edit/Delete User/Set Password |
No |
Yes |
Yes |
|
only users in projects where he has at least admin privileges, cannot modify root |
||
Assign Projects to a User |
No |
Yes |
Yes |
only projects where he has at least admin privileges |
|||
Assign Groups to a User |
No |
Yes |
Yes |
|
only groups from projects where he has at least amin privileges |
||
Groups Configuration Page |
No |
Yes |
Yes |
|
only groups from projects where he has at least admin privileges, only create/update/delete groups with the same or lower privileges |
||
Clone Task Settings |
No |
Yes |
Yes |
only show projects where he has at least admin privileges |
|||
Create/Copy projects |
No |
No |
Yes |
Assign Tasks to users |
Yes |
No |
No |
Configure SLA's, Category |
Yes |
Yes |
No |
Default access to reports |
Yes |
No |
No |
Visibility
RayFlow is a modular application with features available as menu item. Based upon the requirement and license, these menu items can be added to a RayFlow project. Furthermore, visibility of menu items can be controlled by permission group.
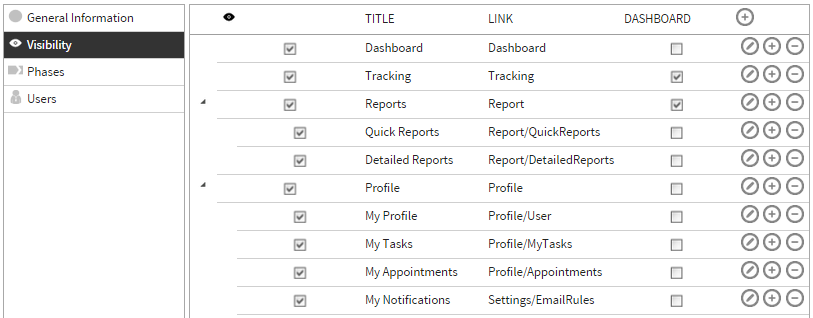
The existence of a menu entry decides if a member of this group is authorized to enter the related page or not. If the entry exists, he will be able to enter the page. If the entry does not exist, he cannot enter the page, instead he will be lead to a page which will state that he is not allowed to access the page.
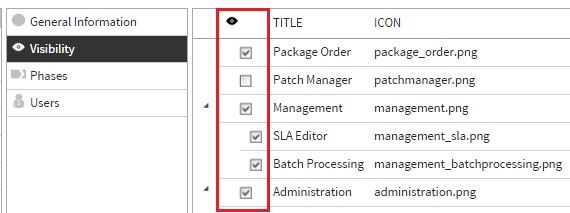
The Visible checkbox decides if the entry will be shown inside of the Side menu and if it can be found using the global search or not. If the checkbox is enabled, the entry will be shown in the Side menu and users will be able to find it using the global search. If the checkbox is not enabled, the entry will not be shown in the Side menu and the global search will yield no results.
The Dashboard checkbox decides if the item will be shown as a tile on the Dashboard page. If it is checked, the tile will be shown on the Dashboard. If it is not checked, there will be no related tile on the Dashboard.
Phases
Phases option allows administrators to define group permission on different phases. A permission group can have three kinds of phase permission:
•View: Users with view rights are able to see a phase. They can read and write comments and download files. They cannot change a status, SLA, category, or user assignment. Furthermore, all visible datafields and appointments are read-only.
•Edit: If a user has edit rights, the full scale of his rights depends on what kind of user he is.
oAdmin/Projectmanager: Projectmanagers and administrators with edit rights can read and write comments, up- and download files, see and create appointments, edit all datafields, assign and unassign task to all users with edit permissions for the phase, change SLA, Category, and type, and always change the status of a task.
oUser: Users with edit rights can read and write comments, edit their own appointments, up- and download files, edit the visible datafields, assign tasks to themselves but cannot unassign tasks, and they can change the status of a task if the task is unassigned or assigned to themselves.
•Download/No permission: If a phase is invisible for a user, it will not be shown anywhere.

Permission in a different phase
If a user had specific permissions in the phase A and is currently viewing phase B the following will be visible.
•Edit
oComments created in phase A are visible in phase B.
oFiles uploaded in phase A are visible in phase B.
oAppointments created in phase A are visible in phase B.
•View
oComments created in phase A are visible in phase B.
oFiles uploaded in phase A are visible in phase B.
oAppointments created in phase A are visible in phase B.
•Download
oComments created in phase A are not visible in phase B.
oFiles uploaded in phase A are visible in phase B.
oAppointments created in phase A are not visible in phase B.
•No permission
oComments created in phase A are not visible in phase B.
oFiles uploaded in phase A are not visible in phase B.
oAppointments created in phase A are not visible in phase B.
Users
For a selected permission group, the Users option allows administrators to add user to or remove users from that group.
All the users who are part of a project are shown beneath the All Users section. They can be assigned to the group by clicking on the Add User to the Group icon.
Similarly, all the existing members of the group are shown under the Selected Users section. They can be removed from the permission group by clicking on the Remove User from the Group icon.
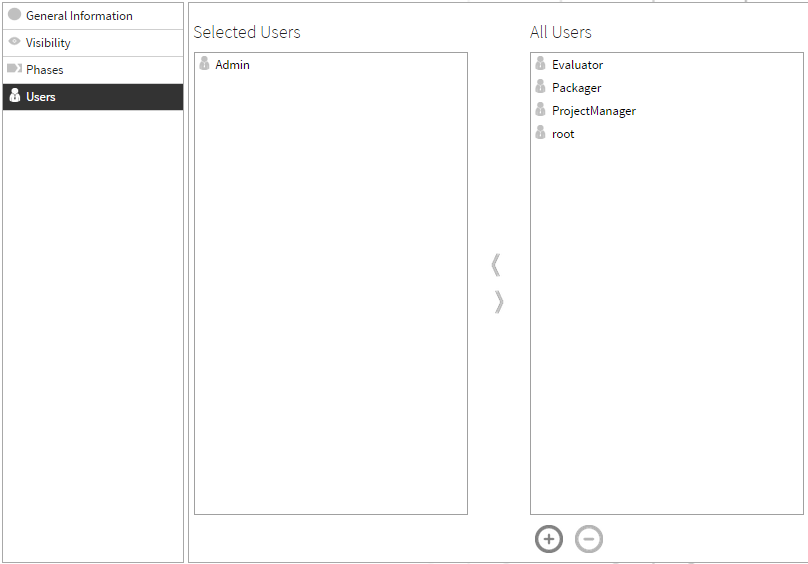
Beneath the All Users section, The Add User and the Disable User tools are available. Using them, a new user can be created and an existing one can be disabled.
 |
Add user to group |
 |
Remove user from group |
Group Management
To Add a New Group
A new permission group can be created by clicking on the Create new group icon.

The Create New Group dialog is shown.
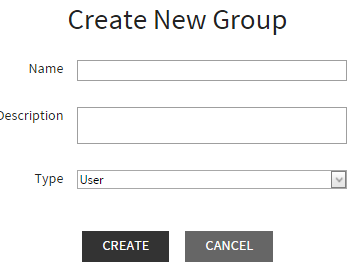
Specify the group properties:
•Name: Name of the permission group
•Description: Brief description of the group
•Type: the group role type is selected from the drop down list. Options available to a normal administrator creating the group include: User, manager, and administrator. An additional root item is added to the option for a root user.
To Delete an Existing Group
An existing permission group can be deleted by clicking on the Delete group icon.

A confirmation message is shown:
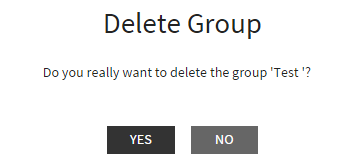
Click on the YES button to confirm deletion of the group. You can discard this action by clicking on the NO button.
To Add New Users via Groups Page
It is possible to create a new user via the properties area of the Users category. Normally, user management is done via the Users page of RayFlow Administration, however, the possibility to add a new user via the Groups page is meant to provide a quick way of creating a new user and assigning it to a group.
Follow the below mentioned steps to create a new user via the Groups page:
1. Go to Administration -> Groups item in the vertical navigation bar.
2. Select a group to which this new user will be added.
3. Select Users category from the Categories area.
4. Click on the Create new user icon, which is available at the bottom of the All Users area

5. A Create New User dialog is shown. More information on this dialog can be found under the Adding new user topic.
6. After filling in the user properties, click on the CREATE button on this dialog to finalize creating this user.
Disabling an user from the group page
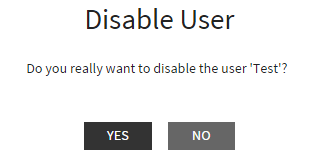
A user under the All Users section can be selected and disabled by clicking on the Disable User icon.

Clicking on this item will prompt a confirmation dialog. Clicking on YES will disable the selected user and contrarily clicking on the NO button will discard this action.
Menus
RayFlow tool is a combination of comprehensive and structured modules called Menus. These menus support different features and when combined together results in an efficient workflow tool. This modular structure of RayFlow makes it flexible when it comes to the customer specific requirements and when it comes to controlling the permission and rights with respect to the different sections and features of the tool individually.
Each of the menu items is listed under the the properties area of a group's visibility category. Based upon the requirements, visibility of a menu item can be controlled for a specific permission group.
The Menu Editor
The properties area of the visibility area is not just a list of menus, but is essentially an editor which allows users to add customized menu items, to control visibility of an item for a certain permission group, to add a menu item to the dashboard, and to edit an existing menu item.
The Menu Editor Interface
The menu editor lists menus and their properties under respective column headers. A user can customize this view by simply dragging and dropping the column headers to and from the Column Chooser.
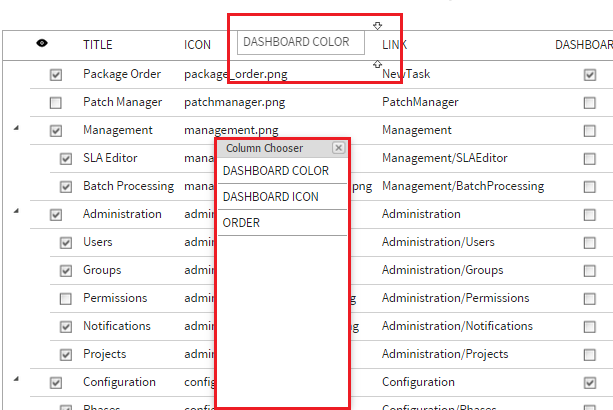
The Column Chooser control can be accessed by clicking on the Column Chooser control icon.

Controlling the Visibility of a Menu Item
A menu item can be made accessible for a specific permission group by activating the visibility checkbox for that menu item. This checkbox is available for each of the menu items beneath the eye icon.
Adding a Menu Item to RayFlow Dashboard
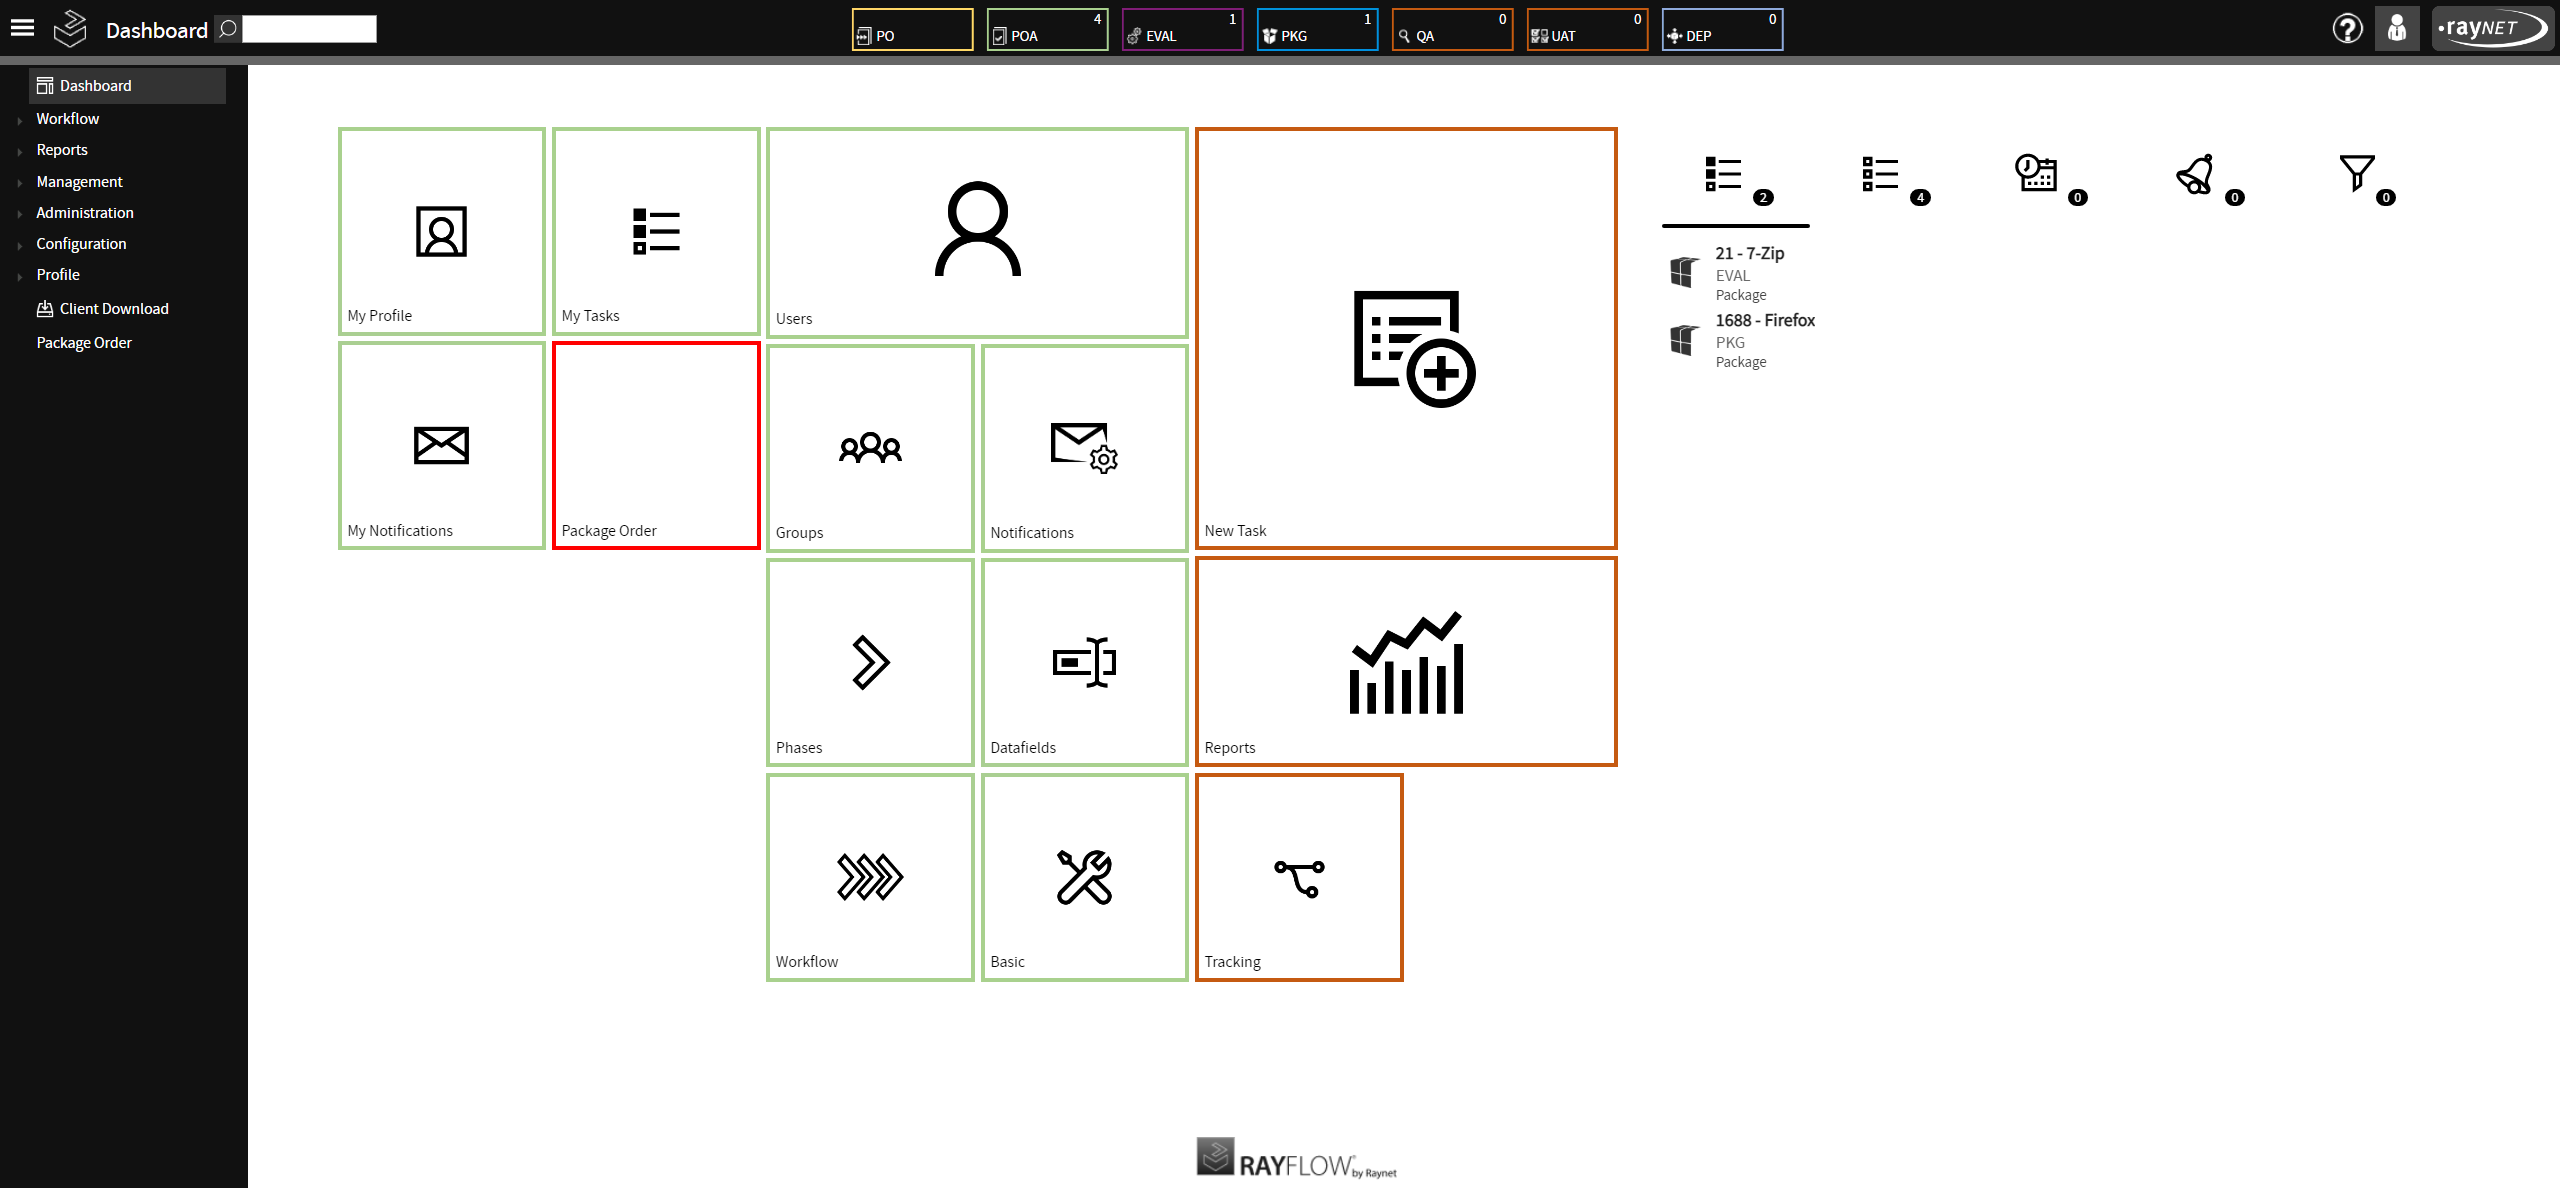
A menu item can be made available on the Dashboard by activating the Dashboard checkbox for it.

Based upon the dashboard configuration for a menu item, the item will be shown on the RayFlow dashboard.
Adding a New Menu Item
A possibility exists to add custom menu items to RayFlow. A custom HTML page can be created, put in the source folder of RayFlow, and be used as a custom menu item.
To add a new menu item select a group on the Groups page, then select the Visibility category under the categories area. Click on the Create menu item icon in the menu editor.

Specify the menu properties:
•Title: Title of the menu item.
•Link: Link to the menu item. If it is a custom menu page, then select (Custom) and enter name of the page, e.g., CustomPage or a web link.
•Column: The number of the column where the tile will be displayed. If set to 0, it will not be displayed.
•Tile size: The size of the tile that is used. Either SMALL, MEDIUM, or LARGE.
•Order: Order number of the menu item. This order number will determine the menu item position in relation to other menu items.
•Parent: In the vertical navigation bar, a menu item can either be added to an existing menu as a parent item or as a child item.
•Visible: Enable or disable the checkbox for menu item to be shown in the UI.
•Dashboard: When enabled the menu item will be shown on RayFlow dashboard.
•Dashboard Color: Select the color of the menu tile on the dashboard

After specifying the menu properties click on the save icon to finalize adding the menu.
Editing and deleting an existing menu item
The properties of a menu item can be edited by clicking on the Edit menu icon for the target menu.

The menu item will be available in edit mode:

When compared to properties available while creating a menu item, following additional properties are available:
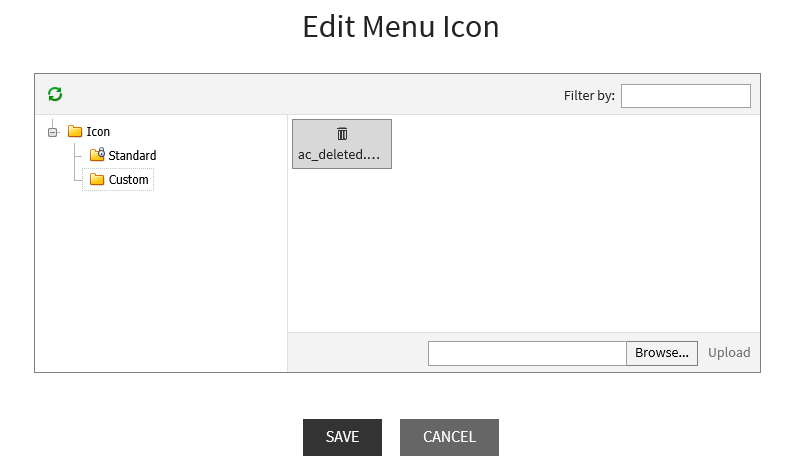
Icon: An icon can be specified for the menu item in the vertical navigation bar. The icon property comes with an edit icon. When clicked upon, an Edit Menu Icon dialog is available. Through this dialog, a user can either pick a standard icon for the menu item or can upload and use a custom item.
The recommended icon size is 20x20 pixels.
Dashboard Icon: This property allows a user to select an icon for the menu item tile on the RayFlow Dashboard. This property comes with an edit icon. When clicked upon, Edit Dashboard Icon dialog is available to the user.
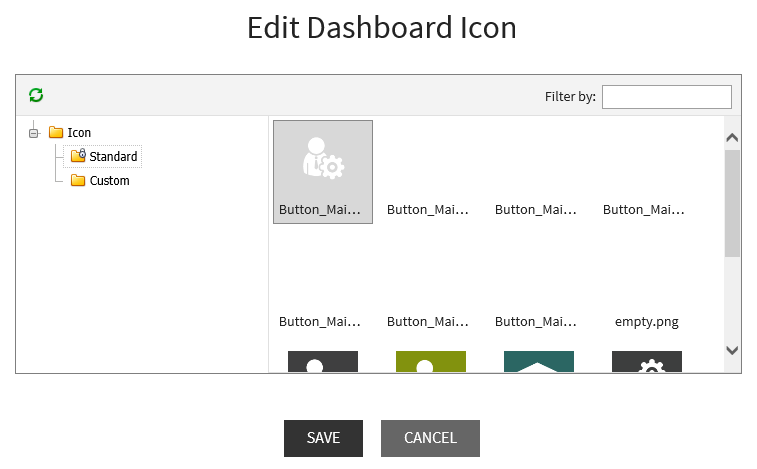
This dialog allows a user to either pick a standard icon for the menu item or to upload and use a custom one.
The recommended icon size is 153x153 pixels.