How Are the Detailed Reports Generated?
RayFlow stores the data related to the projects in its central database. Users can either use Crystal Reports or SQL Server Reporting Services tools to generate reports in the respective formats (.rpt/.rdl) and add them to the RayFlow Reports feature. Based on the report definition these reports can contain various types of information. By default Reject, Status, Hold and Invoice reports are available to the users as standard reports.

By default for SSRS reports are available which can be edited to suit the special needs of a user.
Adding a New Report
RayFlow hosts all the reports (.rdl/.rpt) in the Reports folder, which is part of RayFlow binaries on the RayFlow server. RayFlow web application allows its user to either directly add an existing report in the aforementioned folder to the reports page or first upload a report to the server and then subsequently add it to the page.
Upload a Report
To upload a report to the RayFlow server:
1.Load the RayFlow Reports page by clicking on the reports item either in the vertical navigation or main content section
| 2. | On RayFlow Reports page, select the Detailed Reports item from the functional navigation menu on the left |
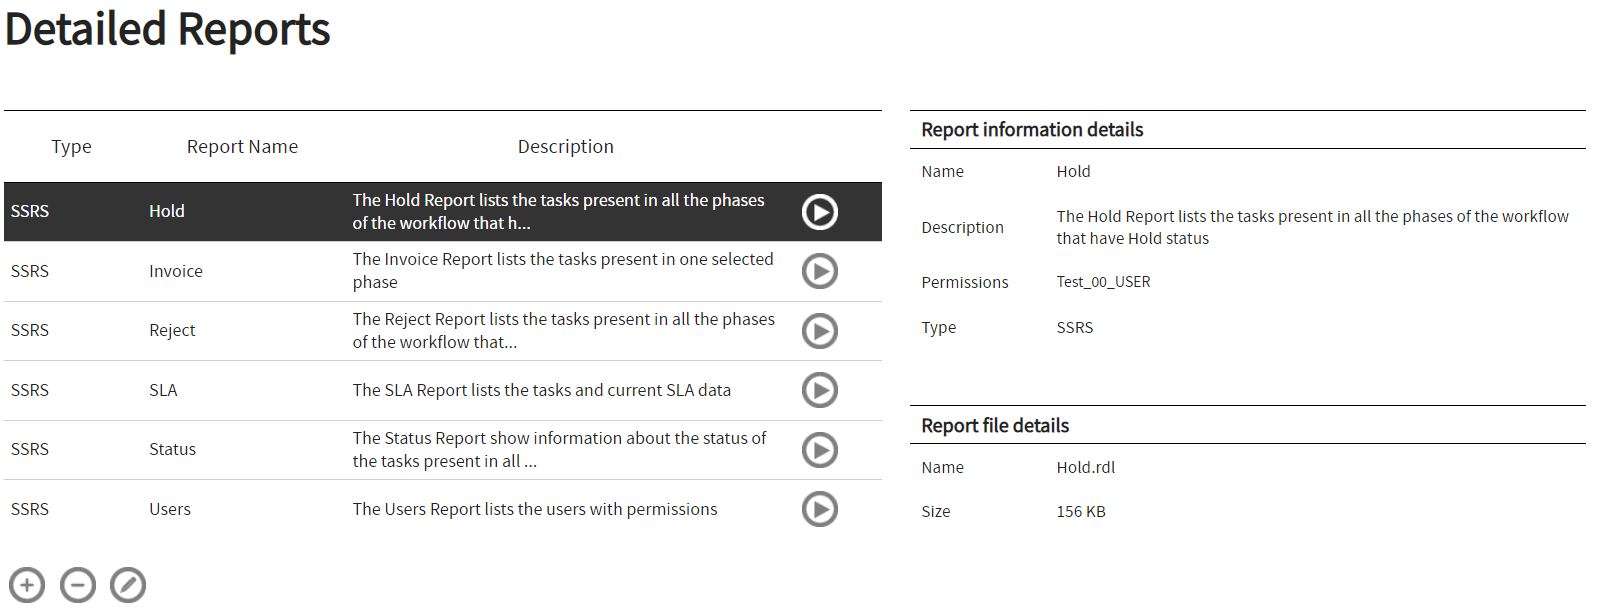
The detailed reports page is loaded with functional options and a list of existing reports
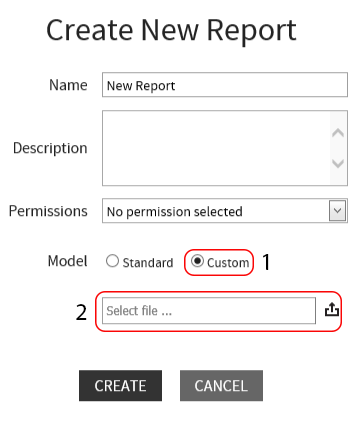
3. Click on the  Icon to create a new report
4. Select Custom for model and then click on the Select file ... field or the little upload button next to it.

5. After selecting the report file click on the Open to add the report.
6. Click on CREATE
To View / Edit / Delete a Report
On the RayFlow Detailed Reports page a list of all the reports added by the user is shown. Visibility of a report is controlled by the permission group set for it. To view a report, simply click upon the Play button, which is available next to a report.
Properties of a report including its permission group can be changed by clicking on the  button. After making the changes, a user can either finalize the change by selecting "Save" button or reject them by selecting Cancel button.
Delete a report,by clicking on the  button.