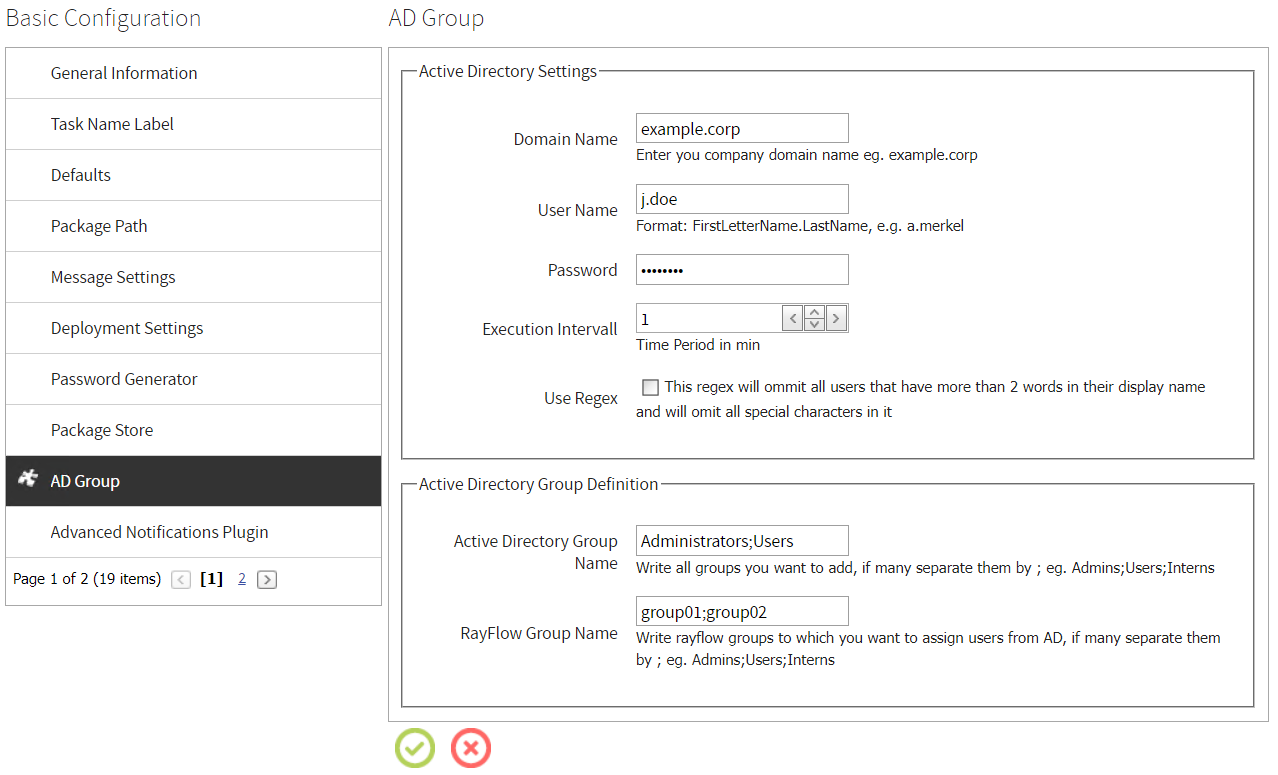
The AD Group plugin can be configured here. This plugin can be used to import users and user groups from the active directory into RayFlow.

The settings for the AD Group plugin is divided into the Active Directory Settings section and the Active Directory Group Definition section.
Active Directory Settings
•Domain Name: This field needs to contain the name of the Active Directory domain.
•User Name: This field needs to contain the name Active Directory user that is being used to import the users.
•Password: This field needs to contain the password matching the user that is being used for the import.
•Execution Interval: This field defines how often the import is being executed. It can contain a value between 1 and 4. If set to 1, the import will be executed once per day. If set to 2, it will be executed twice per day and so forth up to a maximum of 4 times a day.
•Use Regex: If this checkbox is checked, users which have more than two words in their display name or names which contain special characters will be omitted. This option allows to only add users which are used by actual employees. Names containing umlauts, accents, or hyphens will not be omitted even if this checkbox has been checked.
Active Directory Group Definition
•Active Directory Group Name: This field needs to contain all the groups from the AD that are to be added. If more than one group is to be added the groups need to be separated by semicolons (Example: Administrator;Users). The number of Active Directory Group Names needs to match the number of RayFlow Group Names.
•RayFlow Group Name: This field needs to contain the names of the RayFlow groups to which the users from the AD will be added. If more than one group is to be added the groups need to be separated by semicolons (Example: Administrator;Users). The number of RayFlow Group Names needs to match the number of Active Directory Group Names.
|
Note: If a group of AD users needs to be added to multiple RayFlow groups, the entries must look as follows: •Active Directory Group Name: Users;Users;Users •RayFlow Group Name: group01;group02;group03 |
Activate the Plugin
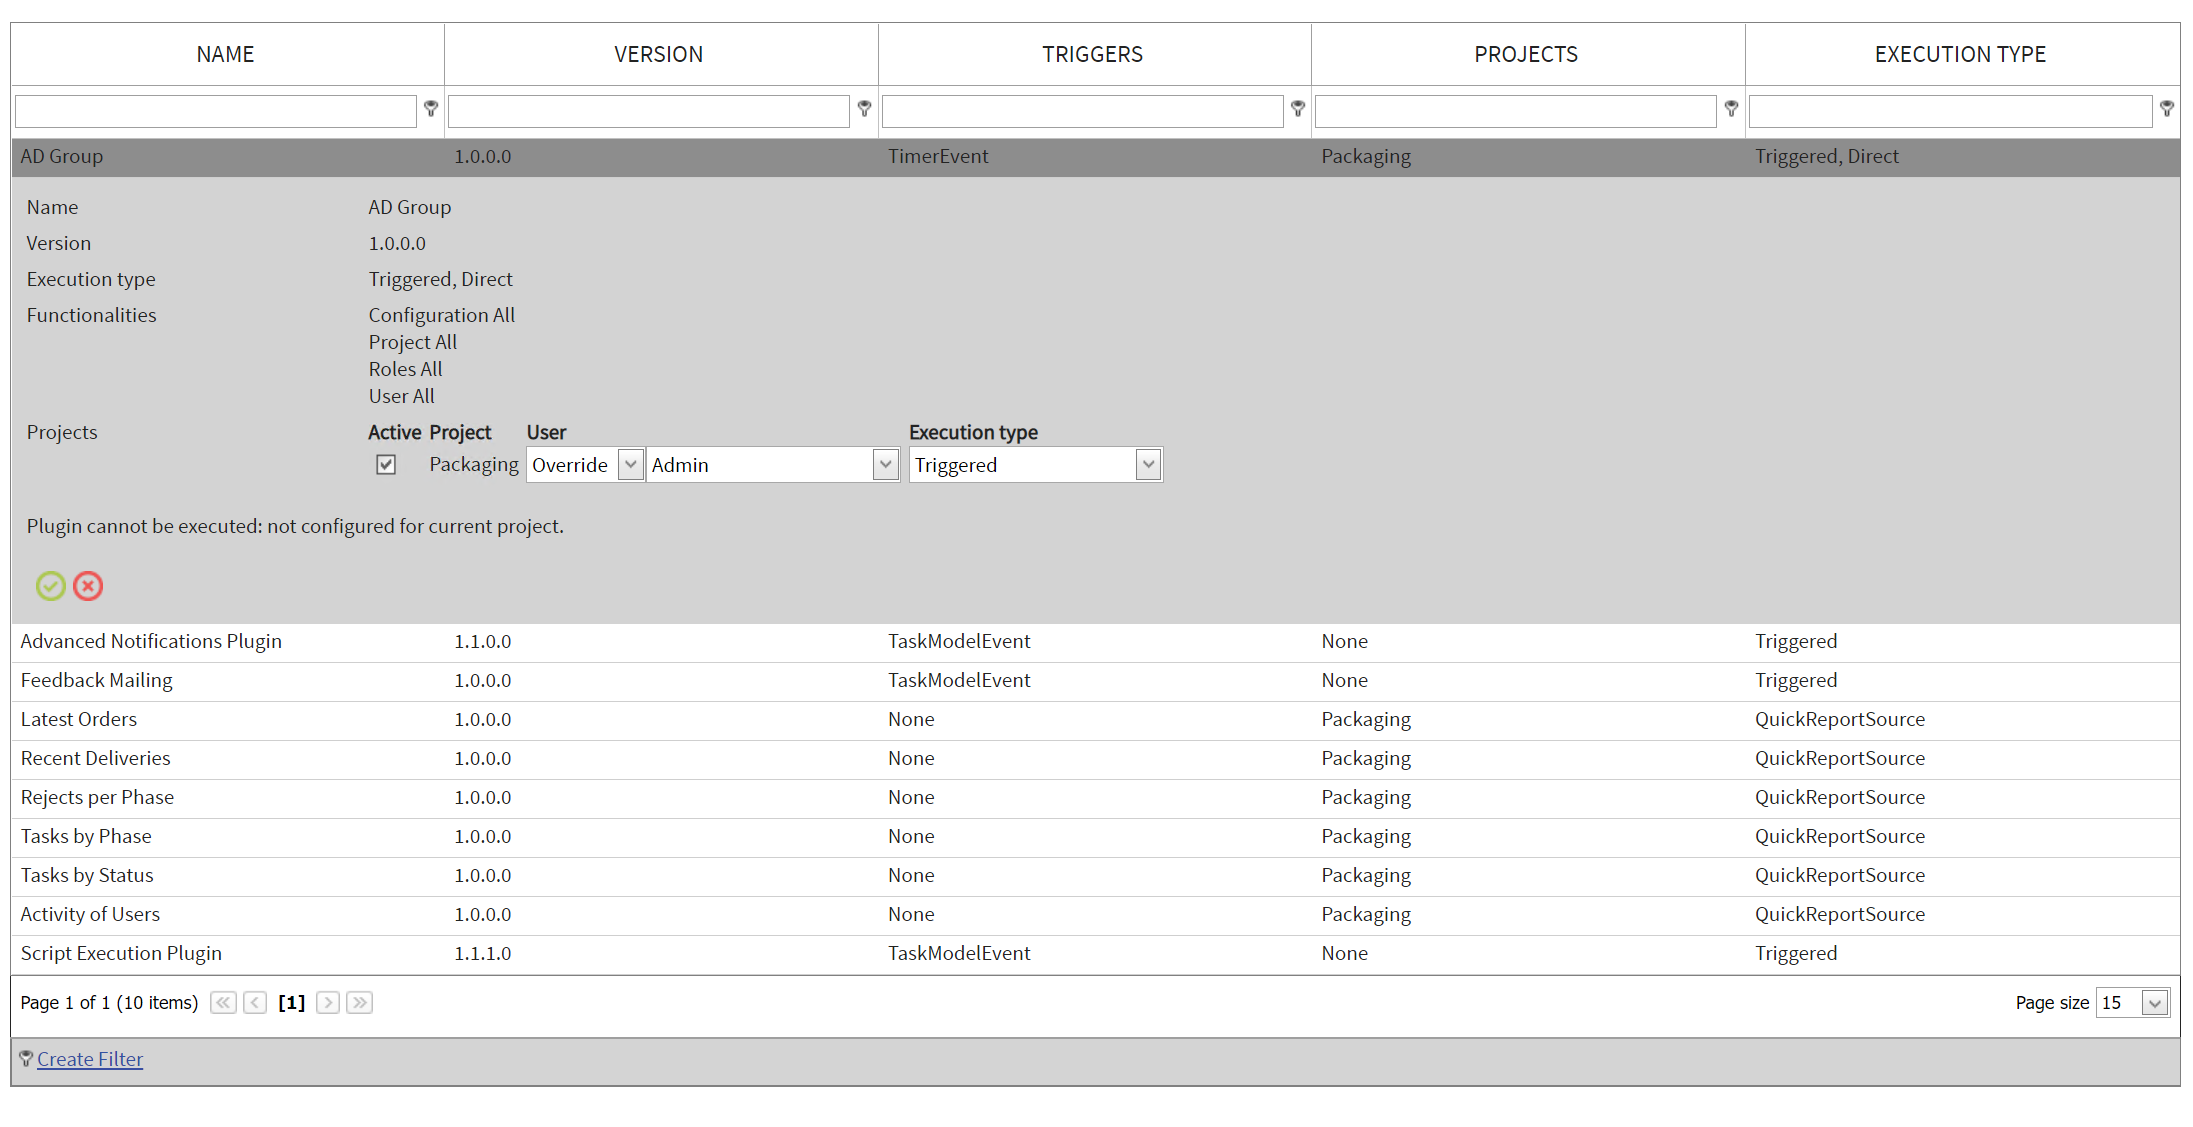
In order activate the plugin, go to Adminstration > Plugins and select the entry for the AD Group plugin.

Select the target projects by checking the checkbox located in front of the name of the project. Select the Override option from the first dropdown menu. Afterwards select a user from the second dropdown menu. It is not relevant for the plugin which user will be selected. Finally select the Triggered Execution type. When all settings have been completed, click on the Save button. The plugin has now been activated for the selected projects and will be triggered automatically according the the schedule defined in the settings.