In order to start the Install wizard, double-click the .msi file.

Welcome Screen
This is the first screen in the Install wizard.

Click on the Next > button to continue the installation.
License Agreement Screen
This screen contains the license agreement. Read the license agreement and select either I accept the license agreement or I do not accept the license agreement.
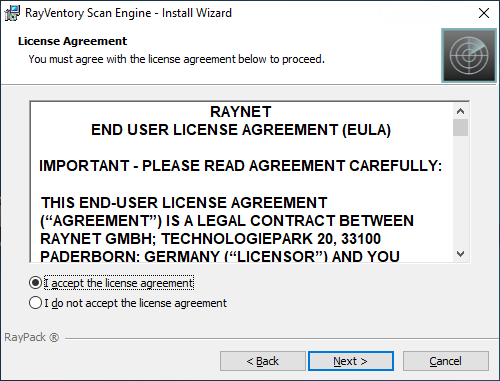
If I do not accept the license agreement has been selected, it will only be possible to either go back to the Welcome screen by clicking on the < Back button or to abort the installation by clicking on the Cancel button. If clicking on the Cancel button a confirmation prompt will appear to ensure that the installation should really be aborted.
After selecting I accept the license agreement click on the Next > button to continue with the installation.
Setup Type Screen
In this screen the setup type of the installation can be chosen.
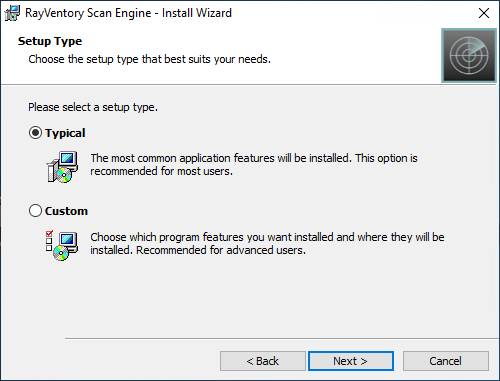
There following options are available:
•Typical: This setup type will install the Scan Engine using the default setup. This setup type is recommended if there are no special requirements.
•Custom: This setup type needs further configuration. When there are special requirements regarding the features needed or the location of the installation choose this setup type.
Click on the Next > button to continue the installation.
Destination Folder Screen
(Only if Custom has been chosen in the Setup Type screen)
In this screen the install location of the Scan Engine can be configured. It will only be available if Custom has been chosen as setup type.
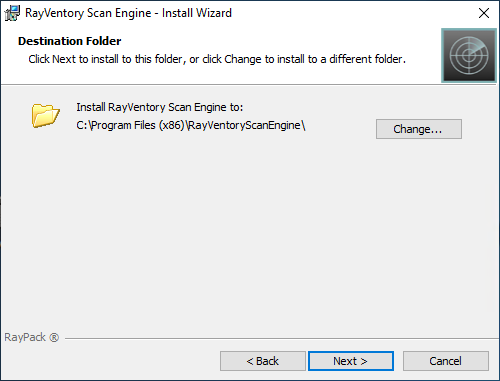
Click on the Change... button in order to open the file browser.
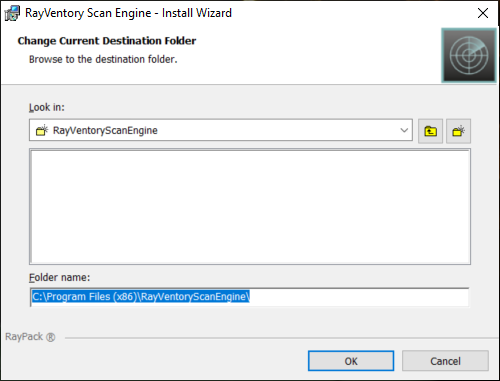
In the file browser, navigate to the target folder and select it. After selecting the folder, click on the OK button.
By default, the target folder for the installation is C:\Program Files (x86)\RayVentoryScanEngine.
Click on the Next > button to continue the installation.
HTTP Upload Service Configuration Screen
(Only if Custom has been chosen in the Setup Type screen)
This screen can be used to define if a local HTTP server for client uploads and a Windows Firewall rule should be defined during the installation process.
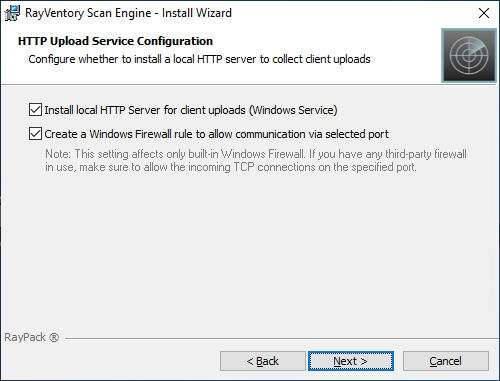
Uncheck the Install local HTTP Server for client uploads (Windows Service) in order to not install the service or if the service is already installed on the device. By default, the service will be installed (Default Port: 591).
Uncheck the Create a Windows Firewall rule to allow communication via selected port if no rule for the Windows Firewall shall be created or if another firewall is being used. If a third-party firewall is in use, an appropriate rule should be created manually in order to allow the incoming TCP connections on the specified port. By default, the rule for the built-in Windows firewall will be created.
The default port used by RayVentory Scan Engine is 591.
Click on the Next > button to continue the installation.
License Type Screen
In this screen the type of licensing used to activate the product can be configured.
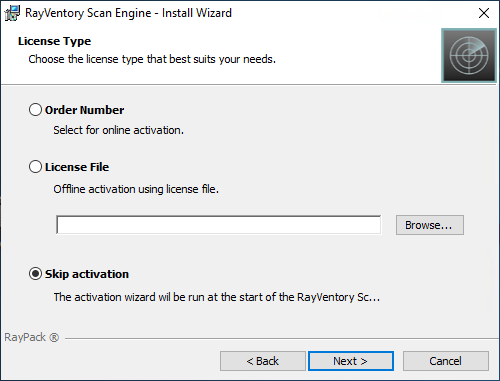
The different options available in this screen are:
•Order Number: This option can be used in order to activate RayVentory Scan Engine using the order number received from Raynet. The process on how to activate RayVentory Scan Engine using the order number is described in the Customer Information Screen step. In order to use this activation method an active internet connection is needed.
•License File: Select this option in order to activate RayVentory Scan Engine with an existing license file. The license file must be of the type .rsl and must be valid for the hardware id of the machine. In order to select the file, click on the Browse... button to open the file browser and select the file. After the file has been selected, click on the Open button of the file browser.
•Skip activation: Select this option in order to skip the activation during the setup and activate RayVentory Scan Engine at a later time. The activation wizard will be run automatically once RayVentory Scan Engine is started for the first time. It can also be executed manually using the Raynet.LicenseActivation.exe. This option should also be used if planning to use the Floating License Server.
Detailed information about the different activation methods can be found in the License Wizard chapter.
Click on the Next > button to continue the installation.
Customer Information Screen
(Only if Order Number has been chosen in the License Type screen)
This screen is only used if the Order Number option has been chosen for the activation. All information necessary for the activation needs to be entered.
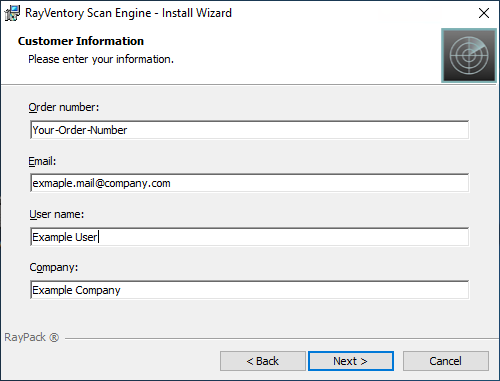
The following information are necessary in order to use the activation method:
•Order number: The unique order number received when RayVentory Scan Engine was purchased. The order number can be recovered by contacting the Raynet sales team.
•Email: This is the email address of the user who performs the activation. The given email will only be used if there are any problems or important information regarding the license.
•User name: The name of the user performing the activation. It does not need to be the same name used for the order.
•Company: The name of the company for which RayVentory Scan Engine will be licensed. This name will appear in the License and Edition view of RayVentory Scan Engine.
When the order number has been confirmed by the RayVentory Scan Engine license server, the product has been activated successfully for the machine.
Click on the Next > button to continue the installation.
Ready to Install the Program Screen
After everything has been configured successfully, the Ready to Install the Program screen will be shown.
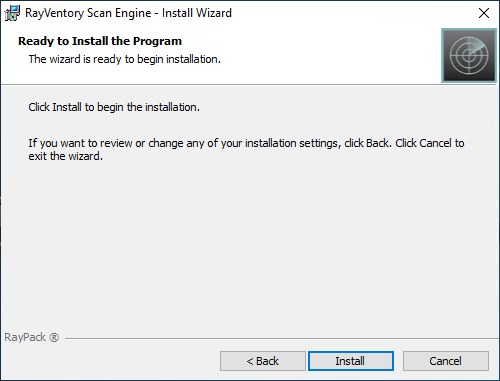
Click on the Install button to start the install process.
Installing RayVentory Scan Engine Screen
This screen is shown during the installation process.

It shows a progress bar and the specific action that is currently being executed by the installation wizard. While this screen is shown, it is possible to abort the installation by clicking on the Cancel button.
Install Completed Screen
This screen will be shown after the installation has been successfully completed.
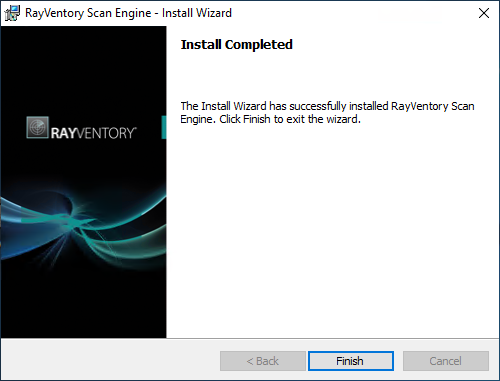
Click on Finish to Close the Install wizard and Finish the installation process.