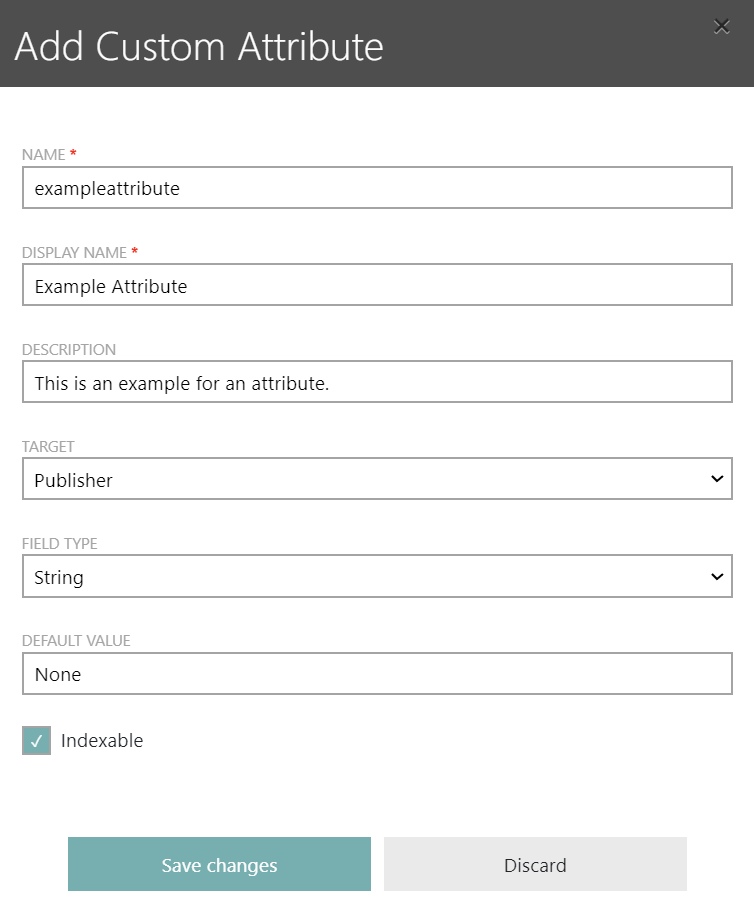
On the sidebar, click on Administration > Custom Attributes. Then click on the Add button located on the top of the page. The Add Custom Attribute dialog will be opened.

The following information can be found in the Add Custom Attribute dialog:
•Name: The unique name of the custom attribute. The name cannot contain any whitespaces or capitalized letters. This field is mandatory.
•Display name: A short name for the custom attribute that will be displayed. In the display name whitespaces and capitalized letters are allowed. This field is mandatory.
•Description: A description of what the custom attribute does.
•Target: The target of the custom attribute. One of the following targets can be selected:
oPublisher
oProduct
oVersion
•Field Type: In this column an icon for the field type of the custom attribute is shown. It can be one of the following field types:
oString
oDate
oCheckbox
oNumeric
oDropdown
•Default value: The default value of the custom attribute. If Dropdown has been selected as Field Type, this field is changed to a Possible Values field which is mandatory. In the Possible Values field, each option for the dropdown menu has to be presented in a new line.
•Indexable: This checkbox is used to define if the custom attribute is indexable. It can be either true or false.
After all relevant information have been added, click on the Save changes button to create the new custom attribute.