Upgrading the RayQC Application
General Upgrade Preparations
RayQC 8.0 is delivered as an MSI software package. In order to install it safely:
1.Download the MSI package for RayQC 8.0 from the Raynet resource repositories.
(If you have not already received credentials, please contact the Raynet support team via our Support Panel).
2.Copy all files that need to be kept for later reuse or look-up (such as resources of global external plug-ins, log, settings and config files, the *.license file, etc.) to a temporary transfer directory outside the RayQC application directory (where they usually reside).
3.Make a backup of your SQL Server database which is used by RayQC Advanced Module.
4.Execute the RayQC 8.0 MSI package and work yourself through the setup routine. The installation of RayQC 8.0 is described in the RayQC 8.0 Installation Guide.
|
Note: If upgrading RayQC Advanced, ensure that a running SQL server is available before starting the migration/installation. |
If an Older Version Then RayQC 2.1 Is Installed on the Target Machine
If an older version then RayQC 2.1 is already installed on the target machine there are two different ways to migrate to the new RayQC 8.0.
•Install RayQC 8.0 and keep the installation of RayQC 1.5 or RayQC 2.0. They will remain untouched by the installation of RayQC 8.0.
General Upgrade Preparations
RayQC 2.1 is delivered as an MSI software package. In order to install it safely:
1.Download the MSI package for RayQC 2.1 from the Raynet resource repositories.
(If you have not already received credentials, please contact the Raynet support team via our Support Panel).
2.Copy all files that need to be kept for later reuse or look-up (such as resources of global external plug-ins, log, settings and config files, the *.license file, etc.) to a temporary transfer directory outside the RayQC application directory (where they usually reside).
3.Remove the old RayQC installation manually.
4.Execute the RayQC 8.0 MSI package and work yourself through the setup routine. The installation of RayQC 8.0 is described in the RayQC 8.0 Installation Guide.
Adjusting the Newly Installed RayQC Instance
1.Launch RayQC.
2.Define config files and settings according to the old system state.
3.Test the new settings and configurations by creating and evaluating checklists, communicating with RayFlow, reviewing log files, etc.
4.If there are issues regarding broken or missing functionality, please feel free to contact the Raynet support team via our Support Panel.
RayUpdater
During the migration, if database changes are necessary, these will be done automatically. While executing the setup routine, RayUpdater, the tool used for a safe migration of the data, will be launched automatically and perform all necessary steps without the necessity of any user input.
Upgrading RayQC Files
The file formats RQCT and RQCP Raynet introduced in RayQC 1.5 and have been massively reworked to match the needs of the modernized application logic. Therefore, it is not possible to simply re-use templates and projects that have been generated with RayQC 1.5 in the current version 8.0.
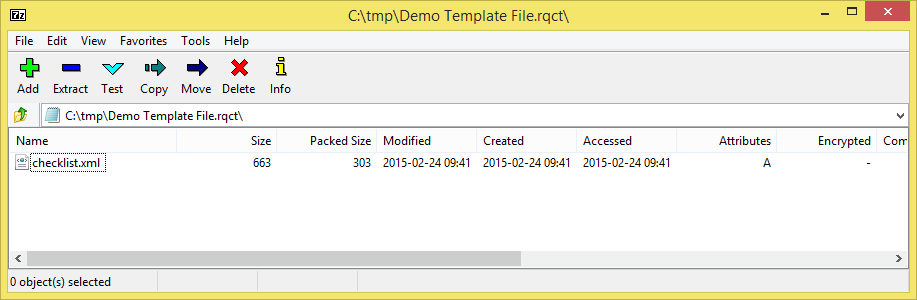
The RQCT files used in RayQC 8.0 are no longer XML structures, but ZIP containers that contain the XML checklist file (checklist.xml) as well as all other resources required to run the checklist on RayQC: plug-ins, help files, images, etc. are stored within dedicated directories wrapped in the ZIP container.
Additional files that represent the current project status of a checklist evaluation (state.xml), post-processing settings and signature information, are added when a template is saved as project file RQCP.
Knowing about these changes makes it quite obvious that there must be some manual steps in any kind of checklist transition from version 1.5 to 8.0. Once this is done, the following standard procedure is a valid option for their transition to 8.0:
To transfer a RayQC 1.5 RQCT to the current 8.0 format, users have to run the following procedure:
1.Copy the original RQCT file to a temporary working directory.
2.Change the file
a.name to checklist
b.extension from .rqct to .xml
3.Create a new ZIP that contains the checklist.xml file. Name the ZIP container according to the old checklist file name, and set the file extension to RQCT.
4.The result of steps 1-4 has to be a zip container with the file extension *.rqct, that contains a checklist.xml file with the original checklist structure.
5.Open this file in RayQC 8.0.
6.It is most likely, that the validation procedure run during checklist loading states issues with the XML source structure. In this case, a dialog is displayed, revealing details about invalid areas with a click on the more button.
Open the checklist.xml file from within the RQCT container, and correct all mentioned issues to establish an XML file that is valid according to the ChecklistSchema.xsd demanded by RayQC 8.0.
7.Save the changes to the checklist.xml file, and re-try to open the RQCT container with RayQC.
8.Repeat steps 6 & 7 until the checklist is successfully validated and opened by the application.
Once this level is achieved, all upcoming changes may be executed directly within the checklist editor. Please refer to the User Guide section about editing checklist templates for further instructions.
|
Be aware:
Please contact your RayQC service consultant, or the Raynet support team to get information about possible forms of assistance for any required upgrading measures. |