This section describes how to import a package from RayFlow into the RayQC Advanced library.
1. Select the item Import package from the swipe-bar
The IMPORT PACKAGE WIZARD is initialized
2. Select RayFlow from the available options.
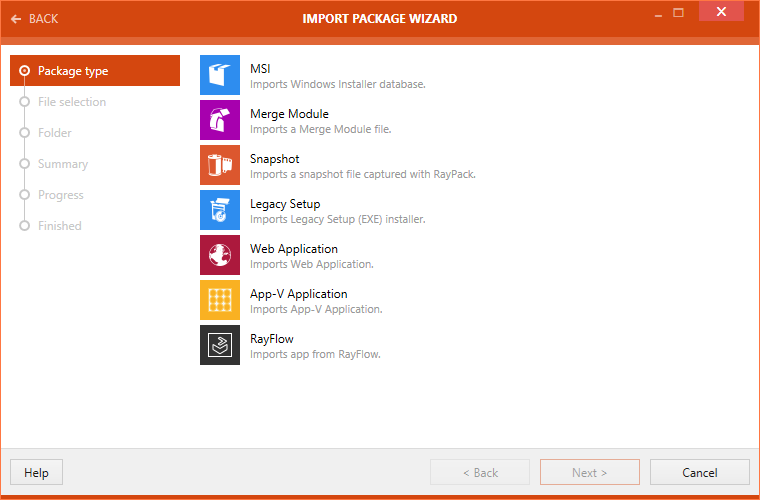
3. Click on the Next > button
The PACKAGE SELECTION page is now available.
4. From the drop-down menu, select the phase in which the target package for import into the library can be found.
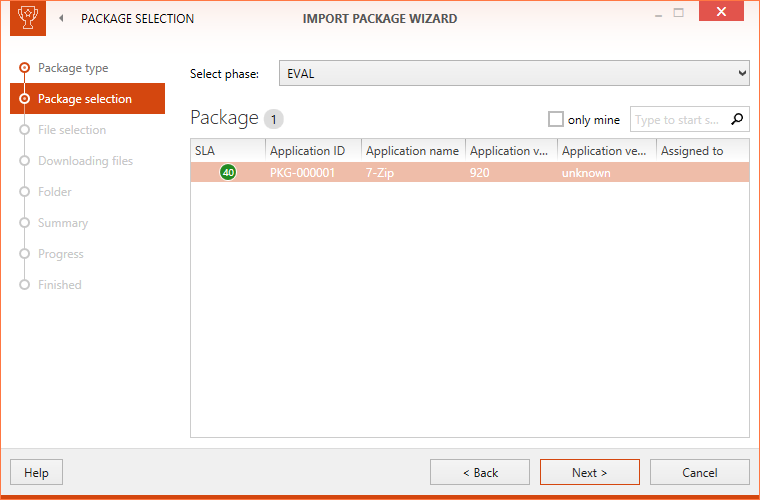
5. After selecting a phase, all packages which are currently in the selected phase will be listed. Select the target package from the list of packages. If there are a lot of package in a phase, it is possible to search the list by using the search function. Furthermore, if the only mine checkbox is checked, only packages assigned to the currently logged in user will be shown.
After the target package has been selected click on the Next > button to proceed.
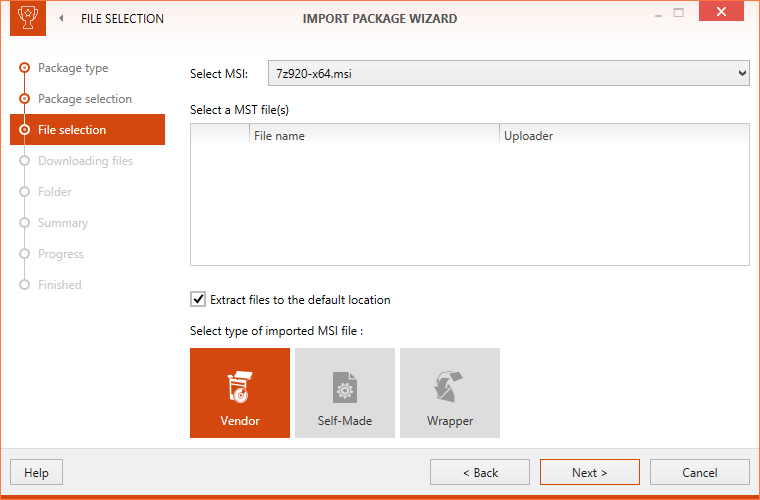
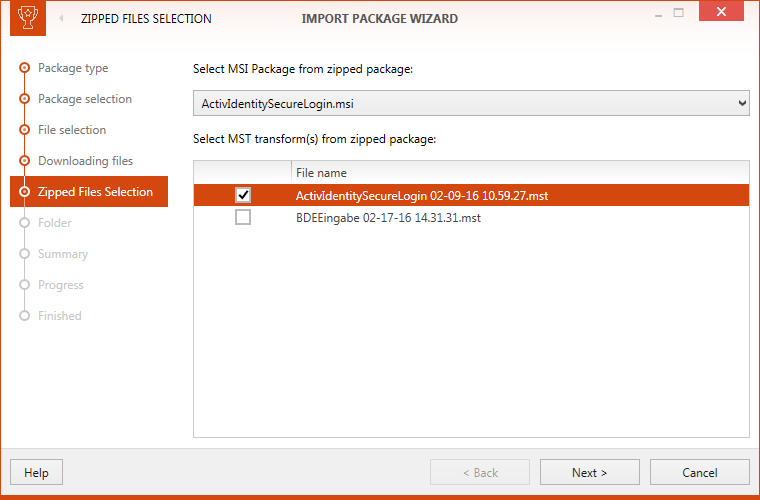
6.The File selection page is shown now. If a RayFlow package contains more than on file that can be imported into the RayQC Advanced library, the target file can be chosen by using the drop-down menu. Furthermore, if there are MST file(s) available in the package, they can also be chosen.
A user can also choose a ZIP package which contains .msi and .mst files.
If a ZIP package contains more than one MSI file, on the next step, the user will be asked to select one .msi file that will be imported into the library.
Click on the Next > button to proceed. The files are downloaded now. After the download has been finished, RayQC Advanced will continue to the Folder page.
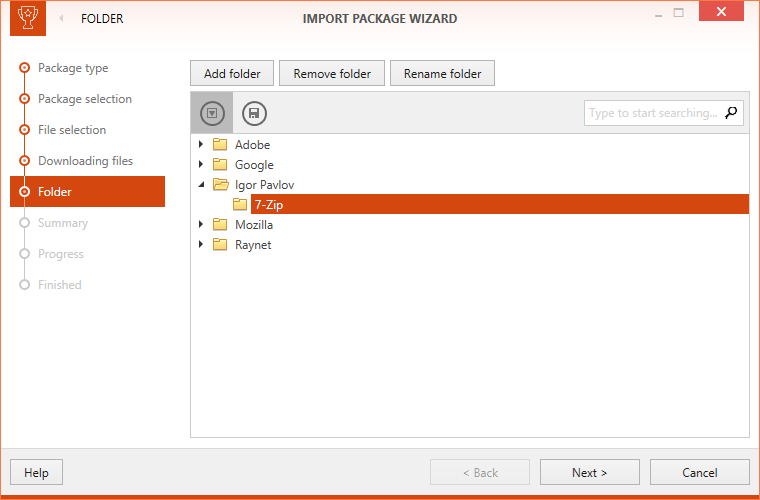
7.On the Folder page select an existing folder or click on the Add folder button to add a new folder as destination for the page. The folder shown here are the folder that are currently part of the SOFTWARE section of the RayQC Advanced library.
After a destination folder has been chosen, click on the Next > button to proceed.
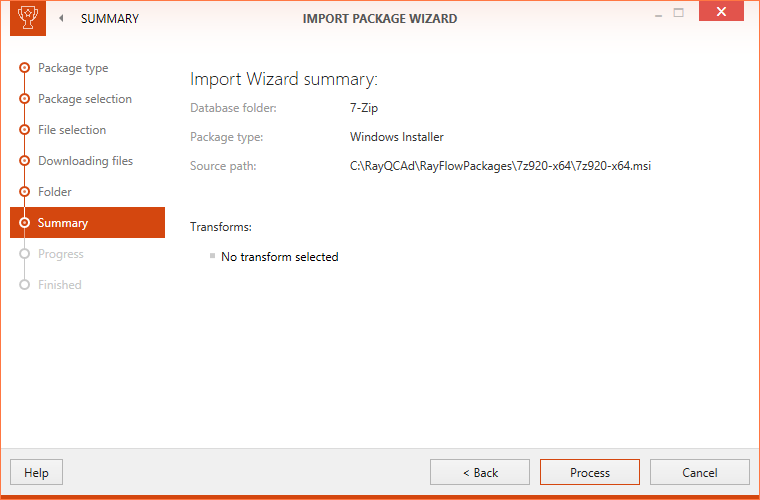
Next, the Summary page is shown. The user input for the package import is summarized on this page.
8.Click on the Process button to start importing the package.
A progress bar is shown.
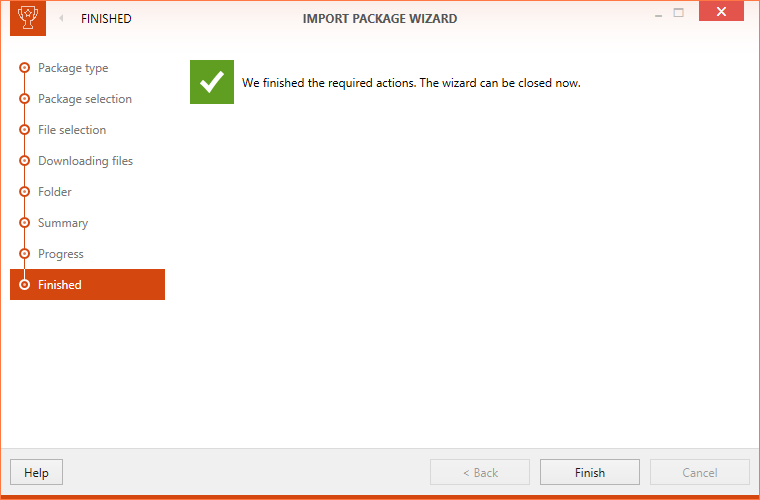
9.Confirmation on successful package import is shown on the Finished page.