Once you have a certificate (from an authority or a self-signed one), the next step is to configure the certificate in RayPack, so that your MSI and MSIX packages can be signed.
The configuration is to be done per profile, in the Settings > Signing + Tagging section.
Depending on the option you choose, you may have one of the following
•A pair of PFX/CER files and a matching password
•A locally installed certificate, in which case you should know its name.
Like mentioned in the chapter Timestamping, it is always recommended to include a timestamp bit in each signed package. For this tutorial we will use a publicly available server http://timestamp.globalsign.com/tsa/r6advanced1 but there are many more choices, both free and commercial.
|
Tip: RayPack comes with a list of available timestamping authorities, you can either select one from the available options or enter a custom URL to the desired timestamping authority. |
Configuring Signing with PFX File
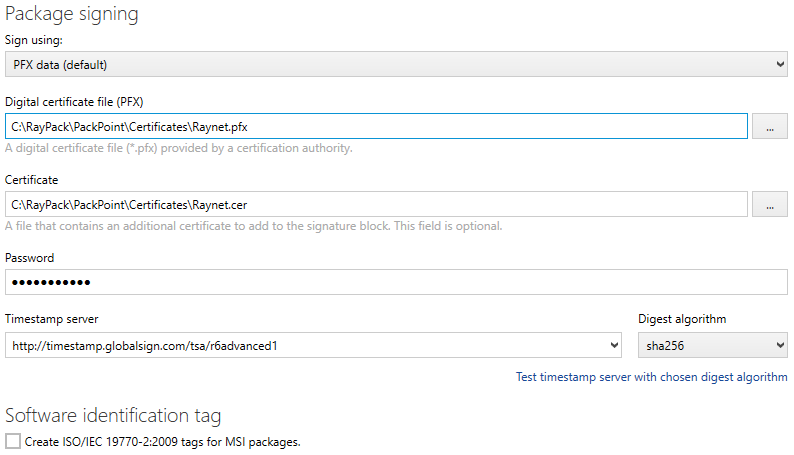
In this example, we assume that you have two files: a digital certificate file Raynet.pfx and a file with additional certificate to add to the signature block Raynet.cer. Both names are the same as in the next chapter, which discussed creating a self-signed certificate. Only the PFX file is required, CER is recommended but optional. The following image shows the desired state of the signing settings:

The process is straightforward, the only thing to keep in mind is that the path to the PFX file is always accessible (for example, if you are using a shared location that is shared by multiple users). Save the settings, you can now build your MSI/MSIX packages with the newly configured certificate.
|
Tip: Make sure that the signing is enabled in the Build options settings or global settings. See chapters Signing + Tagging and Windows Installer. |
Configuring Signing with Certificate Name
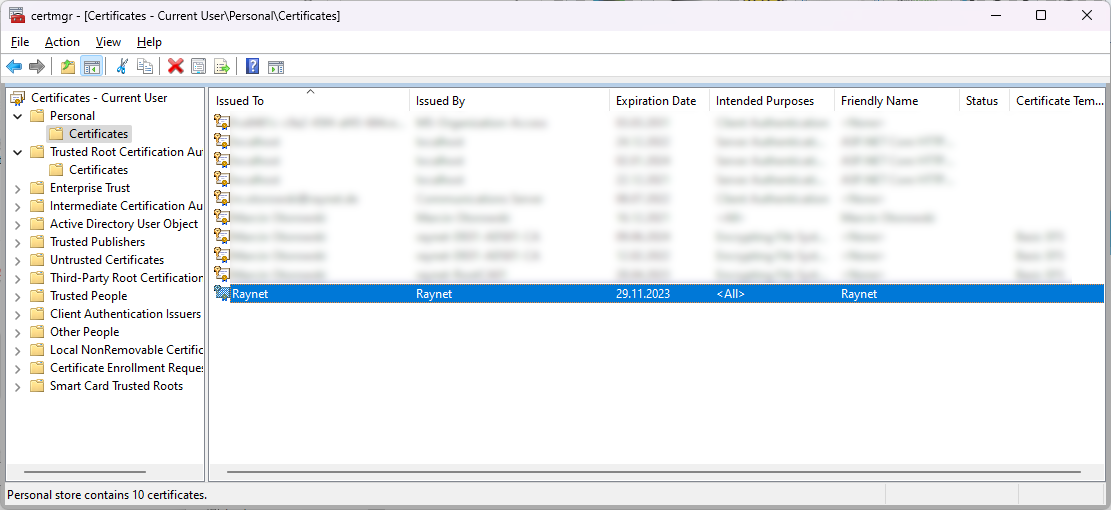
If your certificate is imported into a local certificate store, you can instruct RayPack to use it by referencing its name. The name can be found by opening the Windows Certificate Manager. Press Win + R to open the Run dialog and then type certmgr.msc and press Enter. Go to the section Personal > Certificates. If your certificate is not visible, you can import it using a similar technique to what was described in chapter Importing Certificates.

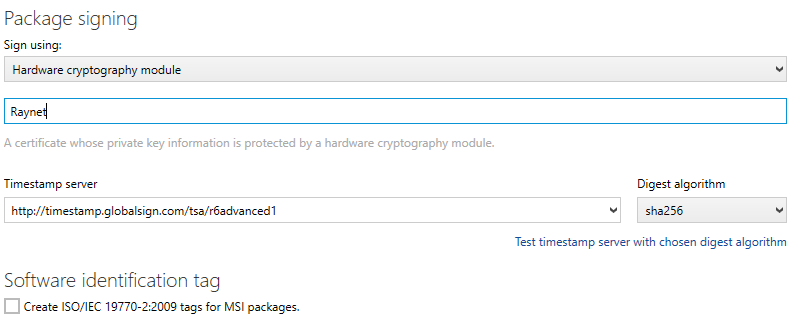
In this example, the name of the certificate is Raynet. Here is how to configure RayPack:

Save the settings, you can now build your MSI/MSIX packages with the newly configured certificate.