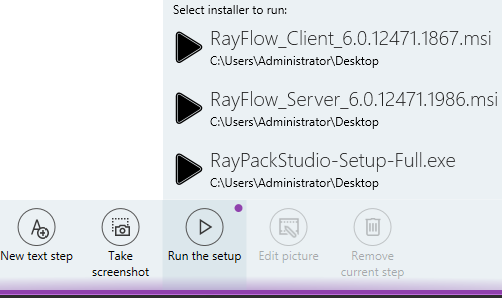
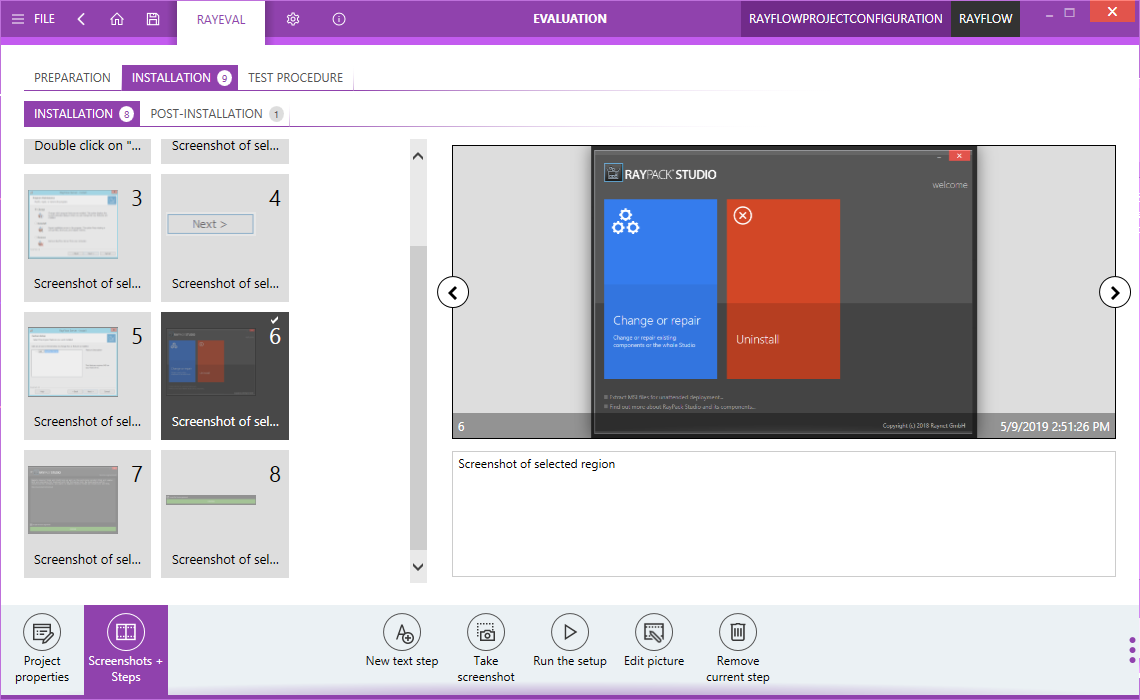
To start the evaluation process click on the Run the setup button located at the bottom. The installation of the package is started and added in the Project details step.
If more than one file was added, the user may choose which package to install first after clicking on the Run the setup button.

After selecting the package file that is to be installed, the package installer is initiated, and a screenshot is taken automatically. This screenshot will be used as the first step in evaluation process.
If a Virtual Machine configured for evaluation is active and the setup path is in UNC format, then RayEval asks how to proceed:

Selecting COPY makes a copy operation from UNC path to the Virtual Machine and then starts the file from there. Pressing USE UNC PATH only sends the URI to the machine, and the file will be started from that location directly on the VM. For this to work, the shared location must be available from both host and guest machine.
Capturing Screenshots and Screen Regions
During the installation process, the user is able to take screenshots of the steps using the trigger set in the Hotkeys section of RayEval. It provides the opportunity to either capture the entire screen, the whole window, or a specific element. When capturing the whole window it is possible to mark a specific area of the screen. By default, the Middle Mouse Button is the button that is defined for capturing a screenshot and Alt and the Middle Mouse Button are used as shortcut to capture the whole window while marking a target element.
The entire screen is captured by clicking the Middle Mouse Button while the pointer is hovering on the desktop. To capture the window either use the defined shortcut for capturing the whole window in a target element or click on the Middle Mouse Button while on the title bar of the window. Finally, a single element can be captured by clicking on the Middle Mouse Button while on the element.
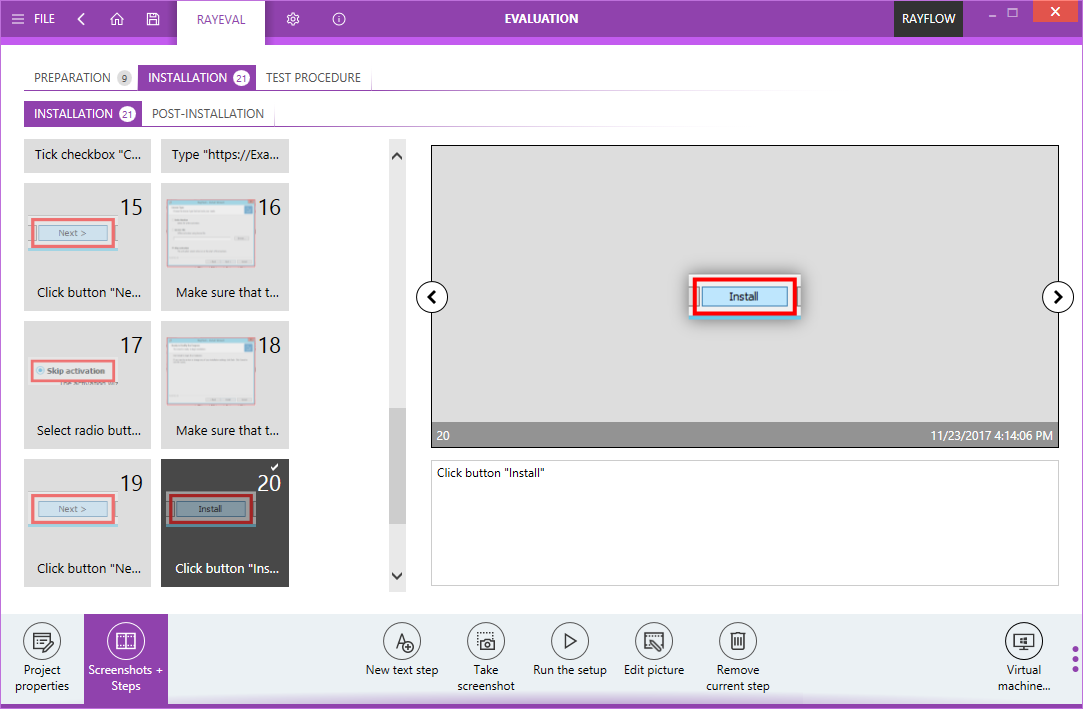
For each screenshot a new step is added to the project.

Concurrently, notification regarding these new steps to be added will transpire. This notification can be viewed when RayEval is minimized.

Apart from the notification, a textbox with default comments will always appear after selecting an option on the screen. These comments are brief instructions or tips that will help the person who is using RayEval, and they can be tailored to the after the specifications of the customer.

Like mentioned before, it is also possible to take a screenshot of an individual user interface element; for example the currently active dialogue / window or individual controls (buttons etc.) that are present on a dialogue or window.

Concurrently on the bottom:

After finalizing the installation steps of a package and making the necessary changes (sorting and arranging screenshots), save the project as described in the Saving the project section of this document.
Post-Installation:
This section of the evaluation contains screenshots of the post installation steps taken after installation of a package.
The screenshots of the steps are based on the requirements from the customer or others.
To start with the post-installation evaluation process, select the Post-installation tab under the Installation tab of the EVALUATION section.

Example of Post Installation:
This example illustrates how RayEval is used to capture some of the post-installation configuration in the packaging process as screenshots. In this example the capture trigger to take screenshots is set to the middle mouse button.
For this example, the post installation configuration requirement is, that the application language has to be set to English.
1.Go to the folder where the program is installed. Capture a screenshot by clicking the middle mouse button.

2.Select the application icon from the installation folder and capture a screenshot by using the capture trigger.

3.Click on the application executable file to open it. In this case, open the 7-Zip data manager.

4.Use the capture trigger to capture a screenshot of Extras.

5.Click on Extras to expand it and then capture a screenshot of the Optionen button.

6.Click on the “Optionen” button to open the options window and capture a screenshot of the option window.

7.On the “Optionen” window, select the option “Sprache”, to select the language of the application. Capture a screenshot of the “Sprache” button.

8.Expand the drop-down menu and select the English language as application language.

9. Capture a screenshot of English as the selected language for the application.

10. English is now selected as the language for the application. The next step towards applying the changes to the application is to click on the Apply button.

11. Capture a screenshot of the Apply button.

12. Capture a screenshot of the OK button using the capture trigger and confirm the changes by clicking on the OK button.

Test Procedure:
This section of the evaluation process contains steps involving the process taken to test if the installed package runs properly after the installation.
Example test procedure:
Here we have taken 7-Zip as the application that is under evaluation and illustrated some of the steps involved in the testing of the package after installation.
1.Go to the folder where your program is installed. Capture a screenshot by clicking the middle mouse button.

2.Select the application icon from the installation folder and capture a screenshot by using the capture trigger.

3.Double-click on the application executable file to run it. Capture a screenshot of the correct behavior of the application when the executable file is run. In this instance 7-Zip data manager is opened.

4.Verify the test steps captured under the test procedure section of the RayEval evaluation project. Additional details pertaining to the steps can be added in the text section beneath the screenshots when they are selected.