One of the first steps in the evaluation is defining the project properties. Properties available as part of project properties page can be defined in the projectconfiguration.xml file. Properties defined by the user are organized within tab based categories.
For more information on how to define properties by using the projectconfiguration.xml read the chapter on Project Configuration.

|
Note: Placement and name of the tabs is dependent on the configuration and project. In the following the default configuration is used. |
Follow the next steps to successfully complete the evaluation project and save it:
BASIC:
1.Click on the BASIC tab to edit the basic properties of the project.
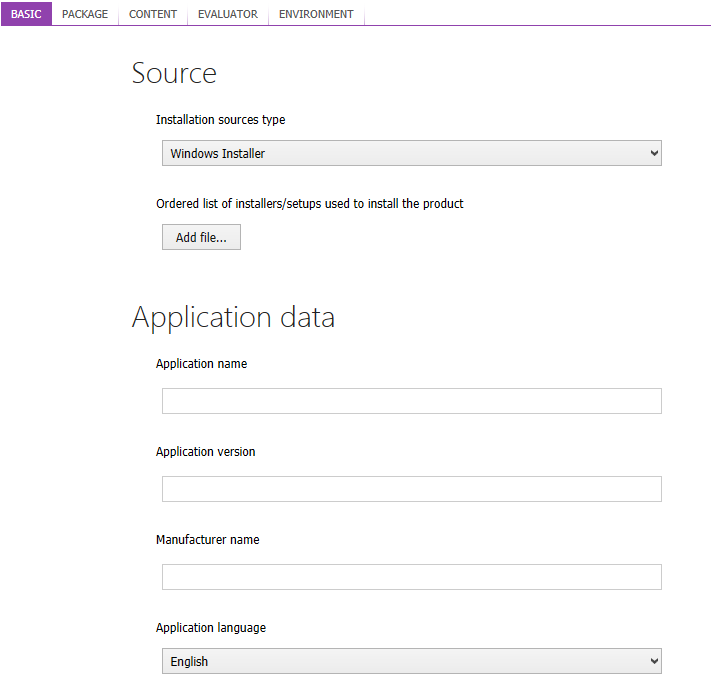
2.Either select the installation source type from the drop-down menu or it will be automatically set, based on the selection in the Installer selector property of tge Select file to add dialog. This dialog is available when a user clicks upon the Add file... button.

3.To add files to your project, click on the Add file... button.
4.Select file to add dialog will open. Select the installer source type from the drop-down menu, navigate to target file, select the target file, and then click on the Open button. This step can be repeated several times to add multiple files to an evaluation project and it is also possible to add any other file type to the project.
|
Tip: The ability to add all file types to the project is best used to add files that may be needed for product implementation to the project. For example: legacy setups (*.exe) or script files (*.bat, *'.vba, *.ps1, etc.). |

5.The file is added to the project.

After adding a Microsoft Installer to the project, it is possible to add a transform file (*.mst) by using the add MST file option next to the package.
6.With the addition of the files, the Application data is updated automatically.
7.If needed, it is possible to change the application data by selecting the field you want to change and setting the desired value.
8.To set a different Application Language, select the desired language from the drop-down menu.
If more than one file has been added to the project the main installer needs to be chosen from the drop-down menu.
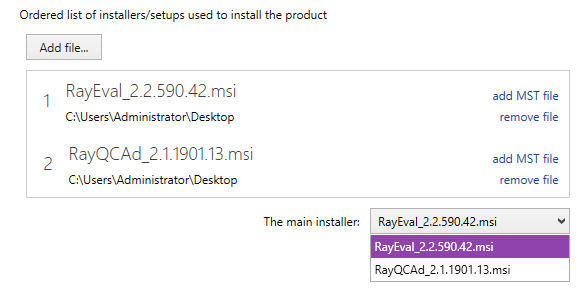
The information which is filled in by RayEval is taken from the installer which is defined as main installer in this field.
PACKAGE:
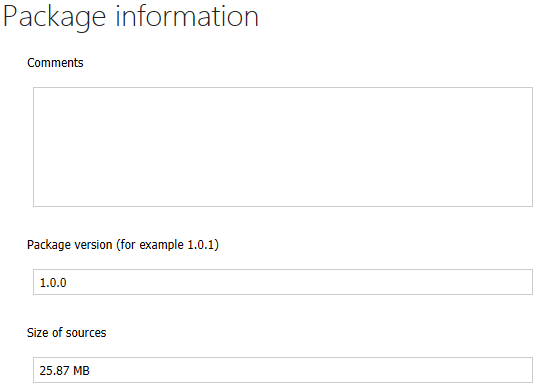
Under the PACKAGE tab there is the option to define the Package information. The following information needs to be provided:
•Comments
•Package version
•Size of sources
CONTENT:
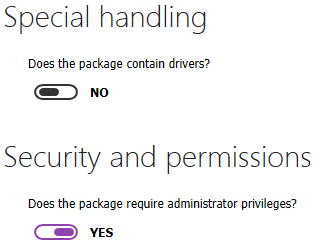
Under the CONTENT tab, it is possible to set information pertaining to the Special Handling and Security and permissions of the package. As part of the special handling, the user can define whether the package contains any drivers. By default, the slide bar is set to NO. Under security and permissions, the user can define whether or not the package requires administrator privileges; by default the slide bar is set to YES. If desired, the default settings can be changed using the slide bar.
EVALUATOR:
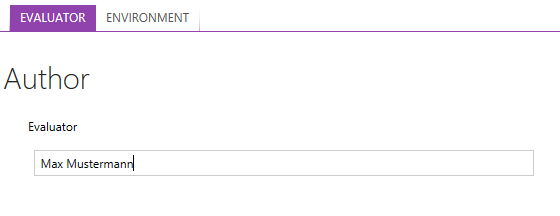
Under the EVALUATOR tab, the name of the author needs to be provided. Usually, the author for the evaluation project is an evaluator. However, based on the defined roles in work environments of the user the roles of the author may vary from packager, to consultant, or something else.
ENVIRONMENT:
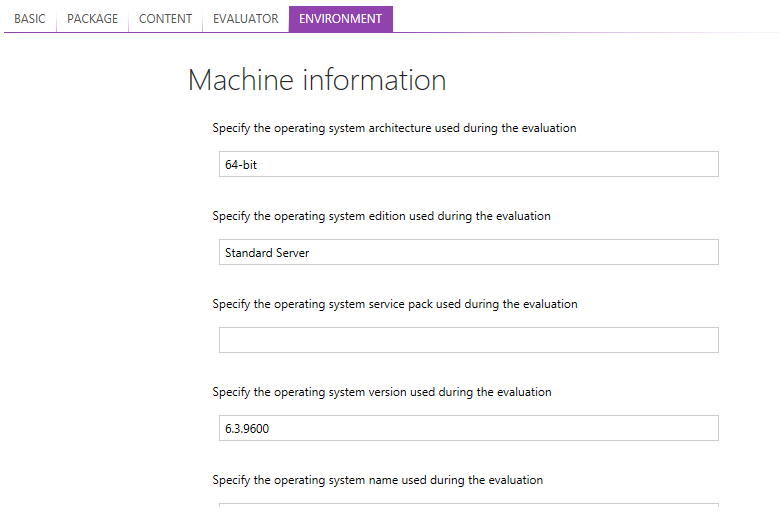
Under the ENVIRONMENT tab, information regarding the machine that is used during the evaluation is automatically set. RayEval provides the possibility to change the values that have been automatically set by selecting the field which should be revised and then entering a new value.
The various information that is gathered and set by RayEval under the section Machine information include:
•The architecture of the system
•The edition of the operating system
•The service pack of the operating system
•The version of the operating system
•The name of the operating system
•The name of the machine
Under the User Information section the account name under which the evaluation is performed, is specified.

|
Tip: After the project properties have been added, it is recommended to the save the project. For information on how to save a project refer to the chapter Saving the Project. |