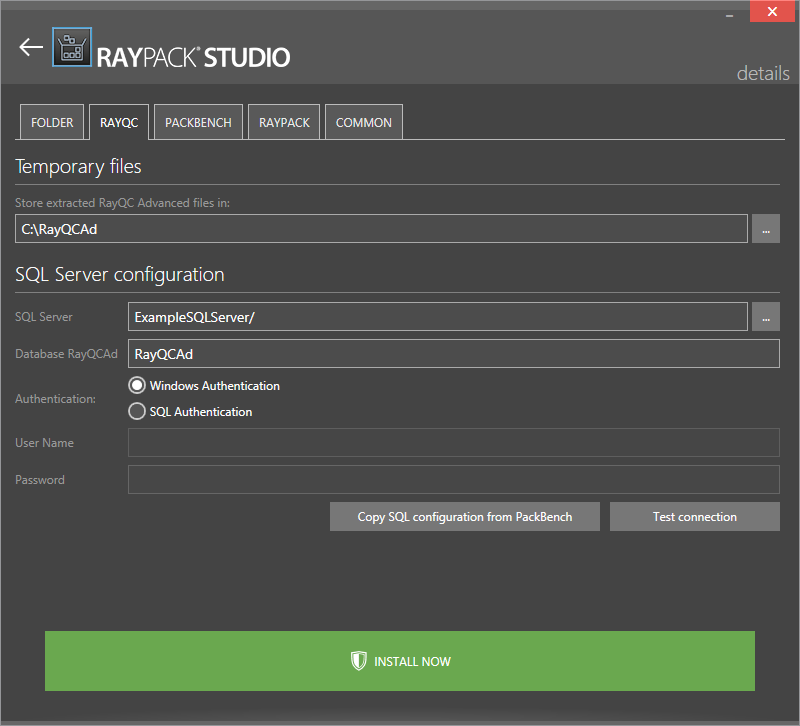
In the RAYQC tab the settings necessary to install RayQC are configured. These settings are comprised of the folder which is used by RayQC Advanced to extract files and the SQL server connection which is needed by RayQC Advanced.

The RayQC Tab
Temporary Files
The directory in which RayQC Advanced is storing its temporary files is configured here. Either keep the default folder or change the folder by using the browse button [...] and select the target folder. By default, the folder configured is C:\RayQCAd.
SQL Server Configuration
•SQL Server: The SQL server needs to be defined. Please specify the server together with the instance (if an instance is required). The server can be specified by its name or by its IP address. The SQL server must exist and must have a user which can create a database and has read and write access to the newly created database. Click on the browse button [...] to select the instance by browsing to the target instance. In order to provide an instance name, separate it from the server name by using a backslash (\) character.
•Database RayQCAd: The name of the database used by RayQC Advanced is defined here.
•Authentication: The authentication method which is used by RayQC Advanced is defined here. There are two options available:
oWindows Authentication: If this is chosen, the Windows authentication of the current user will be used for the login.
oSQL Authentication: If this is chosen, enter a user name into the User Name field and a password into the Password field.
There are also two buttons available which can be used to configure the connection and ensure that the connection is working.
•Copy SQL configuration from PackBench: This button can be used to copy the SQL configuration given in the PACKBENCH tab.
•Test connection: This button can be used to verify that the configured connection to the SQL server is working.
For more information on RayQC and RayQC Advanced refer to the RayQC User Guide and the RayQC Installation Guide.