1.Select an unassigned fingerprint.

2.The FINGERPRINT DETAILS will be opened.
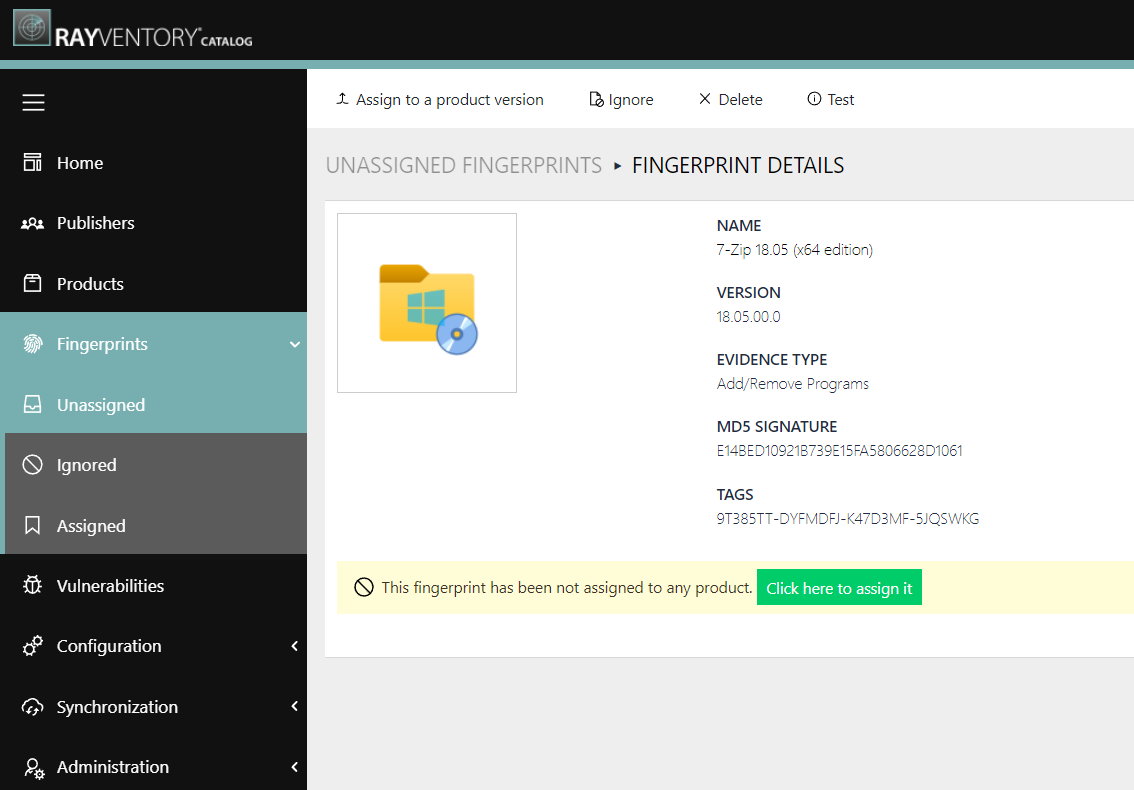
3.Click on the Click here to assign it button.

4.The Assigning a fingerprint dialog will be opened.
5.Enter then name of the PRODUCT PUBLISHER. It is recommended to use the common short name when defining the name of the PRODUCT PUBLISHER. It is also recommended to avoid using legal forms.
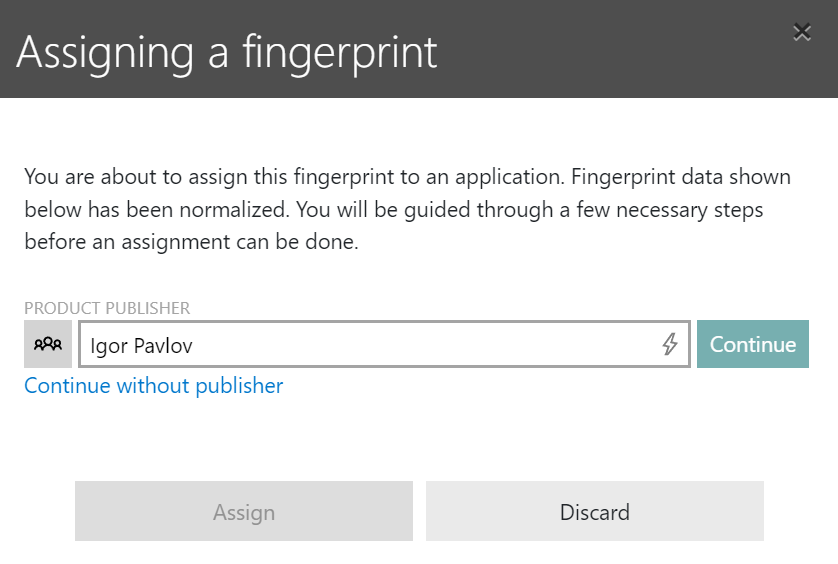
6.Click on the Continue button to confirm the entry.

If the publisher does not yet exist, click on the Create and continue button instead.

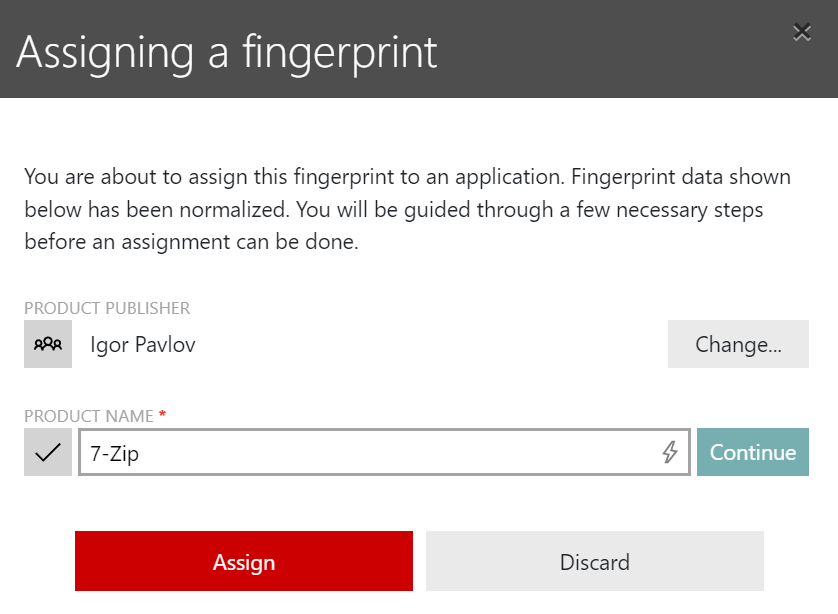
7.The FULL PRODUCT NAME should reflect the common name of the software as it is published to a marked. For example: "Microsoft Office Professional", "WinZip", or "Microsoft SQL Server Express".
|
Note: |
|
Note: |
|
Note: |
8.Click on the Continue button to confirm the entry.
If the publisher does not yet exist, click on the Create and continue button instead.
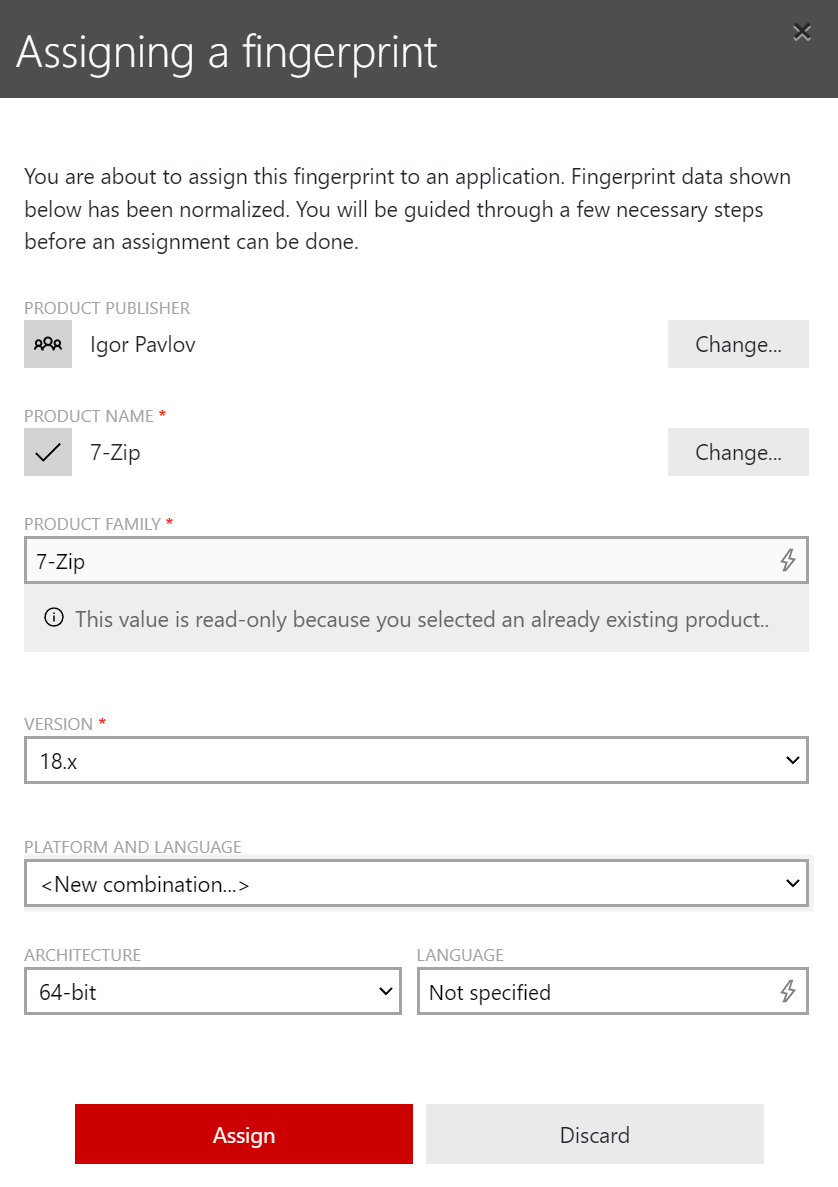
9.Define the PRODUCT FAMILY of the product. The product family groups the history of a product developed for the same purpose.
Example:
oMicrosoft Office: Microsoft Office 2003, Microsoft Office 2007, Microsoft Office 2003 for MacOS
oMicrosoft Office Professional: Microsoft Office Professional 2003, Microsoft Office Professional 2007
|
Note: In case of different editions, it is recommended to omit the word "Standard" for the standard edition. In this case, create the product name without the edition. |
10.Define the VERSION of the product. It is important that software management distinguishes between the commonly known public version of a product and the technical (internal)version number.
|
Be aware: |
If the technical version number is 18.06., the versioning is changed to 18.x. Thus all the fingerprints for the versions 18.01, 18.02, 18.03, etc. will be grouped together.
Example:
o5.16.1601 > 5.x
o5.17 > 5.x
o5 > 5

|
Note: |
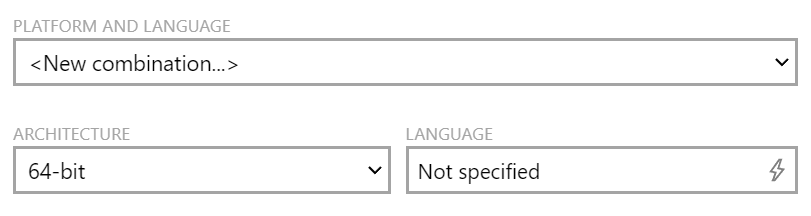
11.In this step PLATFORM AND LANGUAGE for the product need to be defined. For this information, especially the language, further information about the product might be necessary as the technical information delivered might vary from the GUI language of the product. Furthermore, some products are sold as "neutral", which means that they support "English" (as English is the IT standard) and a "language pack" can be used to localize the product to another language.
|
Note: |
12.Click the Assign button in order to save the assignment.

The following steps might be redundant if the structure first approach has been used.
After the fingerprint has been assigned to a product, it is necessary to check and eventually edit the product information and the version information. It is recommended to start by editing the product information and then continue with editing the version information.