The following sections describe the steps to install the Raynet One Data Hub Agent, including prerequisite configurations and the execution of the installation process.
Add API Key
This section describes the process for generating an API key required for the .msi installation of the Raynet One Data Hub Agent, which can be performed after completing these steps.
In DataHub navigate to the profile in the top-right corner and select Profile. This displays the overview of the profile's API keys.
Click the Add button to create a new API key.
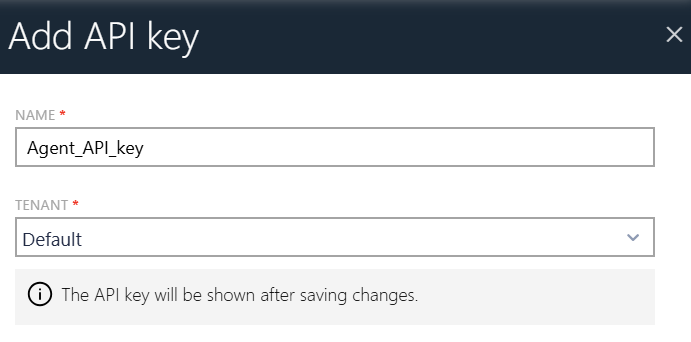 |
•Enter the name for the new API key in the first line. •Select the desired tenant from the dropdown menu. •Click the Save changes button to complete the API key creation. |
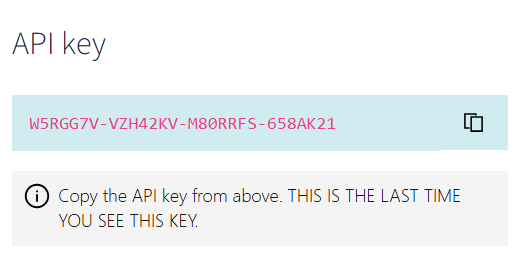 |
•Copy the displayed API key for use in the .msi installation process. |
|
Important: The API key must be created specifically for the tenant that the agent will be collecting data for. As of version 2026.4, Raynet One Data Hub validates that the API key belongs to the same tenant that is specified in the agent configuration. An API key that was generated under a different tenant will cause the agent to stop functioning. When running agents for multiple tenants, ensure that each agent uses an API key that was created within its own tenant. |

Install Data Hub Agent with .msi File
Run the "RayVentory_Data_Hub_Agent.msi" and follow the steps shown within the setup wizard. You will be asked for two important properties:
•The URL of Raynet One Data Hub - the full URL, together with the protocol and port number, for example https://rayventorydatahub.local:8090. When in doubt what the correct URL is, check out the address bar in your browser or ask your administrator
•The API key, which can be generated in Data Hub (section Profile).
•The tenant ID. This information is visible in the tenant selector, which is available from the login screen, settings or from tenant switcher. You can also copy the tenant ID directly from the Download pop-up