Every request requires a special token, called API key. By using a token, the underlying user to whom the token has been assigned will be impersonated, and the actions treated the same as if the user used his login and password.
To create a token:
1.Sign-in to Raynet One Data Hub.
2.Go to your Profile page.
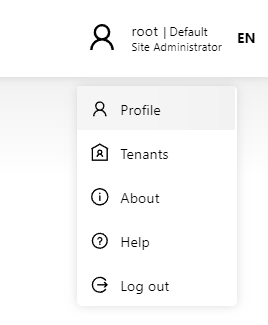
3.Activate the tab API KEYS.
4.Press + Add to open the token wizard.
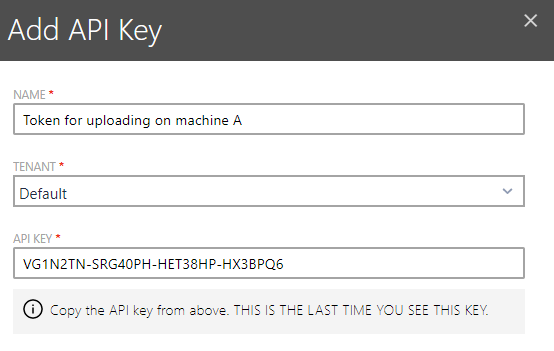
5.Provide the required values.
oName: The display name of the token. This should be any value which describes the purpose or the owner of the token.
oTenant: A token is always valid for a specific tenant. This drop-down defines the assignment.
oAPI Key: This is the actual API key used for authentication. You should leave the default value unless you want to brand your tokens with any pattern.
oPermissions Tab: Navigate to the Permissions tab to configure advanced access controls for the API key.
6.Important: Copy the token or write it down somewhere. As soon as you press Save changes or Discard this value will be not shown anymore!
7.Save changes by pressing Save changes button.
API Key Permissions
API keys can be configured with specific permissions to control access to different features and data. The following permissions are available in the Permissions tab when creating or editing an API key:
AI Endpoint Fetching Permission
This permission controls whether the API key can access the AI-powered data fetching endpoint (/v1/ResultDatabase/fetchViaAi).
·New API Keys: AI endpoint fetching is enabled by default for newly created API keys. You can disable this feature by unchecking the corresponding checkbox in the Permissions tab.
·Existing API Keys: For security reasons, existing API keys created before this feature was introduced have AI endpoint fetching disabled by default. You must explicitly enable this permission if required.
The AI endpoint fetching permission can be viewed in the newly added column in the API keys table, making it easy to identify which keys have this capability enabled.
Configuring AI Endpoint Fetching Permission
To enable or disable AI endpoint fetching for an API key:
1.Navigate to your Profile page.
2.Go to the API KEYS tab.
3.Click + Add to create a new API key.
4.Navigate to the Permissions tab.
5.Check or uncheck the Allow AI Endpoint Fetching checkbox based on your requirements.
6.Save your changes.
|
Note: API keys cannot be edited after creation. To change permissions, you must create a new API key with the desired settings. |
|
Note: Tenant database can be optionally encrypted. The API endpoint ensures that the encryption is done transparently - the information sent to the endpoint should be always unencrypted, regardless of the backend and tenant settings. |
See Also