 |
Best practice: It is recommended to create the following permission sets in a development environment and then migrate them to the productive environment. |
It is recommended to use the authentication with the OAuth 2.0 JWT bearer authorization flow instead of user credentials and security token.
Authentication with OAuth 2.0 JWT Bearer Authorization Flow
First of all, a certificate and a private key pair must be generated. This can be done with OpenSSL by entering the command line and typing in:
"C:\Program Files\OpenSSL-Win64\bin\openssl.exe" req -x509 -sha256 -nodes -days 365 -newkey rsa:2048 -keyout privateKey.key -out certificate.crt
The certificate and the private key will be created in the same folder as the executable.
|
Note: The private key must be known for fetching data from the "Org" using the connector. Otherwise, it will not work due to missing information. |
Keep in mind that certificates expire and that for each "Org" the certificate mus be renewed. With the command about, the certificate will expire after 1 year. A longer period is always recommended to avoid constant renewing of certificates for each "Org".
The certificate is not needed for the connector but must be stored in the Salesforce "Org". Therefore, the certificate must be handed over to the Salesforce administrator.
1.The Salesforce administrator has to log in to the Salesforce "Org" and open Setup. Here the admin can search for App Manager using the search bar.

2.After clicking on App Manager click on New Connected App.

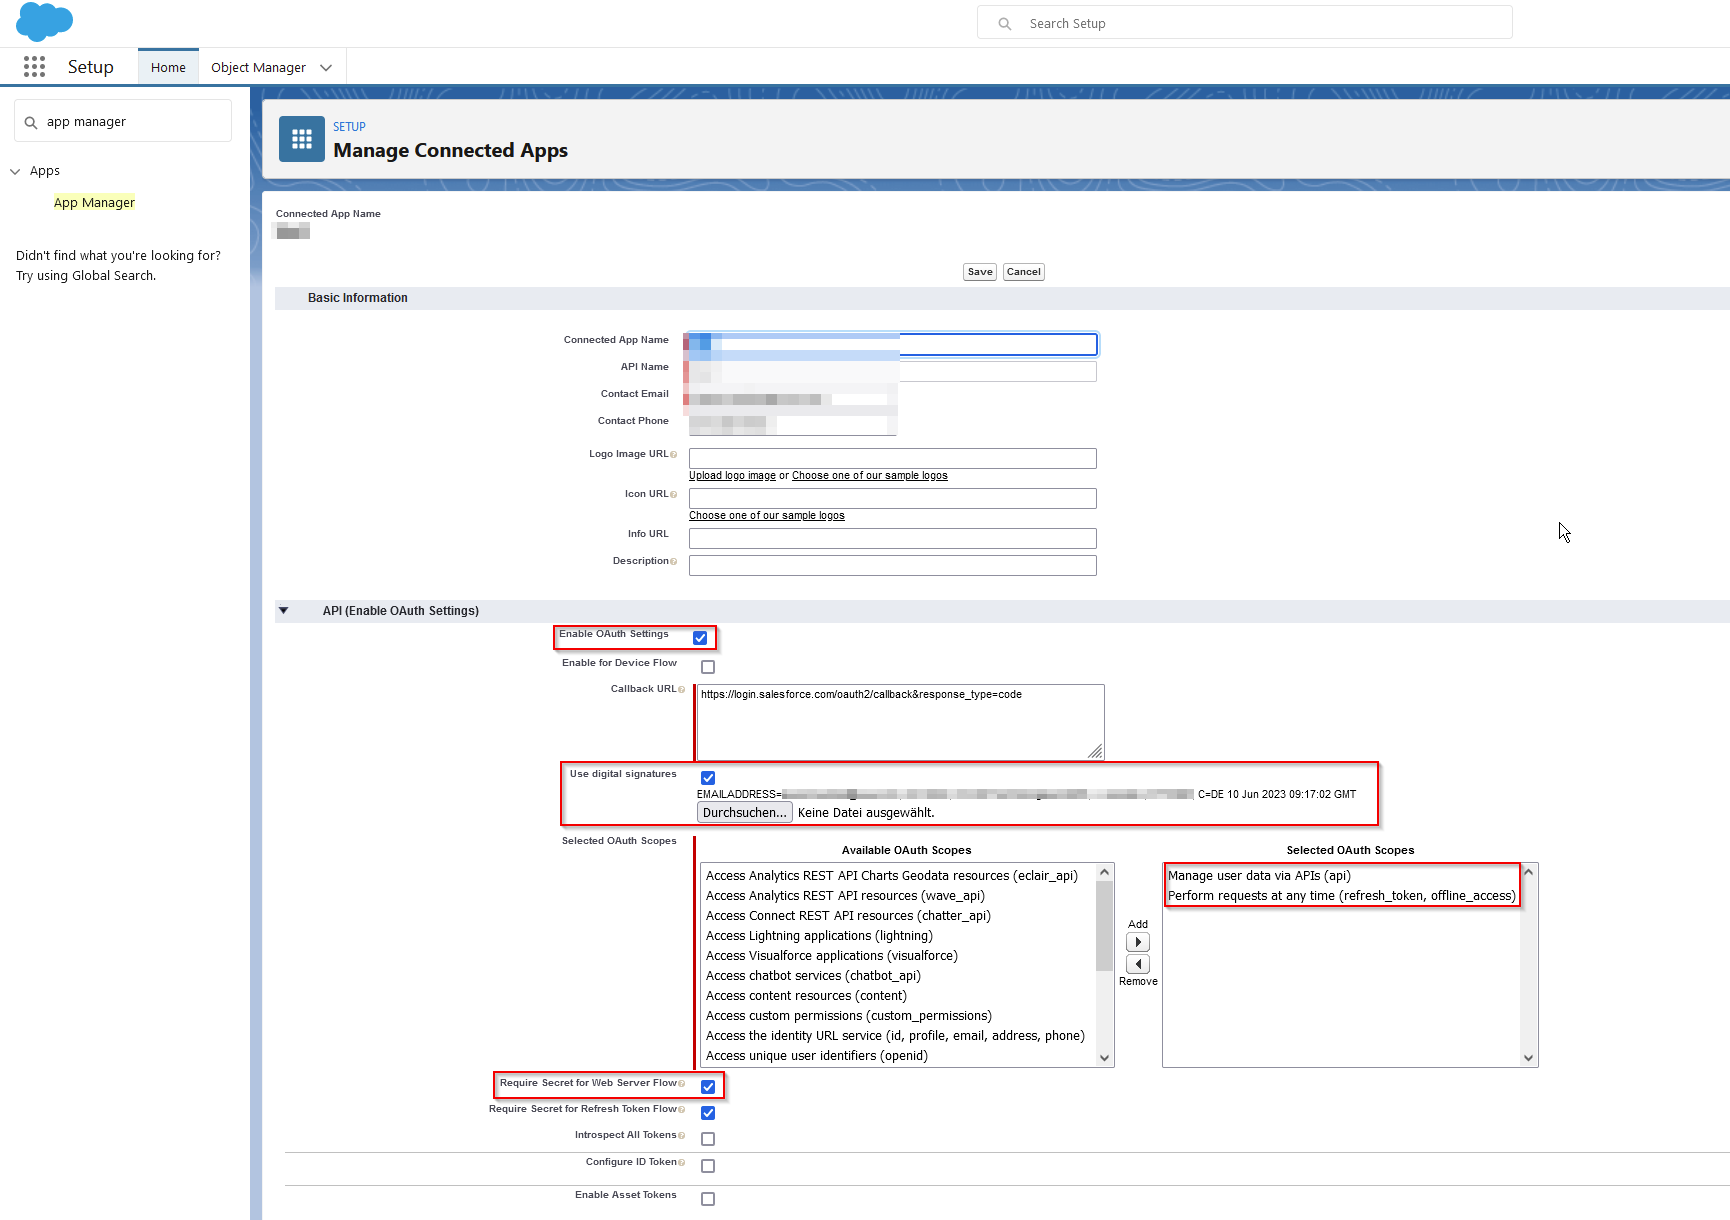
3.Here, the fields that are marked red are mandatory. A name for the connected app and for the API has to be given. Also a Contact Email. In order to enable the OAuth2.0 JWT bearer authorization flow the Enable OAuth Settings have to be set. For the Callback URL it is possible to use the localhost on port 8080.
|
Note: The callack UR in Salesforce is nothing more than what Salesforce calls back as soon as the user gains access to his Salesforce account. A callback URL is typlically the URL that the browser of a user is redirected to after a successful authentication. It is necessary to enter one call back URL per line. Do not separate it them by comma, semicolon, or other characters. The callback URL depends on the OAuth flow that is being used. |
For uploading the certificate that has been created, Use digital signatures has to be enabled. The Upload must be clicked and the certificate file (.crt) must be selected from the Filebrowser-window. Once the certificate is uploaded, the administrator can see the emailaddress, CN, OU, etc. that are being provided by the certificate.
Ensure that the following OAuth scopes are selected:
oManage user data via APIs (api)
oPerform requests at any time (refresh_token, offline_access)
Select the Secret for Web Server Flow required option and save this connected app.
4.After saving it is possible to manage the connected app.

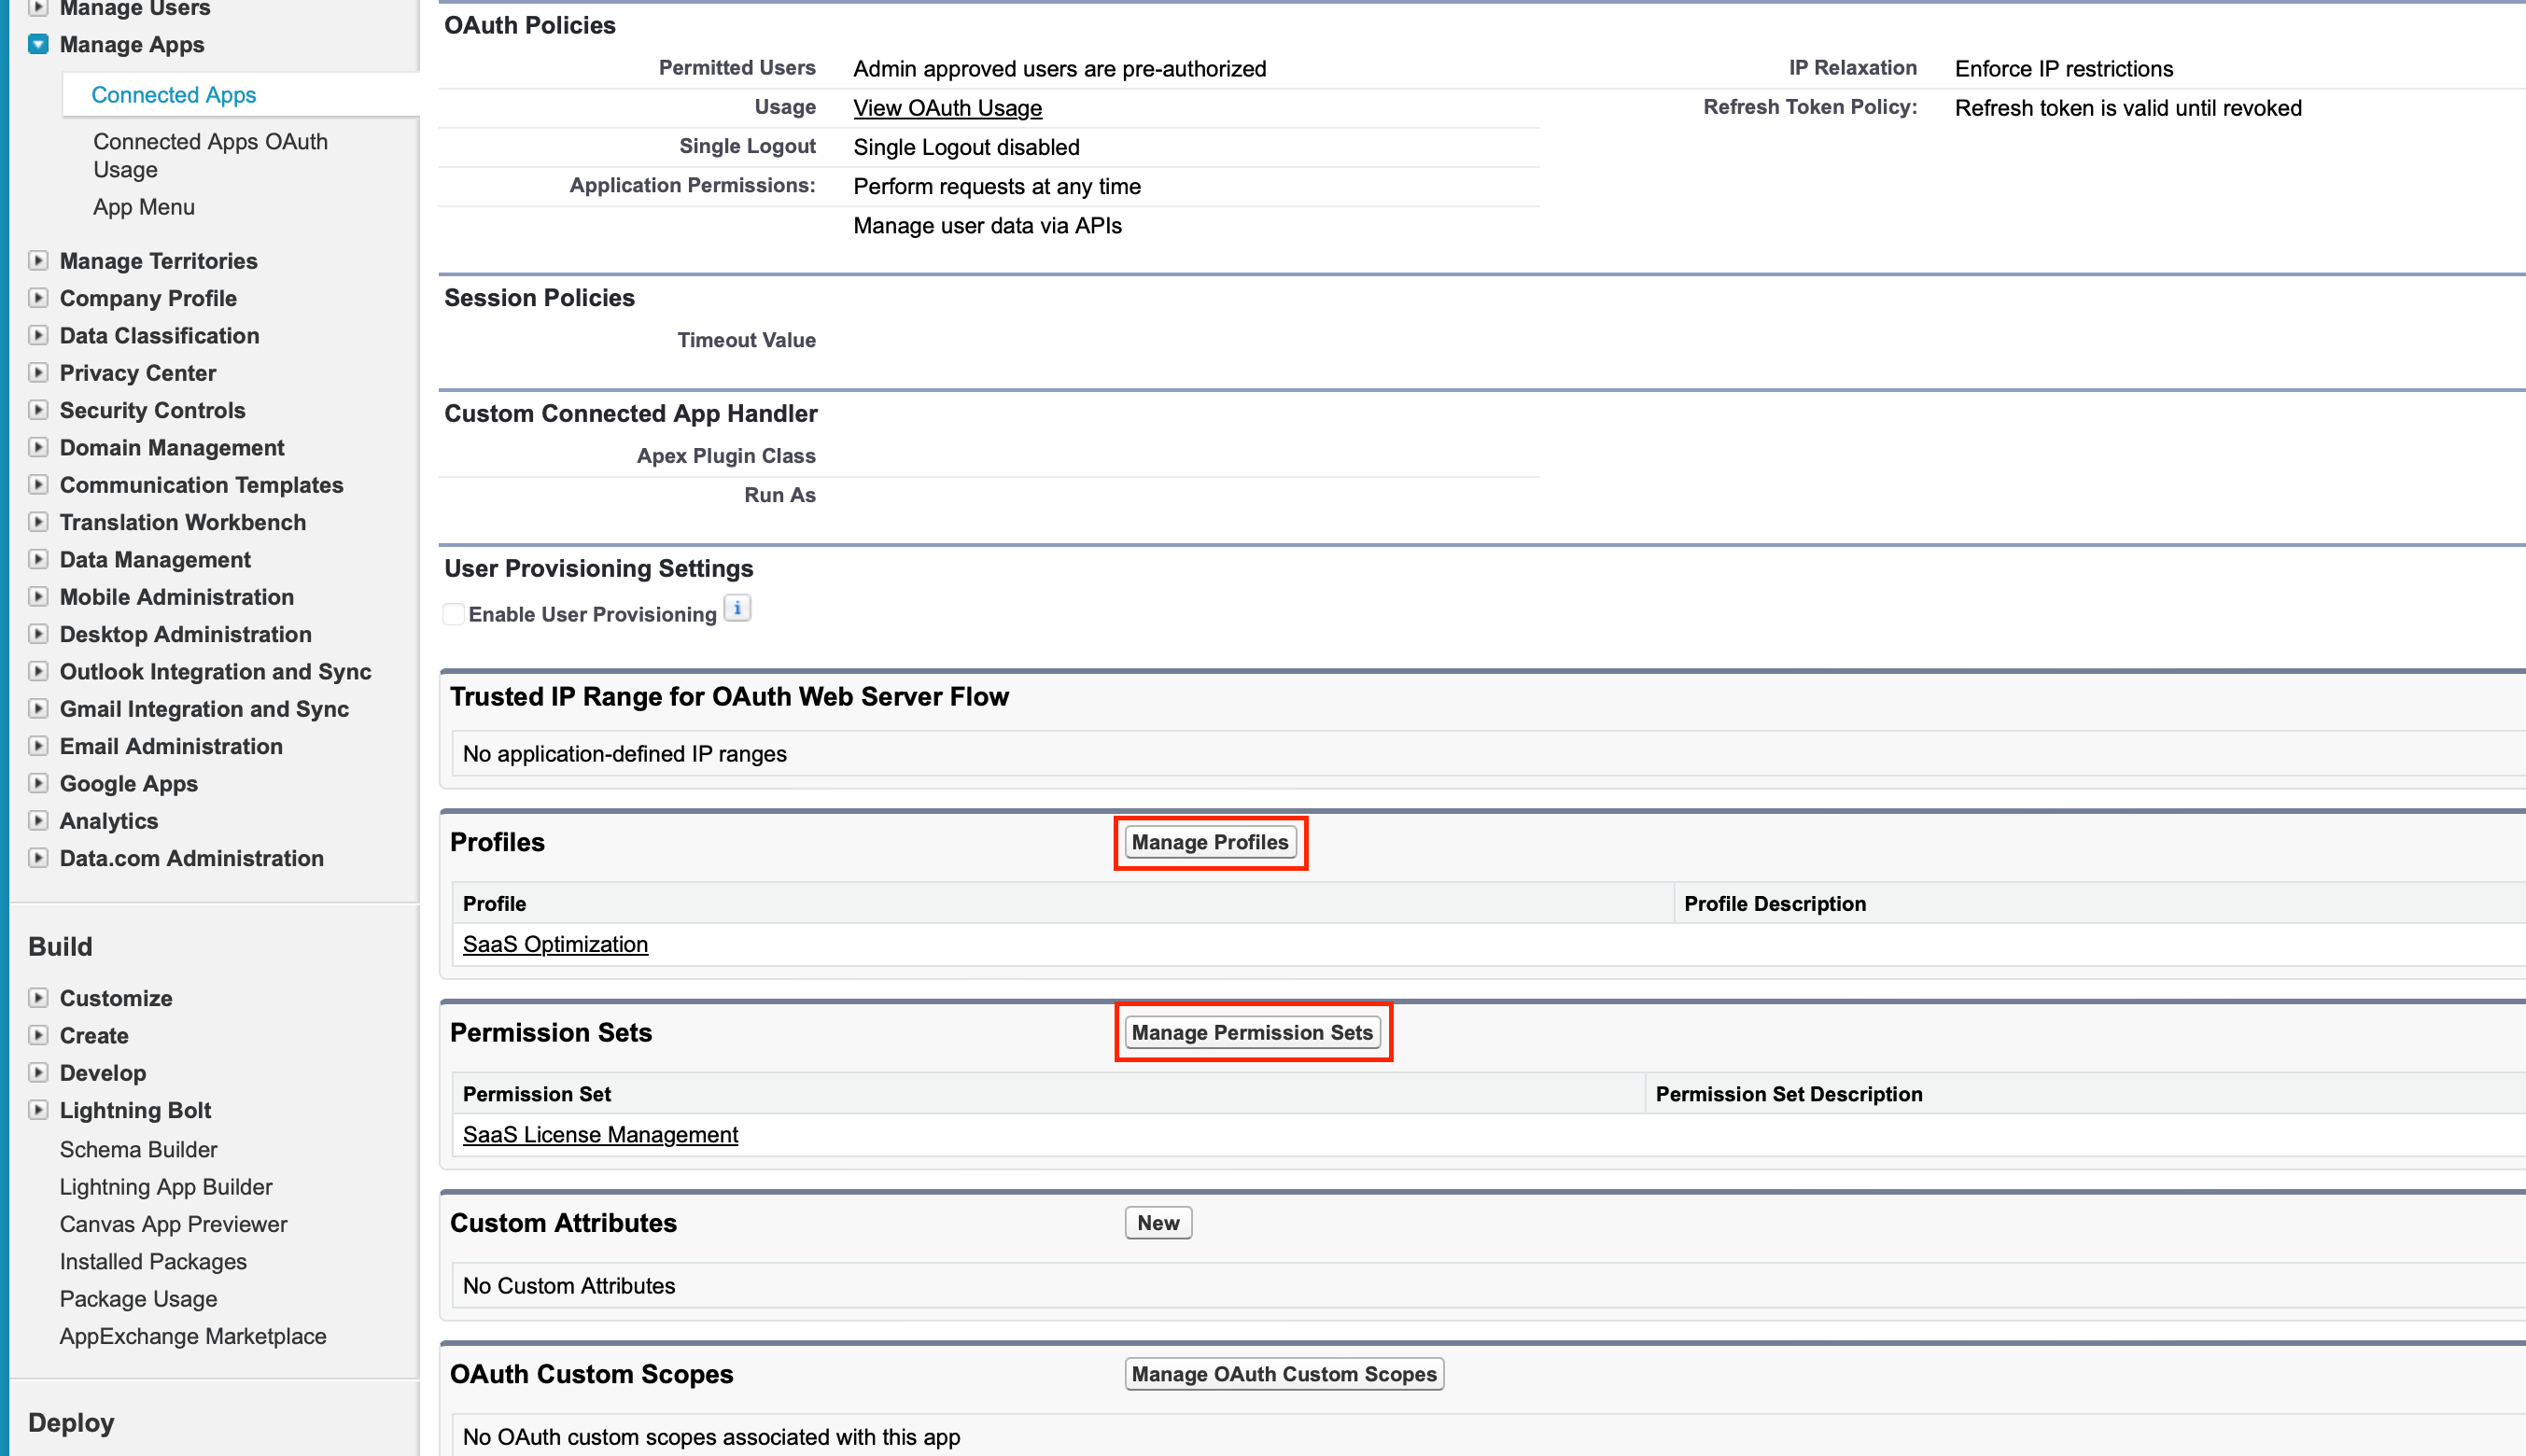
5.Edit the policies:
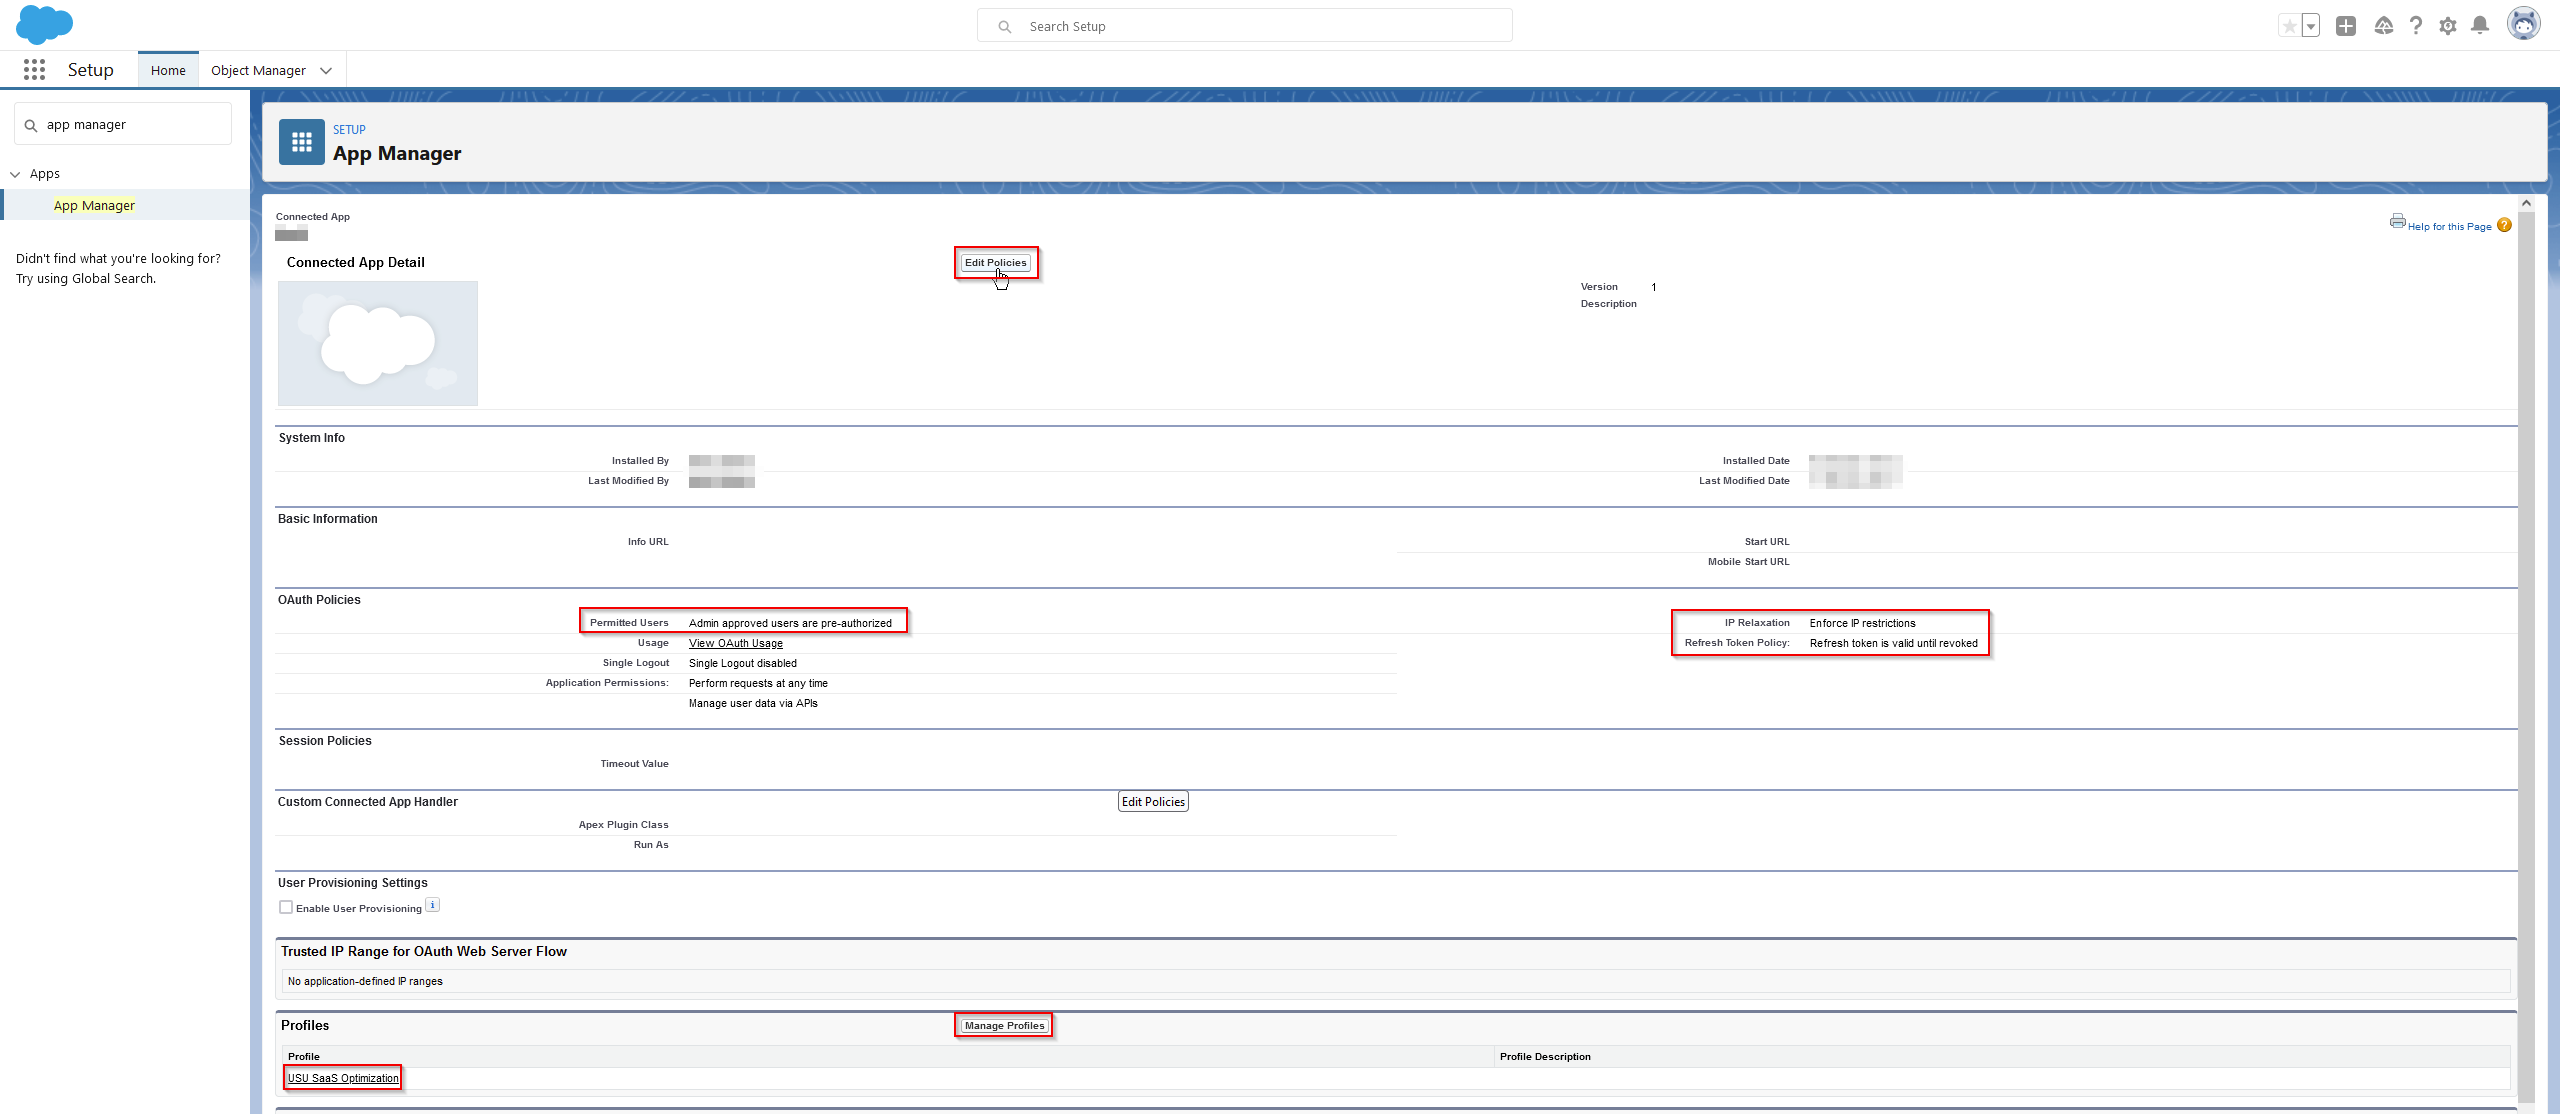
Make sure to set up the additional configuration details:
•Permitted Users: Admin approved users are preauthorized.
•IP Relaxation: Enforce IP restrictions.
•Refresh Token Policy: Refresh token is valid until revoked.
6.Click on Manage Profiles and select the profile which was created in the previous steps.
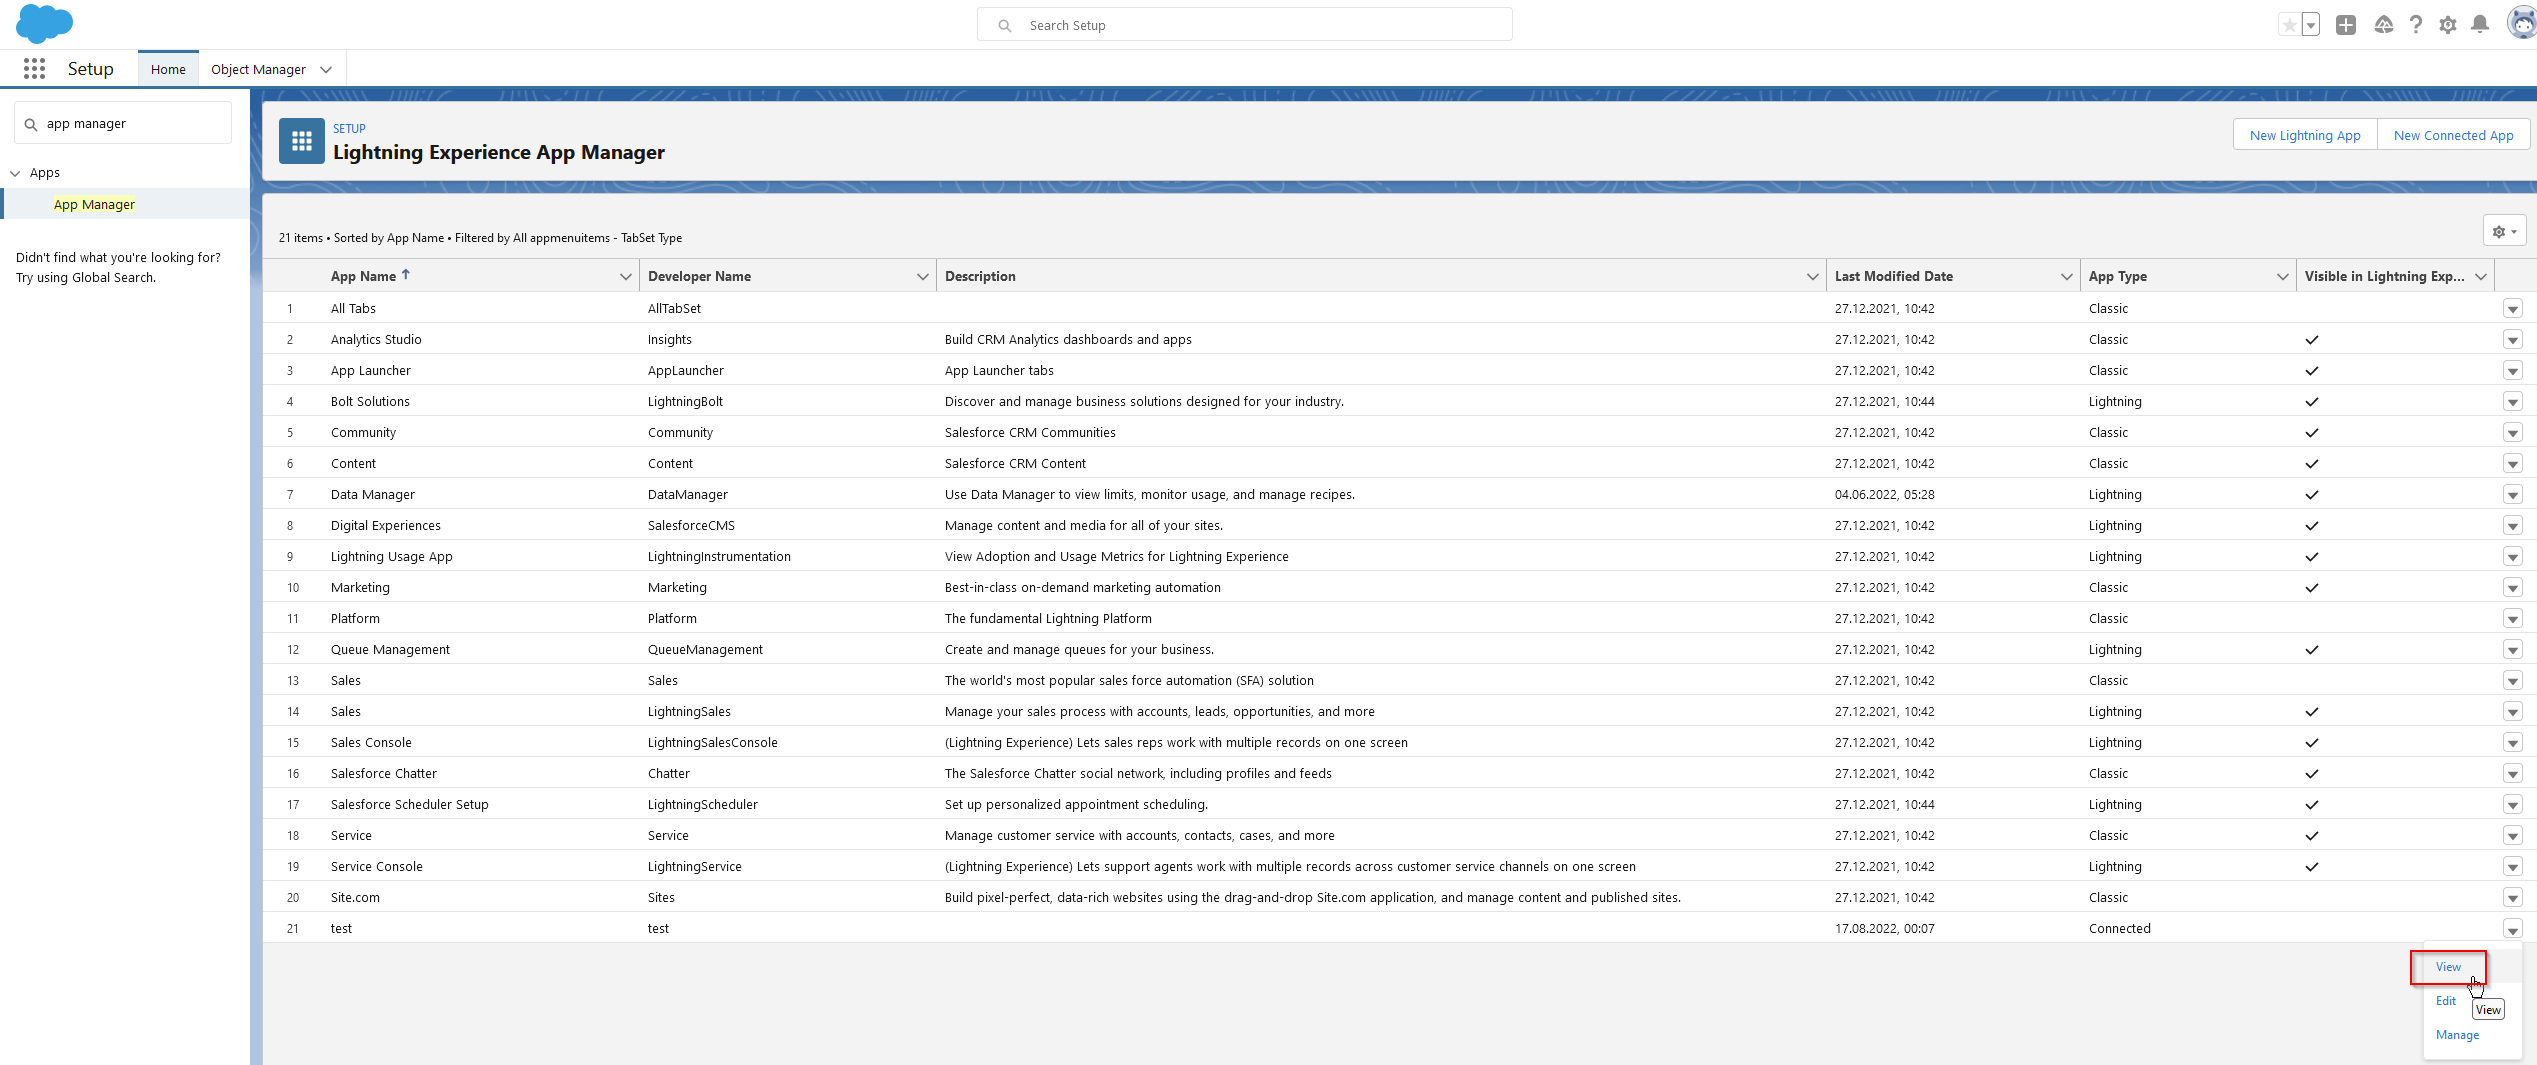
7.After saving the new connected app it will appear on the App Manager list. In the App Manager list, click on the arrow button and then on View.
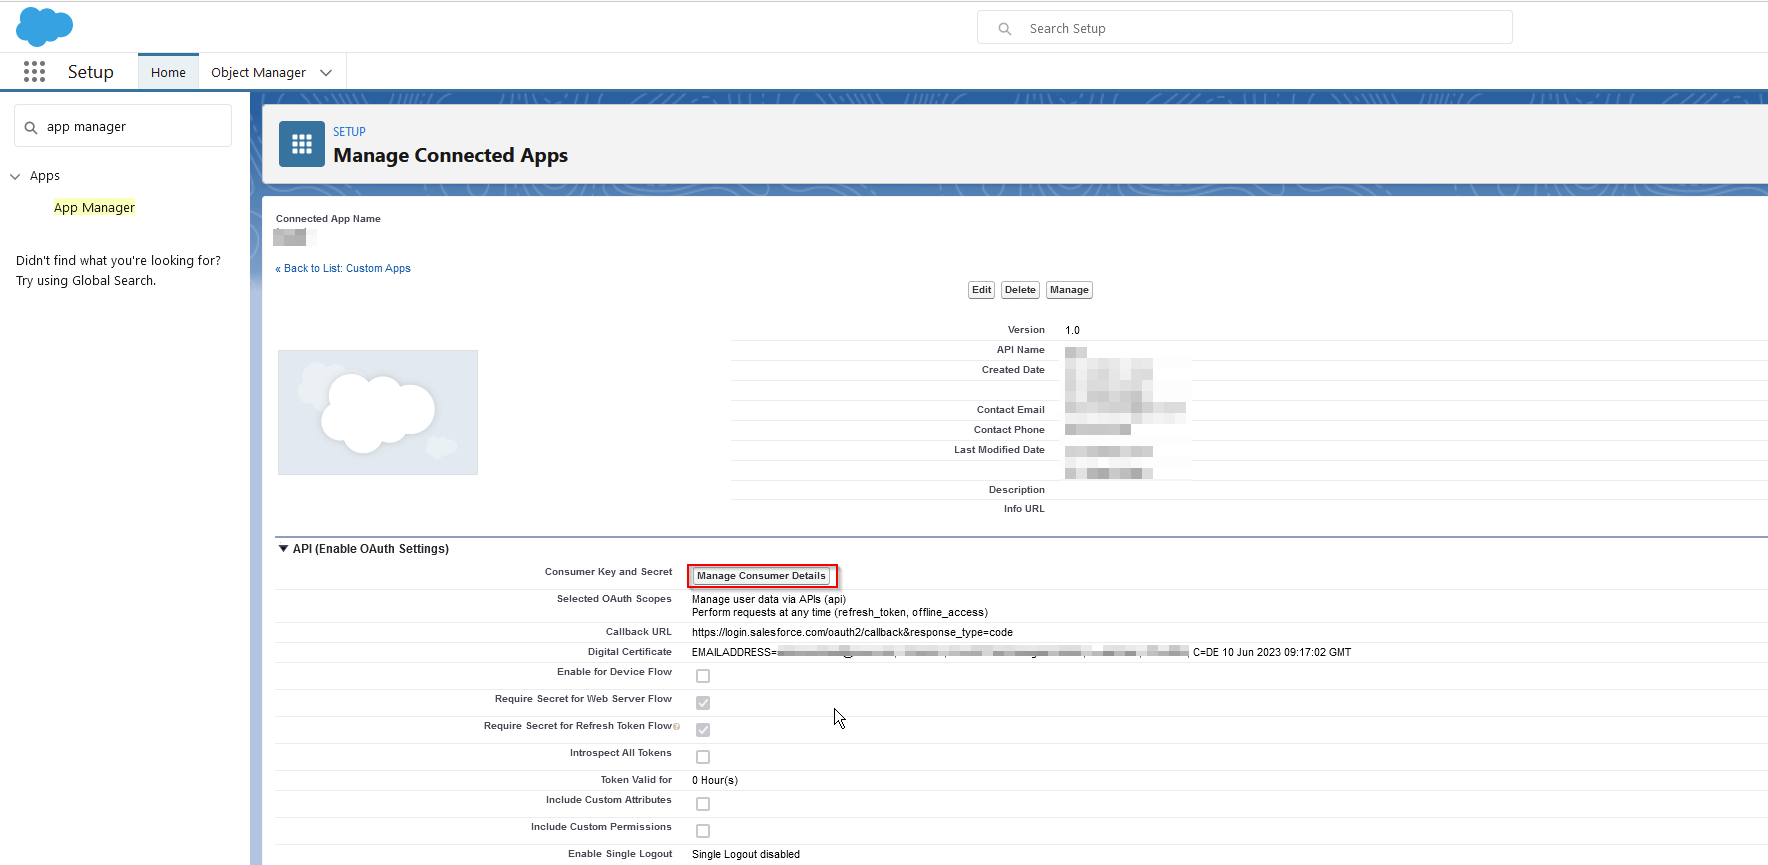
8.It is possible to view the Client_ID via Manage Consumer Details. The Consumer Key is also known as issuer or client_id.
9.Make sure that the profile and permission set created before are linked to the connected app.
For fetching data from this org the Consumer Key as client_id, the content of the private key as privateKey, the username and the Server URL of the org must be typed into the connector.
A description for creating the OAuth 2.0 JWT bearer authorization flow by Salesforce can be found here: https://help.salesforce.com/s/articleView?id=sf.connected_app_create.htm&type=5.