For a connection there are two ways to connect to the M365 API.
1.Authentication with client_secret:
oTenant (e.g. ae920d54-43e4-4e1e-ba99-6d010a689326)
oClient_id (e.g. 11d96d2d-b347-4132-a89a-0bf5fb0962b6)
oClient_secret (e.g. D927Q~xy0tFUvetlWpwgJRkV-bhsbEVlNumOU)
2.Authentication with certificate and private key
oTenant (e.g. ae920d54-43e4-4e1e-ba99-6d010a689326)
oClient_id (e.g. 11d96d2d-b347-4132-a89a-0bf5fb0962b6)
oCertificate (e.g. ----BEGIN CERTIFICATE-----MIIJNjCCBx6gAwljAggTbQAsk0xDD...)
oPrivate key (e.g. ----BEGIN PRIVATE KEY------MIIEvQIBsDdNBtkqhkiG9w0BAQEFA...)
The variant with certifcate and private key is explained in the Best Practice Configuration chapter.
Authentication with Client_secret
1.Login at https://aad.portal.azure.com.
2.Go to Azure Active Directory and click on App registration.
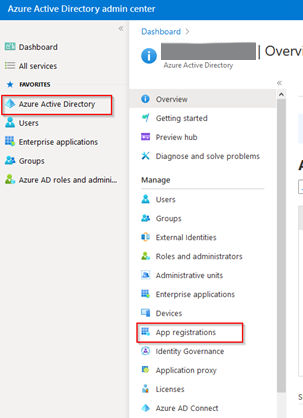
3.Click on New registration.

4.Give a name to the application (e.g. Data Hub).

Supported account types |
Description |
|---|---|
Accounts in this organizational directory only |
This option maps to Azure AD only single-tenant.
This is the default option unless the app is being registered outside of a directory. In cases where the app is registered outside of a directory, the default is Azure AD multi-tenant and personal Microsoft accounts. |
Accounts in any organizational directory |
This option maps to an Azure AD only multi-tenant.
If the connector has been registered as Azure AD only single-tenant, it can be updated to be Azure AD multi-tenant and back to single-tenant through the Authentication blade. |
Accounts in any organizational directory and personal Microsoft accounts |
This option maps to the Azure AD multi-tenant and personal Microsoft accounts.
If the connector has been registered as Azure AD multi-tenant and personal Microsoft accounts, it cannot be changed in the UI. Instead it is necessary to use the application manifest editor to change the supported account types. |
5.Then click on Register.
6.Copy the Application (client) ID and the Directory (tenant) ID and paste it into any text editor for further reference.

7.Go to Certificate and secrets and click on New client secret.
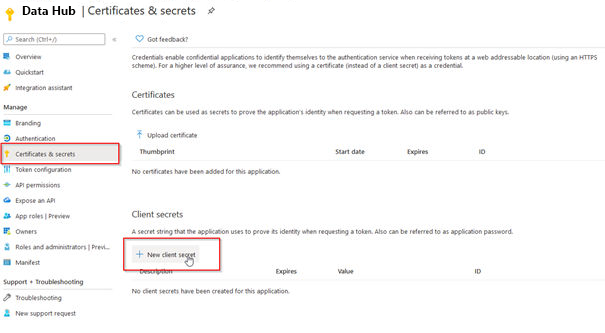
8.Click on Add (description is optional).
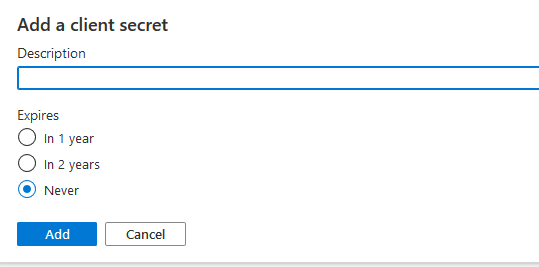
9.Copy the client secret (Value).

10.Click on View API Permission.
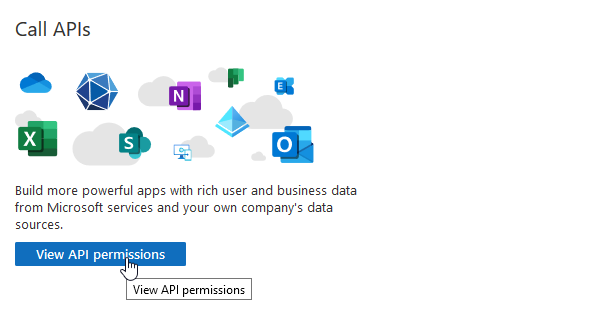
11.Click on Add a permission.
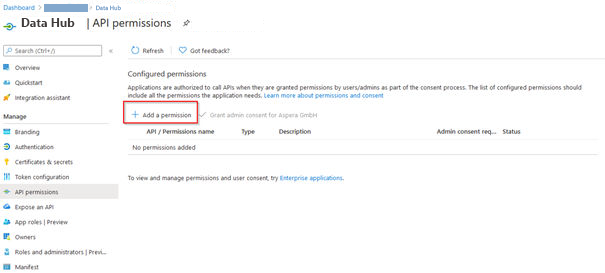
12.Under Microsoft APIs, select Microsoft Graph.

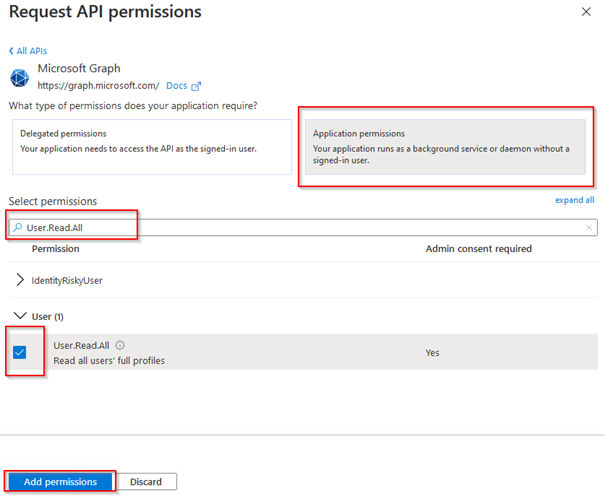
13.Select Application permissions.
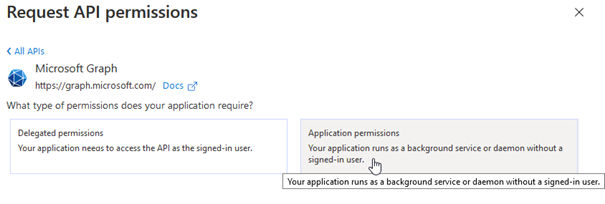
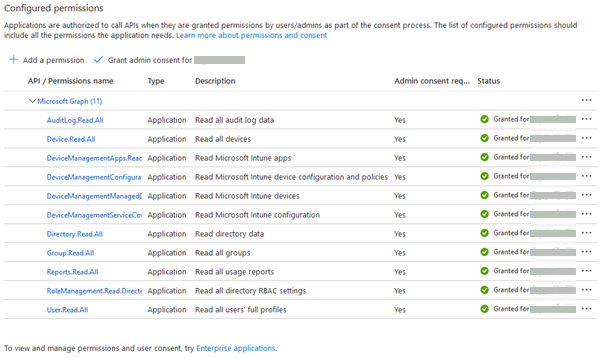
14.Select ALL required permission (see https://docs.microsoft.com/en-us/graph/api/user-list-directreports?view=graph-rest-1.0&tabs=http), e.g. User.Read.All. Click Add Permissions.
15. Click on Grant admin consent for...
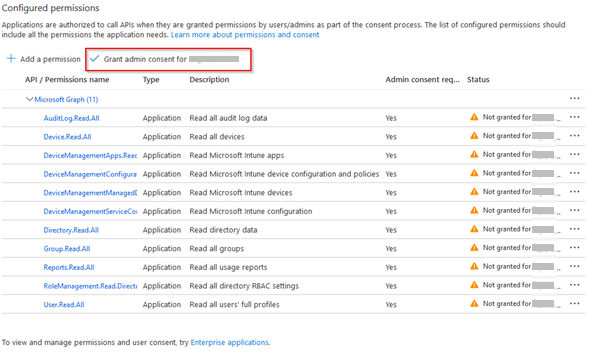
16.Check if status is set to Granted for...
17.Note down the tenant ID, client ID, and client secret.